
Visual Art by Artani Paris | Pioneer in Luxury Brand Art since 2002
Your home should support comfortable, independent living throughout your retirement years, yet most houses are designed for younger, more mobile residents. As you age, small inconveniences become significant obstacles: stairs you once bounded up now exhaust you, dim lighting that never bothered you makes navigation treacherous, and bathtubs that posed no problem become fall hazards. The encouraging news? Simple, affordable home adjustments dramatically improve comfort, safety, and accessibility without expensive renovations or moving to assisted living. This comprehensive guide presents practical modifications supporting aging in place—the ability to live safely and comfortably in your own home as you age. You’ll discover room-by-room improvements addressing common challenges: bathroom modifications preventing falls and improving accessibility, lighting upgrades reducing accident risk and eye strain, stairway and entrance adaptations enhancing mobility, kitchen adjustments simplifying meal preparation, bedroom modifications promoting restful sleep and morning safety, and whole-home improvements creating comfortable, accessible living spaces. Most modifications cost under $500 and require no special skills, making them accessible DIY projects or simple handyman jobs. Whether you’re planning ahead while fully capable or responding to declining mobility, these adjustments help you maintain independence, comfort, and safety in the home you love for years to come.
Understanding Aging-in-Place Needs and Benefits
Before diving into specific modifications, understanding why home adjustments matter and what challenges they address helps you prioritize changes most benefiting your situation.
Common Age-Related Home Challenges: Physical changes create predictable home challenges. Vision changes make dim lighting dangerous, reduce depth perception affecting stair navigation, decrease ability to see obstacles. Mobility limitations from arthritis, balance issues, or reduced strength make stairs difficult, tubs risky, reaching high shelves impossible. Reduced flexibility makes bending to floor storage challenging, reaching overhead cabinets difficult. Decreased grip strength complicates opening jars, turning doorknobs, operating faucets. Balance problems increase fall risk, particularly in bathrooms, on stairs, when transitioning between standing and sitting. Cognitive changes can lead to forgotten tasks like turning off stoves. Temperature regulation difficulties make seniors vulnerable to extreme heat or cold.
Benefits of Aging-in-Place Modifications: Injury prevention—falls cause 3 million ER visits annually among seniors; modifications reduce fall risk by 30%. Maintained independence—accessibility improvements allow daily activities without assistance. Cost savings—$3,000-$10,000 modifications prevent $50,000+ annual assisted living costs. Comfort and familiarity—remaining in long-time home near neighbors and friends supports emotional wellbeing. Property value—accessibility features increasingly attractive to aging Baby Boomers enhance resale value. Peace of mind for family—safe homes reduce family worry. Delayed institutionalization—proper modifications allow 5-10 years longer home residence.
Prioritizing Modifications: Start with safety concerns—bathroom grab bars, improved lighting, stair railings. Address current difficulties causing daily struggles. Plan for anticipated needs even if not immediately necessary. Consider budget constraints—start with low-cost, high-impact changes. Create three-tier plan: immediate needs (safety hazards), short-term improvements (within 6-12 months), long-term planning (future needs addressed gradually).
| Modification Priority | Timeline | Typical Cost Range | Impact Level |
|---|---|---|---|
| Bathroom grab bars and non-slip surfaces | Immediate | $100-$500 | High (fall prevention) |
| Improved lighting throughout home | Immediate | $200-$800 | High (safety, visibility) |
| Stair railings and handrails | Immediate if stairs present | $150-$600 | High (fall prevention) |
| Lever door handles and faucets | Short-term (6-12 months) | $200-$800 | Medium (accessibility) |
| Walk-in shower or tub modifications | Short-term to Long-term | $1,500-$8,000 | High (safety, independence) |
| Ramps or lift systems for stairs | When mobility declines | $150-$15,000 | High (accessibility) |
| First-floor bedroom/bathroom | Long-term planning | $5,000-$25,000 | High (eliminates stairs) |
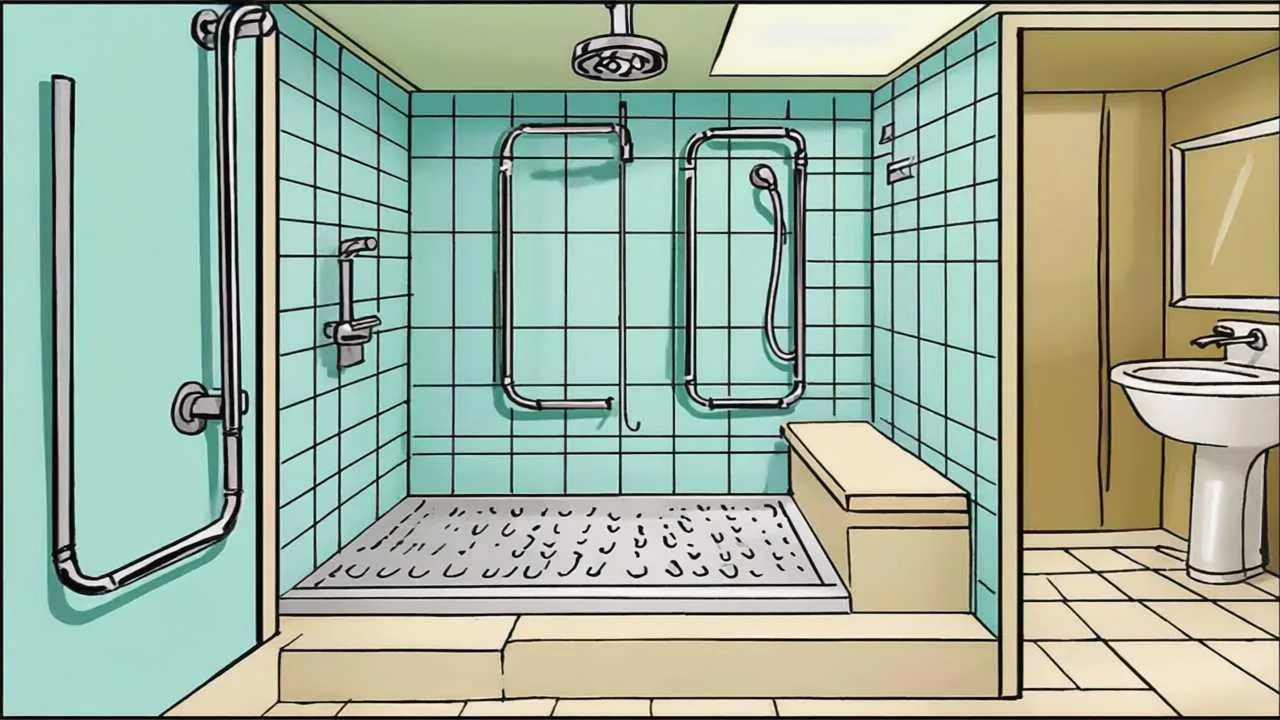
Bathroom Safety and Accessibility Modifications
Bathrooms present highest fall risk—slippery surfaces, awkward positions, and water create dangerous conditions. Strategic modifications dramatically reduce injury risk while improving comfort and independence.
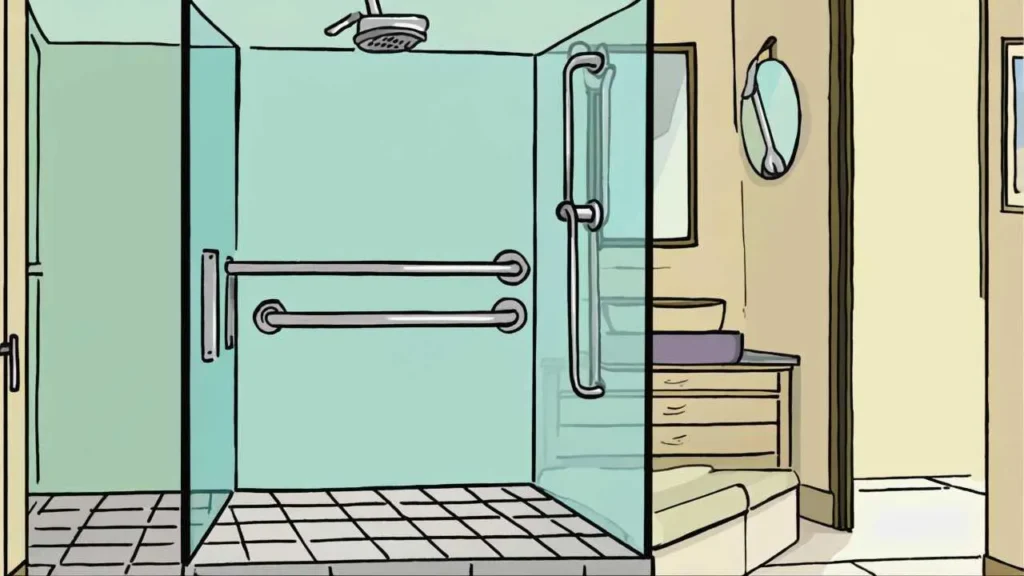
Essential Grab Bars and Support Rails: Grab bars provide crucial stability preventing falls. Shower/tub grab bars—install horizontal bars inside shower or tub for stability entering, exiting, and bathing. Mount securely into wall studs. Professional installation recommended ($150-$300 installed, $30-$80 DIY materials). Toilet grab bars—install bars both sides of toilet assisting with sitting and standing. Consider L-shaped bars providing vertical and horizontal support ($50-$150 each). Ensure all grab bars support 250+ pounds per ADA guidelines. Choose textured surfaces preventing slipping when wet. Grab bars seem institutional initially but literally save lives—bathroom falls cause serious injuries including hip fractures and head trauma often ending independent living.
Non-Slip Surfaces and Bath Safety: Wet surfaces become treacherously slippery. Non-slip bath mats—use suction-cup mats inside tubs and showers, replacing annually ($15-$30). Non-slip floor mats—place absorbent mats outside tubs catching water. Ensure rubber backing prevents sliding ($20-$50). Anti-slip floor treatments—apply slip-resistant coatings to bathroom floors ($30-$100 DIY, $200-$500 professional). Textured tub/shower floor—retrofit smooth bottoms with adhesive anti-slip strips ($10-$30). For renovations, specify slip-resistant tile. Bath bench or shower chair—eliminate standing during bathing with stable seats ($40-$150). These dramatically reduce fall risk and fatigue.
Walk-In Showers and Tubs: Traditional bathtubs require dangerous stepping over high edges. Walk-in showers—barrier-free showers with zero threshold allow easy wheelchair/walker access. Include built-in seating and handheld showerhead. Professional installation required ($3,000-$8,000). Curbless shower conversion—remove tub, level floor, install tile shower with no step. Most comprehensive but expensive ($5,000-$12,000). Shower threshold ramps—temporary solution creating gentle slope over existing threshold ($30-$80). Walk-in tubs—tubs with watertight doors eliminating stepping over high sides. Include seating and safety features. Note: sit while tub fills and empties ($2,500-$10,000 installed). Tub cut—cutting section out of existing tub side creates walk-in access ($500-$1,500). For those unable to afford major renovations, prioritize grab bars, non-slip surfaces, and shower seats.
Toilet Modifications: Standard toilet heights (15 inches) require excessive bending. Raised toilet seats—add 2-6 inches height using removable seat riser ($25-$80). Simple, cheap but can shift. Comfort-height toilets—taller toilets (17-19 inches) reduce bending. Replacement costs $150-$400 plus $150-$300 installation. Permanent solution, better aesthetics. Bidet attachments—aid hygiene for limited flexibility. Electronic bidet seats ($200-$600) or simple attachments ($30-$100). Toilet safety frames—freestanding frames surrounding toilet providing armrests and support ($40-$100). Good for renters or temporary needs.
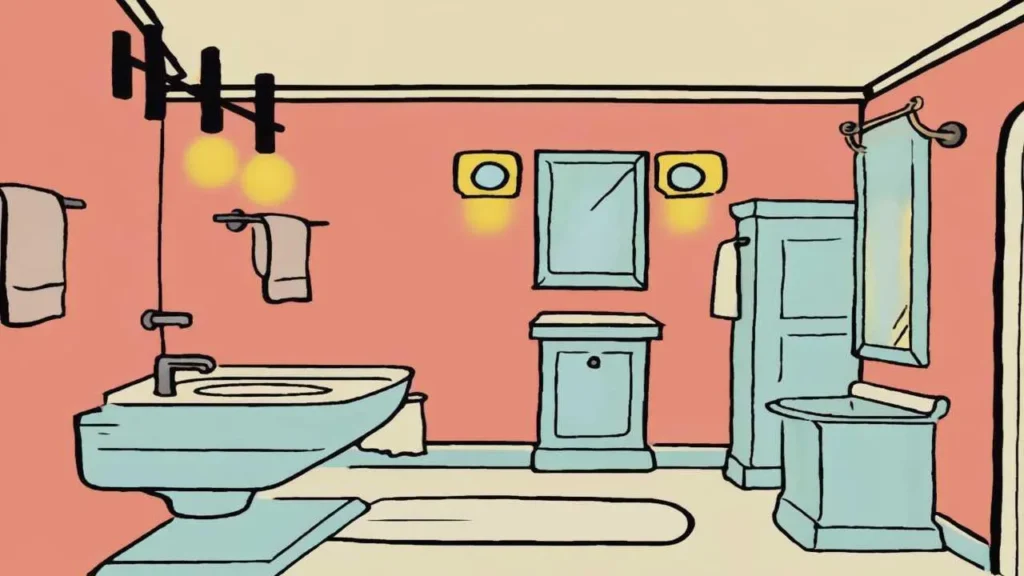
Lighting and Accessibility Features: Bright, even lighting—upgrade to 100-watt equivalent LED bulbs eliminating shadows. Bathrooms need bright overhead plus focused task lighting at mirrors ($50-$200). Motion-sensor night lights—automatic lights in bathrooms and hallways prevent dangerous nighttime navigation ($15-$40). Lever faucets—replace twist knobs with lever handles operated with whole hand ($50-$150 installed). Handheld showerheads—flexible showerheads on sliding bars allow seated showering ($30-$100, easy DIY). Mirror height—ensure mirrors usable from standing or seated positions (36-42 inches from floor to bottom). Storage accessibility—move frequently used items to 30-60 inch height range.

Visual Art by Artani Paris
Lighting Improvements Throughout the Home
Vision naturally declines with age—by 60, you need three times more light than at 20. Inadequate lighting contributes to falls, eye strain, and difficulty performing tasks. Comprehensive lighting improvements create safer, more comfortable homes.
Increasing Overall Light Levels: Higher wattage bulbs—upgrade to maximum safe wattage for fixtures (typically 60-100 watt equivalent LED). LEDs produce bright light using minimal electricity, lasting years ($2-$8 per bulb). Additional light fixtures—add supplemental lamps in dark corners, reading areas, activity zones. Floor lamps, table lamps, under-cabinet lights eliminate shadows ($20-$100 each). Dimmer switches—install dimmers allowing brightness adjustment ($15-$40 per switch, simple DIY). Three-way bulbs—bulbs with multiple brightness levels in lamps allowing quick adjustment ($5-$10 per bulb). Brighter overhead fixtures—replace old fixtures with modern LED fixtures providing better distribution and higher output ($40-$200 per fixture plus installation). Calculate lighting needs: general room lighting 20-30 lumens per square foot; task lighting 50-75 lumens; reading areas 100+ lumens.
Strategic Task Lighting: Kitchen task lighting—under-cabinet LED strips illuminate countertops for food preparation ($30-$80 per cabinet, easy peel-and-stick). Reading lamps—position adjustable lamps providing bright, focused light over chairs and beds. Look for 60-100 watt equivalent with adjustable arms ($30-$100). Workbench/hobby lighting—bright, focused light for detailed work like sewing, woodworking, crafts. Consider full-spectrum bulbs mimicking natural daylight ($40-$150). Closet lighting—install motion-sensor LED strips or battery-operated stick-on lights for easy clothing selection ($15-$50). Stairway lighting—illuminate every step with overhead lights at top and bottom plus step lights or LED strips on treads ($80-$300 professionally installed, $30-$100 DIY). Entryway lighting—bright lighting at front and back doors for safe key insertion, package handling, visitor identification ($50-$150 per fixture).
Automatic and Motion-Sensor Lighting: Automatic lighting eliminates fumbling for switches in darkness—common cause of falls. Motion-sensor night lights—install in bathrooms, hallways, bedrooms providing gentle illumination for nighttime navigation without fully waking you ($12-$30 each, plug into existing outlets). Motion-sensor outdoor lights—illuminate pathways, driveways, entrances when you approach ($30-$80 each). Motion-sensor closet lights—lights activate when you open closet doors ($20-$50). Timer switches—automatically turn lights on/off at specific times ($15-$40 per switch). Smart lighting systems—control lights via voice commands (Alexa, Google Home), apps, or schedules ($15-$50 per smart bulb, plus hub $50-$100). Photocell outdoor lights—automatically turn on at dusk, off at dawn ($25-$60 per fixture).
Reducing Glare and Improving Quality: While you need more light, you’re also more sensitive to glare. Matte light bulbs—use frosted or matte LED bulbs rather than clear bulbs reducing harsh glare. Lampshades and diffusers—use shades diffusing light rather than exposing bare bulbs. Position lamps thoughtfully—avoid placing lights creating glare on TV screens, computer monitors, or windows. Window treatments—use blinds, shades, or curtains controlling natural light to reduce daytime glare. Anti-glare screen filters—add filters to computer monitors and tablets ($10-$30). Warm vs. cool bulbs—experiment with color temperature. Warm white (2700-3000K) creates cozy ambient light; bright white (4000-5000K) provides energizing task light; daylight (5500-6500K) offers truest color rendering. Many seniors find warm white most comfortable for living areas and cool white better for tasks.
Stairway and Entrance Safety Improvements
Stairs represent significant fall hazards—over one million stair-related injuries occur annually among those 65+. Strategic modifications and alternatives dramatically improve safety.
Stair Railings and Handrails: Continuous railings—install railings running full length of stairs on both sides. Railings should extend 12 inches beyond top and bottom steps ($150-$600 professional installation). Proper height and grip—railings 34-38 inches high with 1.25-2 inch diameter graspable by whole hand. Replace ornamental railings that can’t be gripped securely. Sturdy mounting—railings must support 250 pounds, securely fastened to wall studs or reinforced mounting. Test regularly ensuring they haven’t loosened. Textured surface—railings should provide secure grip even with sweaty palms. Railing extensions—add railings to any steps including single steps between rooms or at entrances. Contrasting color—paint or wrap railings in contrasting color from walls improving visibility.
Stair Visibility and Tread Improvements: Step edge marking—apply bright, contrasting tape to leading edge of each step making depth perception easier. Yellow or white tape on dark stairs ($15-$30 for roll). Non-slip stair treads—add adhesive non-slip treads to each step increasing traction ($30-$80 for full staircase). Carpet runners—secured carpet provides cushioning and traction. Ensure firmly attached with no loose edges creating trip hazards ($200-$600 professionally installed). Remove clutter—never leave items on stairs. Keep completely clear. Adequate lighting—install lighting at top and bottom plus intermediary lighting for long staircases. Every step should be clearly visible. Consider LED strip lighting along stair edges ($50-$150). Reflective tape—add reflective tape to step edges providing visibility even with minimal light ($10-$20 per roll).
Stair Alternatives for Significant Mobility Limitations: Stair lifts—motorized chairs traveling on rails installed along staircases. User sits, presses button, rides up or down. Expensive but allows continued stair use when climbing unsafe ($3,000-$5,000 straight stairs, $7,000-$15,000 curved stairs). Consider used/refurbished lifts for savings. Residential elevators—home elevators provide wheelchair accessibility. Extremely expensive and require significant space ($20,000-$50,000+ installed). First-floor conversion—convert existing first-floor room to bedroom and add first-floor bathroom if absent. Eliminates stair navigation entirely. Most cost-effective for those unable to climb stairs ($5,000-$25,000 depending on extent). Move to single-level home—ranch-style homes or condos eliminate stairs entirely. For some, moving proves cheaper than extensive modifications.
Entrance Accessibility: Exterior ramps—portable threshold ramps ($50-$200) provide temporary solutions. Permanent ramps require proper slope (1 foot ramp per 1 inch rise) and railings ($1,000-$3,000 professionally installed). Step railings—add railings at exterior steps leading to entrances. Crucial for icy winter conditions ($150-$400 per entrance). Keyless entry—smart locks or keypad entry eliminate fumbling with keys in cold weather or darkness ($100-$300 per lock). Lever door handles—replace round knobs with lever handles operated without grip strength ($15-$40 per handle, easy DIY). Door width—standard 32-inch doors barely accommodate walkers, can’t accommodate wheelchairs. Widening doorways to 36 inches costs $700-$2,500 per doorway but provides wheelchair accessibility. Exterior lighting—bright lights at all entrances with motion sensors ($40-$120 per entrance). Clear pathways—maintain clear, level walkways free of hoses, cords, or debris. Repair cracked concrete preventing trips.

Visual Art by Artani Paris
Kitchen and Living Area Comfort Modifications
Kitchens and living areas where you spend most time deserve modifications enhancing comfort, safety, and accessibility for daily activities.
Kitchen Storage and Accessibility: Lower frequently used items—move dishes, glasses, food, cooking tools from high shelves to easy-reach zones (30-60 inch height). Use high shelves only for rarely used items ($0, just reorganization). Lazy Susans—install rotating shelves in corner and deep cabinets bringing items to you ($15-$40 each). Pull-out shelves—retrofit cabinets with sliding shelves eliminating reaching into deep cabinets ($30-$80 per shelf, professional installation $150-$400 for multiple). Lower work surfaces—some counter space at 30-34 inch height allows seated food preparation. Rolling carts provide portable lower surfaces ($50-$150). Accessible storage containers—replace heavy canisters with lightweight, easy-open containers. Use easy-grip handles and large labels. Step stool with handrail—stable step stool with grab bar provides safe access to higher shelves ($40-$100). Never use chairs or unstable stools.
Kitchen Safety and Usability: Lever faucets—single-lever faucets operate with whole hand, allow one-handed operation ($80-$200 installed). Touch or motion faucets—turn on/off with simple touch or hand wave. Especially useful for arthritis or limited grip ($150-$400 installed). Anti-scald protection—set water heater to 120°F maximum. Install anti-scald valves at faucets ($50-$150 per faucet). Induction cooktop or electric range—replace gas ranges (carbon monoxide risk if burners left on) with safer induction or electric. Induction cooktops remain relatively cool and automatic shut-offs improve safety ($700-$2,000 installed). Timer with loud alert—use kitchen timers with very loud alarms preventing forgotten food ($10-$30). Fire extinguisher—mount accessible fire extinguisher near (not above) stove. Check annually, replace after use ($15-$40). Non-slip floor mats—place anti-fatigue, non-slip mats in front of sink and stove reducing leg strain and slip risk ($30-$80).
Living Area Comfort and Safety: Furniture arrangement—create clear pathways 36 inches wide between furniture allowing walker or wheelchair navigation. Remove unnecessary furniture cluttering spaces (free, just rearrangement). Furniture height—chairs and sofas should be 19-21 inches high with firm cushions for easier standing. Add firm cushions to low, soft seating ($30-$60 per cushion). Lift chairs—recliners with powered lifting assist help you stand with minimal effort. Medicare sometimes covers with prescription ($400-$2,000). Coffee table alternatives—remove or replace low coffee tables with C-tables sliding under sofas providing accessible surfaces ($40-$100). Low coffee tables create trip hazards. Remote control organization—use holders keeping all remotes accessible in one place ($15-$30). Cordless phones—keep cordless phones in multiple rooms ($30-$60 per handset). Emergency alert systems—wearable pendant or watch-style systems connecting to emergency services ($25-$50 monthly).
Flooring and Fall Prevention: Remove throw rugs—small rugs create trip hazards. Remove entirely or secure firmly with rug grips ($0-$20 for grips). Low-pile carpet—if replacing flooring, choose low-pile carpet or smooth, slip-resistant flooring. Thick, plush carpet impedes walkers and wheelchairs. Cord management—secure electrical and cable cords along walls using cord covers or clips ($10-$30). Clutter elimination—clear floor surfaces of boxes, magazines, shoes. Everything should have designated storage. Furniture sliders—place felt sliders under furniture legs preventing movement if you lean on furniture for support ($8-$15 per set).
Bedroom and Climate Comfort
Bedroom Safety and Accessibility: Bed height adjustment—ideal bed height has feet flat on floor while sitting on bed edge (typically 20-23 inches from floor to mattress top). Add bed risers ($15-$40 per set) or remove legs to achieve proper height. Bed rails—portable bed rails assist with rolling over and getting in/out of bed ($40-$100 per rail). Bedside lighting—place lamps on both sides of bed with easy-reach switches. Consider touch lamps or clap-on devices ($25-$60 per lamp). Motion night lights—illuminate paths from bed to bathroom preventing stumbling ($15-$40). Bedside essentials—keep phone, water, medications, flashlight, eyeglasses within easy reach using bedside organizer ($20-$40). Easy-reach storage—store frequently used clothing in drawers at waist height. Use closet organizers bringing clothing within easy reach ($50-$200).
Temperature Control and Comfort: Seniors are more vulnerable to temperature extremes. Programmable thermostats—maintain consistent comfortable temperatures automatically. Smart thermostats adjust based on your patterns ($130-$250 installed). Zone heating/cooling—space heaters (oil-filled radiator style) and fans allow comfort in occupied rooms without heating/cooling entire house ($40-$150 per unit). Ceiling fans—improve air circulation and comfort for minimal energy cost. Use year-round (counterclockwise summer, clockwise winter) ($80-$300 per fan installed). Window treatments—thermal curtains or cellular shades reduce heat loss in winter, heat gain in summer ($30-$150 per window). Humidity control—humidifiers in winter and dehumidifiers in summer maintain comfortable 30-50% humidity ($30-$80 per unit). Carbon monoxide and smoke detectors—install on every level with fresh batteries tested monthly. Consider interconnected alarms ($25-$60 per detector).
Smart Home Integration: Voice control systems—Alexa, Google Home, or Siri allow voice-controlled lights, thermostats, locks. Particularly valuable for mobility limitations ($30-$100 for hub plus smart devices). Video doorbells—see and speak with visitors without opening door. Provides security and prevents falls from rushing ($100-$250 installed). Smart plugs—control lamps, fans, appliances via app or voice commands. Includes scheduling and remote control ($15-$40 each). Leak detectors—alert to water leaks before significant damage. Place near water heaters, under sinks, near toilets ($20-$60 each). Smart locks—unlock doors with codes, smartphone, or voice commands eliminating key fumbling and allowing access for trusted helpers ($150-$300 per lock installed).
Funding Home Modifications and Professional Help
Medicare and Insurance: Original Medicare does not cover home modifications, with very limited exceptions for durable medical equipment. Medicare Advantage plans sometimes include benefits for safety modifications—check your plan. Some long-term care insurance policies cover modifications up to specific limits ($500-$5,000 typically). Consult your policy.
Government Programs: Area Agencies on Aging—some AAAs offer home modification programs through Title III-E providing minor modifications. USDA Rural Development programs—rural residents may qualify for grants or low-interest loans for necessary repairs and modifications. State and local programs—many states offer home modification programs for low-income seniors. Contact your State Unit on Aging. Veterans Affairs—VA offers grants up to $6,800 for veterans with service-connected disabilities for home modifications through Specially Adapted Housing program. Rebuilding Together—nonprofit providing free home repairs and modifications for low-income seniors in many communities.
Tax Deductions and Other Funding: Medical expense deductions—medically necessary modifications may be tax-deductible if you itemize and expenses exceed 7.5% of AGI. Requires doctor’s letter stating medical necessity. Home equity loans or HELOCs—borrow against home equity for significant modifications. Interest may be tax-deductible. Reverse mortgages—homeowners 62+ can use reverse mortgage proceeds for modifications though consider implications carefully. Personal savings—prioritize high-impact safety modifications using savings. Family assistance—family members invested in your safety may contribute to modification costs.
Finding Qualified Contractors: Look for Certified Aging-in-Place Specialists (CAPS) through National Association of Home Builders. Ask Area Agency on Aging for contractor recommendations. Get multiple quotes (3-5) and check references thoroughly. Verify licensing, insurance, and bonding. Ask about experience with accessibility modifications specifically. Occupational therapist evaluation helps identify truly necessary modifications versus contractor upselling. Never pay full cost upfront; typical payment: 30% deposit, 40% midway, 30% completion. For minor work, handyman services often suffice and cost less.
Real Success Stories
Case Study 1: Sacramento, California
Margaret Wilson (74 years old)
Margaret lived alone in a two-story home for 35 years. At 72, she developed osteoarthritis making stairs increasingly painful and dangerous. She fell twice on stairs within six months. Her children pressured her to move to assisted living, but Margaret adamantly wanted to stay in her home.
Margaret worked with an occupational therapist to assess modification needs. She converted first-floor den to master bedroom ($3,500), added first-floor bathroom with walk-in shower ($8,200), installed stair lift for necessary second-floor trips ($4,500), added grab bars in all bathrooms ($600), upgraded lighting throughout home ($800), and replaced door knobs with lever handles ($300). Total investment: $17,900. She financed through home equity line of credit.
Results after modifications (18 months later):
- Zero falls since modifications completed
- Maintained complete independence—no in-home care needed
- Avoided assisted living costing $5,000/month ($90,000 saved in 18 months)
- Remained in beloved home near lifelong neighbors and friends
- Modifications increased home value by estimated $15,000
- Children relieved by safety improvements, visits more relaxed
- Margaret reports feeling confident and secure in her home
“My children thought I was being stubborn refusing to move, but this is my home. The modifications cost money but less than three months in assisted living. More importantly, I’m still independent in the place where I raised my family and built my life. The changes actually make my home more comfortable than before—the walk-in shower is luxurious, and I love having a bedroom and bathroom on one floor. I wish I’d done some of these modifications years earlier.” – Margaret Wilson
Case Study 2: Portland, Oregon
Robert Chen (78 years old)
Robert lived with his wife in a ranch-style home but struggled with dim lighting causing frequent near-falls and difficulty reading. His vision had declined, making navigation at night particularly dangerous. He considered expensive whole-home renovation.
Instead, Robert implemented lighting upgrades systematically. He installed LED bulbs throughout home (100-watt equivalent, $150), added under-cabinet lighting in kitchen ($120), installed motion-sensor night lights in hallways and bathrooms ($80), added task lighting at reading chair and workbench ($200), installed motion-sensor outdoor lights at entrances ($180), and added dimmer switches in living areas ($120). Total cost: $850.
Results after lighting improvements:
- No more near-falls or stumbling in darkness
- Reading became comfortable again without eye strain
- Wife noticed Robert’s mood improved with better lighting
- Nighttime bathroom trips no longer frightening
- Cooking safer with well-lit countertops
- Energy bills actually decreased despite more lights (LED efficiency)
- Home feels more welcoming and comfortable
“I thought I needed to spend $20,000 renovating my entire home. The occupational therapist said better lighting would solve 80% of my problems. She was right. For under $1,000, my home went from feeling dark and dangerous to bright and safe. The motion-sensor night lights were game-changers—no more fumbling for light switches at 3 AM. This simple change gave me back my confidence at home.” – Robert Chen
Frequently Asked Questions
How much do home modifications for aging in place typically cost?
Costs vary dramatically based on scope. Basic safety modifications (grab bars, lighting, non-slip surfaces, lever handles) cost $1,000-$3,000 and significantly improve safety. Mid-range modifications (bathroom accessibility, stair lift, smart home features) cost $5,000-$15,000. Extensive modifications (first-floor bedroom/bathroom conversion, walk-in shower, multiple renovations) cost $15,000-$30,000+. Most experts recommend starting with highest-impact, lowest-cost changes first. Even $500-$1,000 in strategic modifications dramatically reduces fall risk and improves comfort. Compare these costs to assisted living ($50,000+ annually) or nursing homes ($80,000+ annually)—home modifications are cost-effective for maintaining independence.
Will home modifications hurt my home’s resale value?
Most accessibility modifications either increase value or have neutral impact. Modifications that add value: bathroom renovations with walk-in showers, improved lighting, lever door handles (now preferred by many buyers), smart home features, first-floor bedroom/bathroom. Modifications with neutral impact: grab bars (easily removed), raised toilets (preferred by many), motion-sensor lights. Only highly specialized medical equipment (ceiling lifts, hospital beds built-in) might narrow buyer pool. The aging Baby Boomer population increasingly values accessibility features. Many real estate agents report age-friendly homes sell faster and for higher prices in retirement-popular areas. If concerned, choose modifications easily reversed or universally appealing.
Should I hire a professional or DIY home modifications?
Depends on modification complexity and your skills. Safe DIY projects: replacing light bulbs, adding night lights, installing non-slip mats, replacing door knobs with levers, adding non-slip stair treads, reorganizing storage. Hire professionals for: grab bar installation (must support 250 pounds, requires proper mounting), walk-in showers or bathroom renovations, stair lifts or ramps, electrical work, structural modifications, anything requiring permits. Consider hiring Certified Aging-in-Place Specialist (CAPS) for assessment and planning ($100-$300). Occupational therapists provide home safety evaluations identifying priorities (sometimes covered by insurance). Poor installation of safety features like grab bars is dangerous—invest in professional installation for critical safety items.
When is the right time to make home modifications?
Ideal time is before you need them—proactive modifications prevent falls and injuries rather than reacting after accidents. Consider modifications when: you experience first fall or near-fall, you notice stairs becoming difficult, you have new diagnosis affecting mobility, you retire and plan to age in place, you have minor balance or vision issues. Don’t wait for crisis. Common mistake: delaying modifications until after serious fall when injury may prevent returning home. “Universal design” features benefit all ages, so adding them early means years of use. That said, it’s never too late—even 85-year-olds benefit from safety modifications allowing continued independent living.
Does Medicare or insurance cover home modifications?
Medicare generally doesn’t cover home modifications. Exceptions: durable medical equipment (DME) like toilet risers, bath chairs, walkers sometimes covered. Medicare Advantage plans sometimes include $500-$2,000 annually for home safety modifications—check your specific plan. Medicaid covers some modifications in some states for eligible low-income seniors. Long-term care insurance policies sometimes cover modifications ($500-$5,000 lifetime limits typically). Veterans with service-connected disabilities may receive VA grants up to $6,800. Home modifications prescribed by doctors may be tax-deductible as medical expenses. Check with Area Agency on Aging for local programs offering free or low-cost modifications for low-income seniors.
What are the most important modifications for fall prevention?
Top priority fall prevention modifications: Grab bars in bathrooms (especially shower/tub and by toilet), improved lighting throughout home (especially stairs, hallways, bathrooms), non-slip surfaces in bathrooms and on stairs, handrails on both sides of stairs, removal of tripping hazards (throw rugs, clutter, cords), motion-sensor night lights for nighttime navigation, raised toilet seats reducing strain and fall risk during sitting/standing. These address the most common fall scenarios. Research shows comprehensive approach reducing multiple risk factors is most effective—single modification helps, but combination of grab bars + lighting + non-slip surfaces + handrails reduces fall risk 30-50%. Start with bathrooms and stairs where most serious falls occur.
How do I find qualified contractors for aging-in-place modifications?
Look for Certified Aging-in-Place Specialists (CAPS) through National Association of Home Builders. CAPS-certified contractors receive special training in senior needs. Ask Area Agency on Aging for contractor recommendations—they often maintain lists of reputable, senior-friendly contractors. Get multiple quotes (3-5) and check references thoroughly. Verify licensing, insurance, and bonding. Ask about experience with accessibility modifications specifically. Beware contractors pushing unnecessary expensive modifications—get second opinions for major work. Occupational therapist evaluation helps identify truly necessary modifications versus contractor upselling. Never pay full cost upfront; typical payment schedules are 30% deposit, 40% midway, 30% completion. For minor work, handyman services often suffice and cost less than general contractors.
Can I make modifications if I rent my home?
Yes, but requires landlord permission for permanent modifications. Temporary/removable modifications needing no permission: furniture risers for bed, non-slip bath mats, removable grab bars (suction or tension), motion-sensor plug-in lights, non-slip stair treads, toilet risers, portable ramps. Modifications requiring permission: installed grab bars, replacing door knobs, painting stairs for visibility, installing different lighting fixtures, bathroom renovations. Fair Housing Act requires landlords provide “reasonable accommodations” for disabilities, which may include allowing modifications at tenant’s expense. Get permission in writing specifying who pays for modifications and whether you must restore to original condition when moving. Some landlords agree to modifications if you pay costs. Negotiate—many landlords appreciate improvements increasing property value.
How do smart home devices help seniors age in place?
Smart home technology dramatically improves safety and convenience. Voice assistants (Alexa, Google Home) control lights, thermostats, locks hands-free—valuable for mobility limitations. Smart lights eliminate dangerous dark navigation and can be scheduled or voice-controlled. Video doorbells prevent falls from rushing to door and improve security. Smart locks eliminate fumbling with keys and allow trusted helpers keypad access. Smart thermostats maintain comfortable temperatures automatically. Leak detectors prevent water damage. Medical alert integration calls for help automatically. Smart plugs control any device remotely. Key benefits: reduced fall risk from better lighting, hands-free control when mobility limited, remote family monitoring and assistance, automated safety features (lights on at sunset, doors locked at night). Initial investment ($200-$500 for basic system) pays dividends in safety and independence. Many seniors initially skeptical become enthusiastic users once experiencing benefits.
What if I can’t afford necessary home modifications?
Multiple options for low-income seniors: Area Agency on Aging often has programs providing free or low-cost minor modifications (grab bars, lighting) for eligible seniors. Rebuilding Together provides free home repairs and modifications for low-income seniors in many communities. Habitat for Humanity has programs helping seniors with home repairs. State and local governments often have home modification programs—search “[your state] home modification assistance seniors.” Veterans Administration provides grants for eligible veterans. Churches and community organizations sometimes help seniors with home projects. Medicaid may cover modifications in some states for eligible individuals. Prioritize highest-impact, lowest-cost changes first—grab bars, lighting, and removing tripping hazards cost under $500 and prevent most falls. Consider family assistance—children invested in your safety may contribute. Home equity loans or lines of credit may be options if you own your home, though carefully consider ability to repay.
Take Action: Your Home Safety Plan
- Conduct home safety assessment this week – Walk through your home identifying hazards and difficulties. Note areas where you’ve tripped, stumbled, or struggled. List: lighting problems, tripping hazards, areas requiring excessive bending or reaching, bathroom safety concerns, stairway issues. Involve family member or occupational therapist if possible. This assessment prioritizes modifications.
- Prioritize top 3 safety concerns – From your assessment, identify three most dangerous or difficult areas. These become your immediate priorities. Typically includes: bathroom (highest fall risk), stairways (serious injury risk), and lighting (affects everything). Focus budget and effort here first before addressing lower-priority improvements.
- Get professional evaluation for bathroom and stairs – Schedule consultation with occupational therapist ($100-$200, sometimes insurance-covered) or CAPS contractor (often free estimates) for professional assessment of highest-risk areas. They identify modifications you might miss and ensure solutions meet your specific needs. Their expertise prevents wasted money on ineffective modifications.
- Start with quick, low-cost improvements immediately – While planning larger modifications, implement immediate improvements requiring no installation: remove throw rugs, clear clutter and cords, add non-slip bath mats, reorganize storage bringing frequently-used items to easy-reach heights, increase light bulb wattage where possible, add plug-in night lights. These $50-$200 improvements provide immediate safety benefits.
- Create 6-month modification plan and budget – List all desired modifications with estimated costs: immediate (this month), short-term (within 3 months), and medium-term (within 6 months). Research contractors, get quotes, explore funding options. Having clear plan with timeline and budget prevents feeling overwhelmed and ensures steady progress toward safer, more comfortable home.
- Schedule first major modification within 30 days – Choose one high-impact modification (typically bathroom grab bars or comprehensive lighting upgrade) and schedule it within one month. Taking action overcomes inertia. Once you experience benefits of first modification, continuing with others becomes easier. Many seniors report wishing they’d started sooner once they see how much modifications improve daily life.
Disclaimer
This article is provided for informational purposes only and does not constitute professional home safety, construction, or medical advice. Home modifications should be performed by licensed professionals when necessary, particularly those involving electrical, plumbing, or structural work. Building codes and safety standards vary by location—consult local authorities before major modifications. For personalized guidance on appropriate modifications for your specific mobility and health needs, consult occupational therapists or certified aging-in-place specialists. Always obtain necessary permits for construction work.
Information current as of October 2, 2025. Building codes, product availability, and costs subject to change.
Related Articles
- Affordable Interior Upgrades for Seniors Over 60 (2025)
- Cozy Home Ideas: How Seniors Create Warm Living Rooms in 2025
You may also like:
Updated October 2025