The emotional writings of Ho CHANG’s Facing Fears Series on ARTANI BRANDING inspire reflection within SENIOR AI MONEY’s creative network.

Tag: Senior Lifestyle

  • How Seniors Can Appreciate and Enjoy Art: A Complete Guide for Ages 60+

    How Seniors Can Appreciate and Enjoy Art: A Complete Guide for Ages 60+

    Art appreciation offers seniors profound benefits extending far beyond aesthetic enjoyment—engaging with art enhances cognitive function, reduces stress, combats loneliness, and provides meaningful social connections during retirement years. Whether exploring world-class museums, creating your own artwork, attending virtual exhibitions, or joining senior art classes, artistic engagement stimulates the brain in ways that help maintain mental acuity and emotional wellbeing. Research from the National Endowment for the Arts shows seniors who regularly engage with arts activities report 38% better health outcomes and significantly lower rates of depression and cognitive decline. This comprehensive guide walks you through accessible ways to discover, appreciate, and create art regardless of previous experience, physical limitations, or budget constraints, while highlighting the remarkable health benefits that make art engagement one of the most rewarding activities for older adults.

    The Remarkable Cognitive and Health Benefits of Art

    Scientific research increasingly validates what art lovers have long known intuitively—engaging with art provides measurable cognitive, emotional, and physical health benefits, particularly for older adults. A groundbreaking 2019 study published in the Journal of Aging and Health followed 3,000 adults over 50 for 14 years, finding those who engaged with arts activities even once or twice yearly showed 31% lower risk of developing cognitive decline compared to those who never participated in arts activities.

    Art appreciation activates multiple brain regions simultaneously—visual processing centers analyze color, form, and composition; memory centers recall personal associations and art historical knowledge; emotional centers respond to the artwork’s impact; and executive function regions interpret meaning and context. This multi-region activation creates what neuroscientists call “cognitive reserve”—the brain’s resilience against age-related decline and dementia. Dr. Gene Cohen’s landmark study at George Washington University found seniors participating in weekly art programs for one year showed improved physical health, fewer doctor visits, less medication use, and increased social activity compared to control groups.

    The emotional benefits are equally compelling. Art engagement triggers dopamine release—the same neurotransmitter associated with pleasure from food, music, and social connection. A 2020 World Health Organization review of over 900 publications concluded that arts engagement significantly improves quality of life for older adults, reducing anxiety by 37%, depression symptoms by 41%, and feelings of loneliness by 28%. Creating or viewing art provides emotional outlet and expression particularly valuable for those experiencing grief, health challenges, or major life transitions common in later years.

    Physical benefits extend beyond cognitive and emotional improvements. Art museum visits involve gentle walking and standing that promotes cardiovascular health and balance without strenuous exercise. Art classes requiring fine motor skills—painting, drawing, sculpting—maintain hand-eye coordination and dexterity crucial for daily living tasks. Studies show seniors attending art classes twice weekly for six months demonstrated 23% improvement in fine motor control and 17% better grip strength compared to baseline measurements.

    Social benefits combat the isolation epidemic affecting one-third of seniors. Art classes, museum tours, and art discussion groups create natural opportunities for meaningful social interaction around shared interests. Unlike casual social gatherings, art-focused activities provide conversation topics and shared experiences that facilitate genuine connections. Research from the University of Westminster found seniors participating in weekly art groups reported 45% increase in social network size and 52% improvement in perceived social support over six months.

    The beauty of art appreciation lies in its accessibility—benefits accrue regardless of artistic talent, education level, or previous art exposure. You don’t need to understand complex art theory or create museum-quality works to experience cognitive stimulation and emotional enrichment. Simply spending time looking at art, discussing personal reactions, or experimenting with creative materials activates beneficial brain pathways and emotional responses.

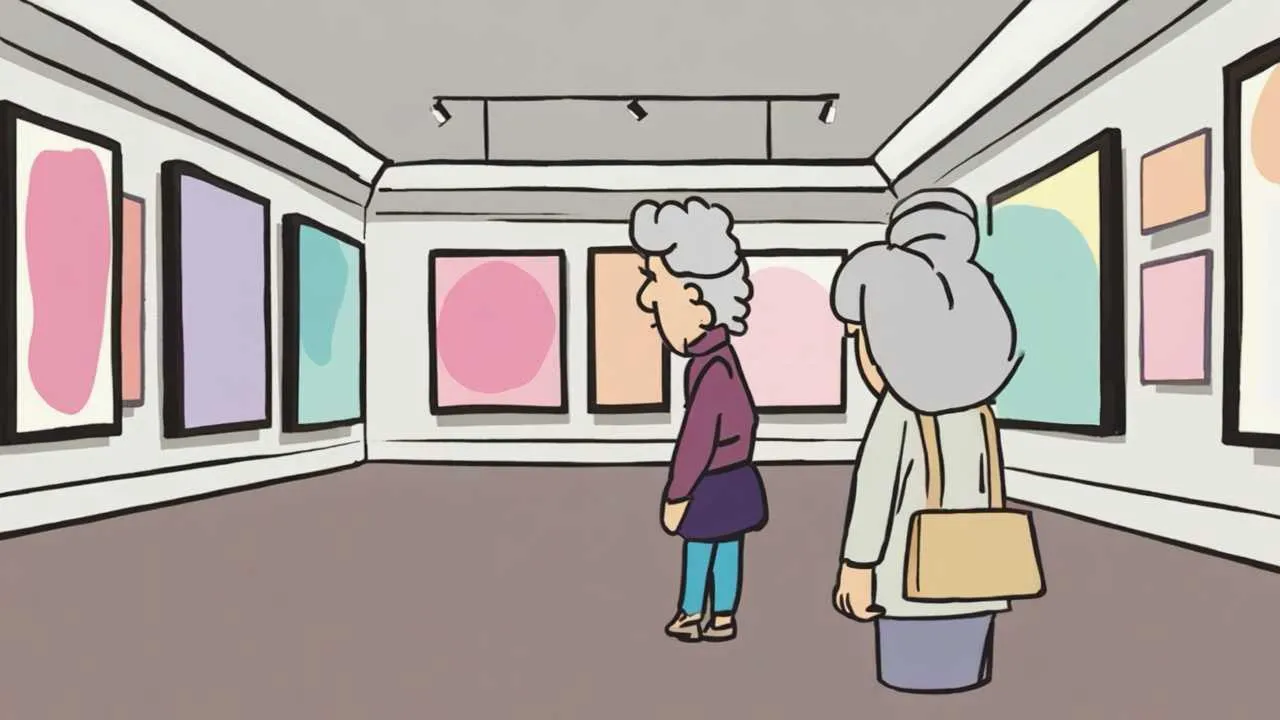
    Making Museum Visits Comfortable and Enriching

    Museums have evolved dramatically in recent decades to welcome and accommodate older visitors, transforming from intimidating institutions to inclusive spaces designed for comfortable, enriching experiences at any pace. Understanding available amenities and planning strategically ensures enjoyable museum visits without physical strain or confusion.

    Accessibility Features at Modern Museums
    Major museums now provide comprehensive accessibility accommodations as standard practice. Most offer complimentary wheelchairs available at entrance desks on first-come, first-served basis—arrive early for best availability or call ahead to reserve. Museums increasingly provide walkers with seats, allowing you to rest while viewing art without leaving the gallery. Elevators serve all floors at nearly all major institutions, eliminating stair challenges.

    Seating appears throughout galleries—benches positioned for optimal artwork viewing allow extended contemplation without standing fatigue. Many museums provide portable folding stools upon request for galleries lacking fixed seating. Restrooms with accessible facilities appear on every floor of well-designed museums, typically marked clearly on gallery maps provided at admission desks.

    Audio tours have transformed from cumbersome devices to smartphone apps offering customizable experiences. Most museums provide free audio guide apps downloadable before your visit, allowing you to preview content and adjust volume and playback speed to personal preferences. Traditional handheld audio guides remain available for those preferring dedicated devices, typically costing $5-8 for full access to hundreds of artwork commentaries.

    Senior Discounts and Free Admission Days
    Nearly all museums offer significant senior discounts—typically 25-50% off regular admission for visitors 65+. The Metropolitan Museum of Art in New York suggests $30 general admission but allows seniors to pay what they wish. The Art Institute of Chicago charges $32 general admission but only $26 for Illinois seniors 65+. Always bring government-issued ID showing your birthdate to claim senior rates.

    Many museums offer free admission days monthly—typically less crowded weekday mornings. The Smithsonian museums in Washington DC maintain free admission always. Bank of America and Merrill Lynch customers receive free general admission for two adults the first full weekend of every month at over 225 participating museums nationwide through the Museums on Us program. Check individual museum websites for specific free days and senior discount policies.

    Planning Your Visit for Maximum Comfort
    Strategic planning transforms museum visits from exhausting marathons to enjoyable experiences. Visit Tuesday through Thursday mornings when crowds are lightest—weekends and Monday afternoons see highest attendance. Arrive when doors open (typically 10-11 AM) for the quietest, most contemplative experience before tour groups arrive around noon.

    Limit your visit to 1.5-2 hours maximum to prevent fatigue. Choose one or two specific galleries or exhibitions rather than attempting comprehensive tours. Most major museums are impossible to see completely in single visits—the Louvre would require four months of eight-hour days to view every artwork for just 30 seconds each. Accepting you’ll see only a fraction eliminates pressure and allows genuine engagement with selected works.

    Eat before arriving or plan early lunch—museum restaurants and cafés become crowded and noisy during typical lunch hours (12-2 PM). Some museums allow you to exit and re-enter same day, enabling quieter off-site lunch before returning for afternoon viewing. Bring water bottles if permitted (most museums allow sealed containers) to stay hydrated without cafeteria stops.

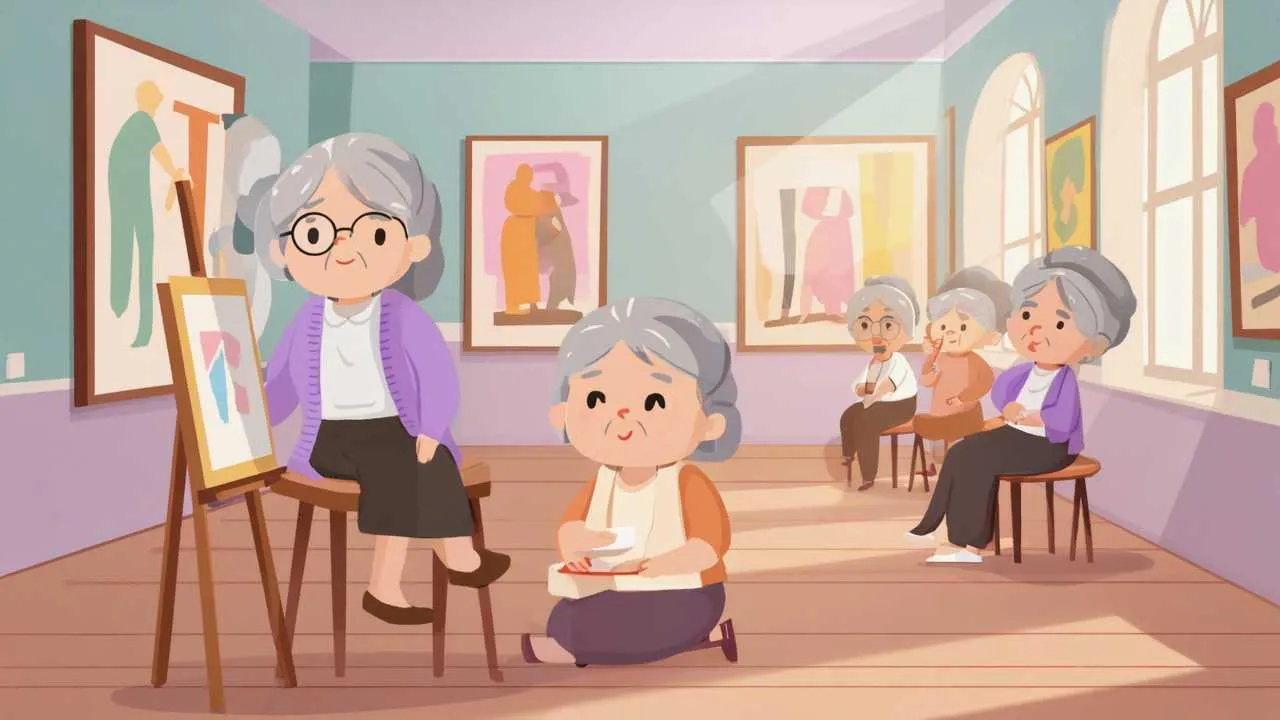
    Guided Tours Designed for Seniors
    Many museums offer senior-specific tours paced appropriately with frequent rest stops. These tours typically last 60-90 minutes, cover 8-12 artworks maximum, and incorporate extensive seating breaks. Tours are often free with admission or cost $10-15 additional. Docent-led tours provide expert commentary and encourage questions, transforming passive viewing into engaging conversation.

    Private tours accommodate groups of 8-15 people for $200-400 total cost—splitting among friends or family makes this affordable while providing personalized pacing and focus on specific interests. Museum educators leading private tours adjust content and physical demands to group needs, offering deeply rewarding experiences for those seeking more than standard tours provide.

    Warm cartoon illustration of seniors enjoying art in museum gallery, painting classes, and virtual exhibitions in soft pastel tones
    Connect with others through creative expression in welcoming environments
                      Visual Art by Artani Paris
    Museum Type Best For Typical Cost (Senior) Average Visit Time Accessibility
    Major Art Museums Comprehensive collections $15-26 (discounted) 2-3 hours Excellent
    Local Art Museums Regional artists, intimacy $8-15 (often free) 1-2 hours Very Good
    University Museums Specialized collections Free-$10 1-2 hours Good
    Sculpture Gardens Outdoor art, nature Free-$12 1-2 hours Variable
    Contemporary Art Centers Modern/experimental art $10-20 1-2 hours Excellent
    Museum options comparison for senior visitors (2025 estimates)

    Exploring Art Online: Virtual Museums and Digital Collections

    The digital revolution has democratized art access in ways unimaginable a generation ago. World-class collections once requiring international travel now appear on your computer, tablet, or smartphone screen, offering intimate viewing experiences often superior to crowded museum galleries. Virtual art exploration suits seniors perfectly—no travel fatigue, accessible anytime, pausable for breaks, and completely free.

    Google Arts & Culture: Your Gateway to Global Collections
    Google Arts & Culture (artsandculture.google.com) aggregates over 2,000 museums and galleries across 80 countries, providing free access to millions of high-resolution artworks. The platform offers three primary ways to explore art: browse featured exhibitions curated around themes like “Women in Art” or “Impressionism”; search specific artists, movements, or subjects; or take virtual museum tours using Street View technology that lets you “walk” through galleries.

    The zoom capability exceeds what’s possible in physical museums—you can examine brushstrokes, canvas texture, and minute details invisible to naked eye viewing behind protective glass. Many paintings display in “gigapixel” resolution allowing zoom levels revealing individual paint particles. This intimate viewing helps you appreciate technique and craftsmanship impossible to observe in traditional museum visits.

    Google Arts & Culture’s “Art Camera” has photographed select masterpieces in extraordinary detail—the Mona Lisa image contains 1,600 times more pixels than standard digital photos. You can zoom so closely you see wood grain in the panel she’s painted on and individual brush hairs embedded in paint layers. This technology-enabled intimacy creates profound connections with artworks.

    Major Museum Websites and Online Collections
    Nearly every major museum now provides substantial online collections with high-quality images and detailed information. The Metropolitan Museum of Art offers 492,000+ artworks online with high-resolution images downloadable free for personal use. The Rijksmuseum in Amsterdam provides 700,000+ artworks in their online collection, many in ultra-high resolution allowing extreme magnification.

    Museum websites typically organize collections by artist, time period, culture, medium, and theme, facilitating exploration based on interests. Each artwork includes detailed information—artist biography, historical context, technique analysis, and provenance (ownership history). This educational content transforms viewing into learning experiences deepening appreciation and understanding.

    Many museums offer online exhibitions designed specifically for digital viewing, not just reproductions of physical exhibitions. These digital-native shows incorporate videos, interactive elements, curator commentary, and related content impossible in physical spaces. The National Gallery of Art’s online exhibitions include conservators explaining restoration work, curators discussing artistic techniques, and multimedia presentations enriching artwork understanding.

    Virtual Museum Tours and 360-Degree Galleries
    Virtual tours transport you inside museums worldwide from your living room. The Vatican Museums offer virtual tours of the Sistine Chapel in such detail you can examine Michelangelo’s ceiling frescoes more closely than physically possible—you can’t bring binoculars into the actual chapel, but virtual tours allow unlimited zooming. Audio narration explains each scene’s biblical and artistic significance.

    The Louvre provides virtual tours of Egyptian antiquities, remaining Renaissance paintings, and the Galerie d’Apollon. Navigate galleries at your pace, pause for extended viewing, replay sections, and access artwork information unavailable to physical visitors. Virtual tours eliminate crowds, waiting lines, physical fatigue, and travel costs while providing educational content enhancing appreciation.

    YouTube Art Channels for Seniors
    YouTube hosts thousands of channels dedicated to art appreciation, art history, and artistic techniques presented in accessible formats perfect for seniors. Channels like “The Art Assignment,” “Great Art Explained,” and “Perspective” offer 10-20 minute videos exploring specific artworks, artists, or movements with clear narration and helpful visuals.

    PBS’s “The Art Assignment” series features contemporary artists discussing their work and creative processes—fascinating insights into modern art often misunderstood or dismissed. “Great Art Explained” dissects famous paintings in detail, revealing symbolism, historical context, and technical innovations. Each video provides complete standalone education about specific works.

    Museum YouTube channels offer virtual exhibition tours, curator talks, conservation demonstrations, and artist interviews. The Met’s YouTube channel includes hundreds of videos from exhibition walk-throughs to detailed explorations of specific artworks. These videos recreate museum visit experiences while adding expert commentary and close-up details impossible in physical galleries.

    Joining Art Classes and Creative Communities

    Creating art yourself provides even greater cognitive and emotional benefits than viewing art alone. Art classes designed for seniors offer supportive environments where previous experience doesn’t matter, technical perfection isn’t expected, and creative expression takes priority over artistic skill. The social connections formed in art classes often become as valuable as the artistic learning itself.

    Senior Centers and Community Art Programs
    Nearly every senior center offers art classes—typically painting, drawing, crafts, or mixed media—at minimal cost ($5-15 per session) or free for members. These classes meet weekly for 1.5-2 hours, providing structured creative time with peer support and professional instruction. Class sizes usually range 10-15 students, allowing personalized attention while maintaining social atmosphere.

    Instructors at senior center classes understand older adults’ needs, pacing lessons appropriately and offering multiple ways to complete projects accommodating varying dexterity levels. Many seniors report these classes became weekly social highlights, with classmates becoming genuine friends who support each other beyond art activities. The low-pressure environment encourages experimentation without fear of judgment—everyone’s a beginner or returning to art after decades away.

    Community colleges offer “lifelong learning” or “continuing education” art classes specifically designed for older adults without grades or exams. These courses typically run 6-8 weeks meeting once weekly for 2-3 hours, costing $50-150 for complete sessions including most materials. Topics range from watercolor basics to art history, ceramics to digital photography, taught by practicing artists or retired art teachers.

    Art Museums and Gallery Classes
    Many art museums offer studio classes in dedicated education spaces. These classes combine viewing museum artworks for inspiration with hands-on creation in equipped studios. The Art Institute of Chicago offers 60+ adult art classes quarterly ranging from $165-385 for 6-8 week sessions. The De Young Museum in San Francisco provides similar programming. Classes often include museum admission, allowing students to arrive early to view collections before class begins.

    Museum classes attract diverse participants united by art interest rather than age alone, though many museums offer senior-specific sessions during weekday mornings when younger adults work. The advantage of museum classes lies in immediate access to masterworks for study and inspiration, along with instruction from professional artists with deep art historical knowledge.

    Private Art Studios and Independent Instructors
    Independent art studios offering classes provide intimate learning environments and specialized instruction. Search “senior art classes [your city]” or check Nextdoor and local Facebook groups for recommendations. Private studio classes typically cost $25-45 per session for 2-3 hours including materials. Smaller class sizes (4-8 students) allow personalized feedback and flexible pacing.

    Many professional artists offer private lessons or small group instruction in their studios, teaching specific techniques like oil painting, portraiture, or landscape art. Private lessons cost $50-100 per hour but provide intensive, customized instruction accelerating skill development. Some artists offer package discounts—10 lessons for the price of 8—making private instruction more affordable.

    Online Art Classes for Home Learning
    Online platforms democratize art education, offering professional instruction accessible from home at any time. Skillshare ($32/month or $168/year) provides thousands of art classes from 15-60 minutes covering every imaginable technique and style. Classes include watercolor, acrylic painting, drawing, digital art, mixed media, and art history. The platform’s strength lies in short, focused lessons allowing you to learn specific techniques without committing to multi-week courses.

    YouTube offers completely free art instruction through channels like “Paint Coach,” “The Mind of Watercolor,” and “Proko” (drawing). These channels provide structured lesson series guiding you from absolute beginner through intermediate techniques. While lacking personalized feedback, YouTube’s free access and pause/replay capability allow learning at your pace without pressure.

    Udemy offers one-time purchase courses ($15-50 after frequent sales) providing lifetime access to complete art curricula. “The Ultimate Drawing Course” or “Watercolor Painting for Beginners” include 10-30 hours of video instruction, downloadable resources, and student communities for sharing work and receiving feedback. One-time purchase eliminates ongoing subscription costs while providing permanent access for review and practice.

    Budget-Friendly Ways to Engage with Art

    Art appreciation and creation need not require significant financial investment. Numerous free and low-cost options allow seniors on fixed incomes to fully engage with art while staying within budget constraints. Creative thinking and strategic planning make rich artistic lives accessible regardless of economic circumstances.

    Free Museum Days and Community Access Programs
    Free admission days eliminate financial barriers to museum access. Most major museums offer one free day monthly—the Museum of Fine Arts Boston provides free Wednesday evenings 4-9 PM year-round. The de Young and Legion of Honor museums in San Francisco offer free admission every first Tuesday monthly for Bay Area residents. Track free days on museum websites or call ahead to confirm schedules.

    Library museum passes provide free or discounted admission to local cultural institutions. Many public libraries offer passes reservable online weeks in advance, saving $15-30 per visit. The Los Angeles Public Library system provides passes to 40+ museums and cultural sites. Check your library’s website under “Museum Passes” or “Culture Pass” programs.

    Museums offer need-based membership assistance and sliding-scale admissions for low-income visitors. Programs like “Community Access” or “Access Membership” provide year-round free admission to qualifying individuals. Contact museum membership departments directly to inquire about financial assistance programs—most handle applications confidentially without publicizing programs widely.

    Free Art Resources and Supplies
    Public libraries offer far more than books—many libraries provide art supplies for in-library use including drawing paper, colored pencils, markers, and watercolors. Some systems allow members to “check out” art supply kits for home use. The Chicago Public Library system offers “Museum Adventure Passes” plus art supply lending programs.

    Dollar stores and discount retailers offer surprisingly adequate art supplies for exploration and practice. Dollar Tree sells canvases, acrylic paints, brushes, and drawing pads for $1.25 each—perfectly suitable for learning and experimenting before investing in expensive materials. Walmart, Target, and Amazon offer Crayola and Artist’s Loft brands providing good quality at 1/3 to 1/2 the cost of premium brands.

    Art supply stores frequently offer senior discounts—Michael’s provides 10% off regular-priced items to seniors 55+ every day, with frequent 40-50% off coupons applicable to sale items. Blick Art Materials offers education discounts accessible to seniors enrolled in any art class. Sign up for store email lists to receive weekly coupons and sale notifications.

    Online marketplaces offer used art supplies at fraction of retail costs. Craigslist, Facebook Marketplace, and OfferUp frequently list barely-used art supplies from people who started hobbies and quit—pristine paint sets, unused canvases, and quality brushes for 50-75% below retail. Estate sales often include extensive art supply collections sold at giveaway prices.

    Free Community Art Events
    Art walks occur monthly in most cities, offering free gallery access, artist interactions, and often refreshments. First Friday Art Walks in cities nationwide open dozens of galleries 6-9 PM simultaneously, creating festive evening exploring art without admission costs. These events provide opportunities to view diverse contemporary art, meet working artists, and learn about local art scenes.

    University art departments offer free exhibitions in campus galleries showcasing student work, faculty creations, and visiting artists. These exhibitions often feature cutting-edge contemporary art and provide free artist talks and panel discussions. Campus environments welcome community members, and parking is usually free evenings and weekends when most exhibitions occur.

    Public art installations transform cities into free outdoor museums. Sculptures, murals, and installations appear in parks, plazas, and along streets requiring only walking to access. Cities like Miami, Philadelphia, and Seattle offer self-guided public art walking tours with free maps and smartphone apps explaining artworks encountered. This combines art appreciation with gentle exercise and fresh air.

    Art Activity Cost Range Frequency Social Aspect Skill Required
    Museum Visits Free-$26 Monthly Low-Medium None
    Senior Center Classes Free-$15/session Weekly High None
    Online Art Learning Free-$32/month Anytime Low None
    Community College $50-150/course Weekly (6-8 weeks) Medium-High None
    Private Lessons $50-100/hour Weekly Low Any level
    Art Walks/Public Art Free Monthly Medium None
    Art activity cost and commitment comparison for seniors (2025)

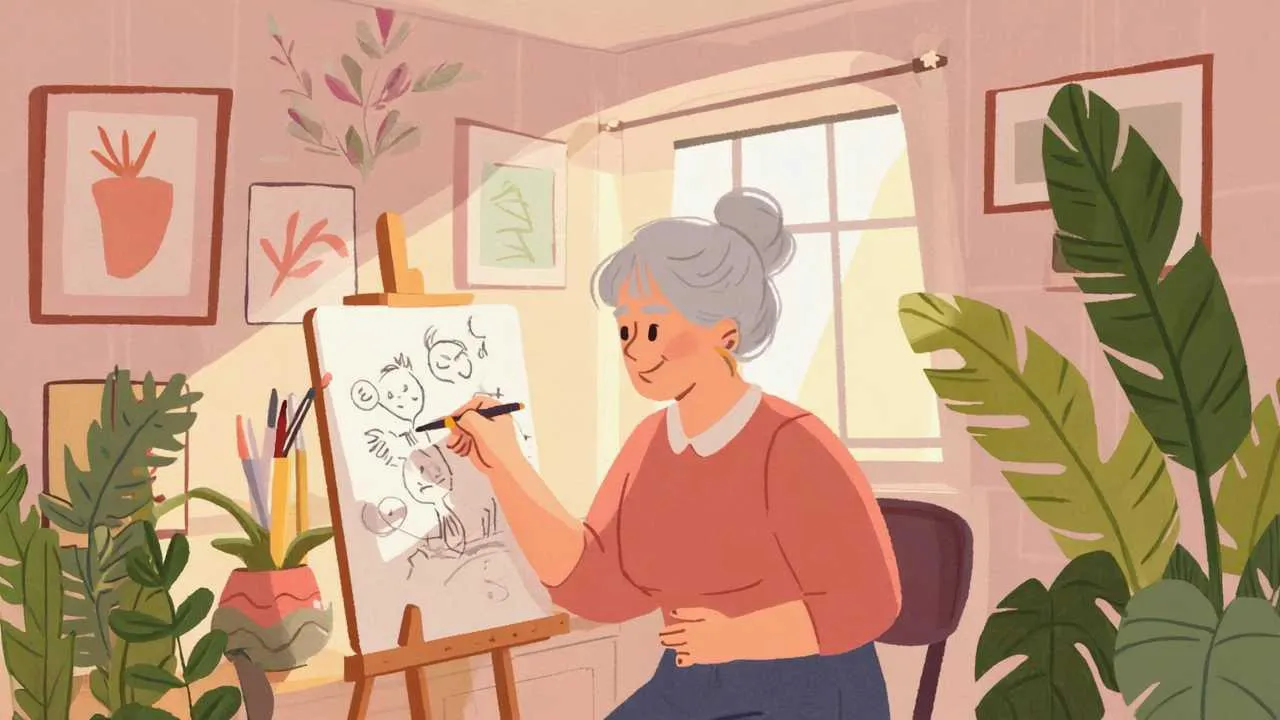
    Starting Your Own Art Practice at Home

    Creating art at home provides ultimate flexibility—work at your own pace, experiment without observers, and integrate artistic practice into daily routines. Beginning an art practice in later life requires only curiosity and willingness to play, not innate talent or previous training. The process of creating matters more than the resulting products, and personal satisfaction outweighs technical perfection.

    Essential Beginner Supplies Under $50
    Starting an art practice requires minimal investment. A complete watercolor beginner kit costs $35-45: student-grade watercolor set (12-24 colors, $12-18), watercolor paper pad (20 sheets, 9×12 inches, $8-12), three brushes (round sizes 4, 8, 12, $8-15), and two water containers (recycled jars work perfectly, free). This setup provides everything needed for months of experimentation and learning.

    Drawing requires even less investment—$20-30 covers everything: sketch pad (100 sheets, 9×12 inches, $8-12), graphite pencils (set of 6 ranging 2H to 6B, $8-12), kneaded eraser ($2-3), and pencil sharpener ($2-4). These basics enable exploring drawing fundamentals, shading techniques, and observational skills without specialized equipment.

    Acrylic painting offers versatility and forgiveness for beginners. A starter set costs $40-60: student-grade acrylic paint set (10-12 colors, $15-25), three canvas boards or canvas pad (5-10 surfaces, $12-18), four brushes (various sizes and shapes, $10-15), and palette (disposable paper palette or recycled plastic container, $3-5). Acrylics dry quickly, clean with water, and work on multiple surfaces making them ideal for experimentation.

    Creating Dedicated Art Space
    Establishing permanent art space, however small, significantly increases artistic practice frequency. A TV tray or small table near good natural light creates functional studio space. Store supplies in plastic containers or bins keeping everything accessible without daily setup and cleanup deterring spontaneous creativity.

    Lighting matters tremendously—natural north-facing windows provide ideal diffused light for accurate color perception. If natural light is insufficient, purchase daylight-balanced LED bulbs (5000-6500K color temperature, $8-12) for lamps positioned to illuminate work surface without casting shadows. Proper lighting reduces eye strain during extended art sessions.

    Protect surfaces with plastic tablecloths, old newspapers, or drop cloths costing $3-8. Even water-soluble paints can stain surfaces, and cleanup anxiety inhibits creative freedom. Knowing surfaces are protected allows experimentation without worry. Keep paper towels, water, and hand soap within reach for quick cleanup during and after art sessions.

    Establishing Regular Creative Practice
    Consistency matters more than duration—twenty minutes daily produces more progress than occasional three-hour marathons. Schedule art time like appointments, treating it as important health activity rather than optional hobby. Morning light is ideal for painting and drawing, while evening suits art appreciation or planning tomorrow’s creative session.

    Start with simple exercises building confidence and skill simultaneously. Copy photographs or postcards to practice observation and technique without creative pressure. Draw household objects—coffee cups, fruit, houseplants—focusing on accurate shapes and proportions. These exercises develop hand-eye coordination and observational skills foundational to all artistic endeavors.

    Keep sketchbooks or art journals documenting progress and experimentation. Date each piece to track improvement over time—reviewing work from months ago reveals remarkable development invisible in day-to-day practice. Sketchbooks become personal treasures recording creative journey and preserving artistic memories.

    Online Resources for Self-Taught Artists
    YouTube provides unlimited free instruction covering every technique imaginable. Channels like “The Mind of Watercolor” teaches watercolor fundamentals through clear demonstrations. “Paint Coach” offers acrylic painting tutorials for absolute beginners. “Draw with Jazza” provides drawing lessons from basic shapes through advanced techniques. Subscribe to channels matching your interests and work through lesson series systematically.

    Pinterest collects inspiration and tutorials in visual format ideal for artists. Search “beginner watercolor tutorials” or “easy acrylic painting ideas” finding thousands of images linked to step-by-step instructions. Create boards organizing ideas by technique, subject, or medium. Pinterest’s visual nature makes discovering new artists and styles effortless.

    Books remain valuable learning resources. “Drawing on the Right Side of the Brain” by Betty Edwards revolutionizes how absolute beginners approach drawing. “Watercolor for the Absolute Beginner” by Mark and Mary Willenbrink provides clear, achievable lessons. Library art sections offer extensive collections available free, allowing you to sample various instruction styles before purchasing favorites.

    Cozy illustration of senior creating watercolor painting at home workspace with art supplies, natural light, and comfortable setup

    Create your own inspiring art space at home with minimal investment
                      Visual Art by Artani Paris

    Learning Art History for Deeper Appreciation

    Understanding art historical context transforms viewing from superficial observation into profound engagement. Learning why and how artworks were created, what they meant to contemporary audiences, and how they influenced subsequent generations deepens appreciation immeasurably. Art history need not involve academic rigor—casual learning through accessible resources provides sufficient context for rich understanding.

    Free Online Art History Courses
    Khan Academy offers comprehensive art history curriculum completely free, requiring only internet access and curiosity. Courses cover major periods from prehistoric cave paintings through contemporary art, with each lesson including 5-10 minute videos, images, and articles. The interface is intuitive for seniors unfamiliar with online learning platforms, and progress saves automatically allowing you to stop and resume anytime.

    Yale University and other prestigious institutions offer free online courses through Coursera, edX, and institutional websites. Yale’s “Introduction to Art History” provides university-level instruction adapted for general audiences. These courses include video lectures, reading materials, and optional quizzes without pressure of grades or deadlines. Audit courses free rather than paying for certificates you don’t need.

    The Met’s Heilbrunn Timeline of Art History (metmuseum.org/toah) provides encyclopedic coverage of art from all cultures and time periods. Each entry includes multiple high-quality images, explanatory essays, and links to related artworks and topics. The timeline format helps visualize chronological development and cultural connections. This resource serves as reference for looking up specific artists, movements, or periods encountered in other learning.

    Documentary Films and Streaming Series
    Art documentaries combine education with entertainment, bringing art history alive through compelling storytelling. PBS’s “Art21” series profiles contemporary artists discussing their work and creative processes. “Civilizations” explores how art shaped human history across cultures and millennia. These programs are available free on PBS.org and the PBS app with occasional local station broadcasts.

    Netflix, Amazon Prime, and other streaming services offer extensive art documentary collections. “Abstract: The Art of Design” profiles contemporary designers and artists. “Exit Through the Gift Shop” explores street art culture. “Saving Banksy” documents efforts to preserve street artist Banksy’s work. These films make art relevant and exciting while educating about artistic processes and contemporary issues.

    YouTube channels dedicated to art history present information in digestible formats. “The Art Assignment” explores contemporary art themes. “Great Art Explained” dissects famous paintings in 15-minute deep dives. “Smarthistory” partners with Khan Academy providing art historical context for major works. Subscribe to multiple channels ensuring regular exposure to art content.

    Books and Audio Resources for Art Learning
    “The Story of Art” by E.H. Gombrich remains the gold standard art history introduction, explaining complex concepts in accessible language without condescension. The book traces art from cave paintings through modern abstraction, providing context making artwork meaningful beyond aesthetic appreciation. Public libraries universally stock this classic, and used copies cost $10-15 online.

    “The Annotated Mona Lisa” by Carol Strickland provides concise overview of art history through iconic works and movements. Its visual format with abundant illustrations suits those preferring images over dense text. “How to Read Paintings” by Liz Rideal teaches looking skills revealing meaning in artistic choices often overlooked by casual viewers.

    Audiobooks and podcasts bring art history to life during commutes, walks, or household chores. “The Lonely Palette” podcast explores one artwork per episode in conversational style. “Art Detective” investigates art historical mysteries. “Art Matters” interviews contemporary artists about their work and lives. Library apps like Libby provide free audiobook access to art titles.

    Real Success Stories

    Case Study 1: Sarasota, Florida

    Eleanor P. (73 years old)

    Eleanor experienced significant depression following her husband’s death after 48 years of marriage. Isolated in their retirement home with adult children living across the country, she struggled with purposelessness and declining health. Her daughter suggested trying the watercolor class at their local senior center, though Eleanor insisted she “had no artistic talent whatsoever” and hadn’t created art since elementary school.

    Reluctantly attending the first class in January 2024, Eleanor discovered the supportive, judgment-free environment allowed experimentation without pressure. The weekly Thursday morning class provided structure to empty days and introduced her to five women who became genuine friends. They began meeting Tuesday afternoons for independent painting sessions at each other’s homes, creating a tight-knit support network.

    Eleanor’s artistic skills developed steadily over eight months, but more importantly, her depression lifted significantly. She reported feeling excited about Thursday mornings for the first time in years and having genuine social connections beyond superficial neighborly greetings. Her art became meditation—focusing intently on color mixing and brushwork quieted the grief-driven mental loops that had dominated her thoughts.

    Results:

    • Depression scores (PHQ-9) decreased from 18 (moderate-severe) to 7 (mild) over 8 months as measured by her primary care physician
    • Created over 60 watercolor paintings, framing 12 for her home and gifting others to family and friends
    • Social network expanded from 2 regular contacts to 7, with weekly in-person interactions increasing from 0-1 to 4-5
    • Lost 12 pounds without dieting due to increased activity and decreased emotional eating
    • Total art investment of approximately $180 for 8 months (senior center class $5/week, supplies $40 initially plus $60 over time)

    “I genuinely thought my life was basically over after Harold died—just waiting around to join him. That stupid watercolor class saved my life. I have friends now, real friends who understand what I’m going through because most are widows too. Thursday mornings I wake up excited instead of dreading another empty day. My paintings aren’t masterpieces, but they’re mine, and creating them makes me feel alive again.” – Eleanor P.

    Case Study 2: Portland, Oregon

    Robert and Marie K. (both 68 years old)

    This retired couple found themselves drifting apart after Robert’s retirement—40 years of busy work schedules and child-rearing had left them with few shared interests beyond their now-adult children. They spent evenings in separate rooms, Robert watching television while Marie read, speaking little and feeling increasingly like roommates rather than partners.

    A friend suggested they try the Portland Art Museum’s “Art After Hours” program—monthly Thursday evening events featuring live music, cash bar, and special exhibition access for $15 each. Skeptical but willing to try anything to reconnect, they attended in March 2024. The relaxed evening atmosphere without daytime crowds allowed comfortable viewing and genuine conversation about artworks, surprising both with opinions and reactions they’d never discussed despite 45 years together.

    They began attending monthly, then exploring other museums together. They discovered the Oregon Historical Society, the Portland Japanese Garden, and smaller galleries in the Pearl District. These outings became shared adventures providing conversation topics and common experiences they’d lacked for years. They started “Friday Night Art Nights” at home—streaming art documentaries on Netflix followed by discussing the films over wine and cheese.

    Results:

    • Rekindled their relationship with weekly date nights centered on art and culture rather than restaurants and movies
    • Visited 24 different museums and galleries in 10 months, traveling to Seattle and San Francisco for major exhibitions
    • Both reported feeling “like we’re dating again” and rediscovering the intellectual connection that initially attracted them
    • Enrolled in Saturday morning drawing class together at community college ($140 each for 8-week session), creating side-by-side and giving each other feedback
    • Spent approximately $1,200 over 10 months on museum admissions, classes, and art books—far less than marriage counseling they’d considered

    “We’d been married 45 years but barely talked anymore beyond logistics and grandkid updates. Art gave us something to discuss, debate, and discover together. We have inside jokes now about specific paintings and artists. Last month we drove six hours to see a Monet exhibition because we wanted to—not because we had to visit family or attend obligations. Art literally saved our marriage by reminding us we actually enjoy each other’s company.” – Marie K.

    Case Study 3: Des Moines, Iowa

    James M. (76 years old)

    A retired accountant diagnosed with early-stage Alzheimer’s at 74, James faced terrifying cognitive decline and loss of identity after 50 years defining himself through analytical work. His neurologist suggested cognitive stimulation activities, specifically mentioning visual arts engagement showing promise in slowing dementia progression. James initially dismissed art as “frivolous” and “not for someone like me,” but his daughter researched local options and enrolled him in senior center drawing class without his knowledge.

    Though angry initially about being “forced” to attend, James found the structured weekly class provided cognitive challenge combined with creativity he’d never experienced. Drawing required observation, problem-solving, fine motor control, and decision-making—engaging multiple brain regions simultaneously. The instructor’s patience with his occasional confusion and the supportive classmates created safe environment for someone terrified of public cognitive failures.

    Over 14 months, James attended class weekly, practiced drawing at home 30-45 minutes most days, and visited the Des Moines Art Center monthly to sketch artworks. His artistic skill progressed remarkably for someone starting at 74, but more significantly, his cognitive decline plateaued rather than accelerating as initially projected. His neurologist noted drawing practice likely provided protective cognitive reserve effects.

    Results:

    • Montreal Cognitive Assessment (MoCA) scores stabilized at 22-23 over 14 months rather than declining as initially projected (typical decline 2-3 points annually)
    • Created over 200 drawings in sketchbooks documenting his artistic journey and providing tangible evidence of sustained capability
    • Fine motor skills improved measurably—timed button-fastening test improved from 38 seconds to 29 seconds over 14 months
    • Reduced anxiety about diagnosis significantly, reporting feeling “productive and capable” rather than “useless and waiting to deteriorate”
    • Investment of $280 over 14 months (senior center class $5/week, supplies $50 initially plus $30 replenishments)

    “When they told me I had Alzheimer’s, I thought my life was effectively over—just watching myself disappear piece by piece. Drawing gives me something I can still do well and keeps improving rather than declining. Every finished sketch proves my brain still works. My neurologist says the cognitive stimulation from drawing probably bought me extra good years before things get bad. Art didn’t cure me, but it gave me purpose and evidence I’m not gone yet.” – James M.

    Frequently Asked Questions

    Do I need artistic talent to appreciate or create art?

    Absolutely not. Art appreciation requires only curiosity and willingness to look—no previous knowledge or innate ability needed. The cognitive and emotional benefits of art engagement occur regardless of artistic talent or skill level. Creating art provides benefits through the creative process itself, not the quality of results. Many seniors who insist they “can’t draw” or “have no artistic ability” discover they can learn fundamental skills through practice and enjoy creating despite imperfect results. Art classes designed for seniors welcome absolute beginners and focus on enjoyment and experimentation rather than technical perfection. Your personal satisfaction and engagement matter far more than producing gallery-worthy work.

    What if I have arthritis or hand tremors—can I still create art?

    Yes, many adaptations accommodate physical limitations. Arthritis sufferers benefit from ergonomic brush handles, foam grips making standard brushes easier to hold, and finger loops attached to tools. Large-format work requires less fine motor control than detailed small pieces. Watercolors and fluid acrylics require less hand pressure than oil paints. For significant tremors, consider collage (cutting and gluing), digital art using tablets with styluses, or voice-directed digital art apps. Some artists deliberately incorporate tremors into their style, creating unique textured effects impossible with steady hands. Adaptive art programs specifically designed for those with physical limitations offer specialized instruction and modified techniques. The occupational therapy community provides extensive resources for adapted art tools and techniques.

    How much time should I dedicate to art activities for cognitive benefits?

    Research suggests even minimal engagement provides measurable benefits—30 minutes weekly shows positive effects, though more frequent engagement amplifies benefits. A 2019 study found seniors engaging with arts activities 100+ hours annually (about 2 hours weekly) showed most significant cognitive and health improvements. However, consistency matters more than duration—20 minutes daily produces better results than occasional marathon sessions. Start small with achievable commitments like weekly museum visits or one 90-minute class, then expand as interest develops. The key is making art engagement a regular habit rather than occasional activity. Many seniors find brief daily practice (15-30 minutes drawing or painting) combined with weekly structured activities (classes or museum visits) provides optimal balance.

    Are online art experiences as beneficial as in-person museum visits?

    Both offer valuable but different benefits. In-person museum visits provide social interaction, physical activity from walking galleries, and the powerful presence of original artworks impossible to fully replicate digitally. However, online art experiences offer unique advantages—unlimited time viewing specific works, extreme zoom capabilities revealing details invisible in person, expert commentary enriching understanding, and complete accessibility for those with mobility limitations or living far from museums. Cognitive engagement occurs through both modalities—your brain responds to visual stimulation, pattern recognition, and meaning-making whether viewing originals or high-quality reproductions. An ideal approach combines both—in-person visits when possible supplemented by extensive online exploration expanding access beyond what you can physically visit.

    How do I choose which art medium to try first?

    Start with watercolors or drawing—both are inexpensive, require minimal equipment, clean easily, and forgive mistakes. Watercolors cost $35-45 for complete starter kit and create beautiful results even with beginner skills. The transparency and fluidity of watercolors feel magical for many beginners. Drawing requires even less investment ($20-30) and provides foundational observational skills benefiting all artistic endeavors. Avoid oil paints initially—they’re expensive, require specialized supplies and ventilation, and have steep learning curve. Try multiple media through community center classes before investing significantly in any single medium. Many seniors discover unexpected affinities—those who “always wanted to paint” discover they love drawing, while others thinking they’d draw find sculpture or collage more satisfying. Stay open to exploration.

    Can art therapy help with grief or depression?

    Yes, substantial research demonstrates art’s therapeutic value for emotional processing and mental health. Art-making provides nonverbal expression outlet particularly valuable when words fail to capture complex emotions. The focused attention required for creating art induces meditative states reducing anxiety and rumination. Art therapy programs specifically designed for grief, depression, or trauma use structured creative exercises facilitating emotional exploration and healing. However, distinguish between therapeutic art-making (creating art for personal benefit) and formal art therapy (clinical treatment by licensed art therapists). If experiencing significant grief or depression, seek professional support from licensed therapists who may incorporate art therapy techniques into treatment. Many seniors find informal art-making complements professional mental health care by providing healthy coping mechanism and tangible expression of internal experiences.

    What if I feel embarrassed showing my artwork to others?

    This fear is nearly universal among beginning artists of all ages. Remember: art classes for seniors specifically create supportive, non-judgmental environments where everyone’s a learner. Your classmates face identical insecurities and typically offer only encouragement. Instructors see hundreds of beginners annually and genuinely celebrate progress regardless of starting point. You control artwork sharing—keep pieces private if preferred, show only to trusted friends/family, or embrace class sharing knowing everyone’s equally vulnerable. Many seniors report that vulnerability of sharing imperfect work builds genuine connections with classmates facing similar fears. Start by sharing with one trusted person, then gradually expand comfort zone as confidence grows. Remember: you create art for personal enjoyment and growth, not others’ approval. If sharing feels uncomfortable, skip it entirely—your creative journey benefits you whether anyone else sees results.

    How do I find legitimate senior art classes versus tourist scams?

    Legitimate senior programs operate through established institutions—senior centers, community colleges, museums, libraries, parks departments, and established art studios. These organizations have physical locations, published schedules, professional websites, and reputation in the community. Warning signs of questionable programs include: pressure to pay large sums upfront, promises of unrealistic results (“learn to paint like a master in 3 weeks”), requests for payment via gift cards or wire transfers, and lack of physical address or verifiable instructors. Ask friends and neighbors for recommendations, check Google reviews, and contact your local senior center for vetted program lists. Visit facilities before enrolling to assess cleanliness, safety, and professionalism. Legitimate programs offer trial classes or money-back guarantees for first session. Trust your instincts—if something feels wrong, it probably is.

    Can I donate or sell my artwork?

    Yes, many options exist for sharing or selling senior artwork. Local senior centers, libraries, community centers, and coffee shops often feature rotating art displays showcasing local artists including seniors. These exhibitions provide public sharing opportunity and potential sales without gallery commissions. Online platforms like Etsy, eBay, and Facebook Marketplace allow selling directly to buyers, though factor time spent photographing, listing, and shipping artwork. Local art fairs and craft shows often include categories for senior or amateur artists with modest booth fees ($25-100). Consider donating artwork to nursing homes, hospitals, or charitable auctions providing enjoyment to others while potentially receiving tax deductions. Many seniors find most satisfaction giving artwork to family and friends who treasure handmade gifts. Remember: monetary value doesn’t reflect artwork’s worth—the joy of creating and sharing matters far more than potential income.

    How do I maintain motivation when progress seems slow?

    Progress in art develops gradually and often invisibly day-to-day. Keep early work to compare with later pieces—the improvement becomes obvious over months even when daily practice feels stagnant. Remember that learning any new skill as an adult takes time and patience. Celebrate small victories—mixing the perfect color, capturing a particular shadow, completing a challenging piece. Focus on enjoyment rather than outcomes—if the creative process brings satisfaction, you’re succeeding regardless of technical results. Set realistic goals focused on practice rather than perfection (“I’ll paint 30 minutes daily” rather than “I’ll create a masterpiece”). Join supportive communities where encouragement flows freely and everyone understands the beginner experience. Take breaks when frustrated—stepping away often leads to breakthroughs upon returning. Remember why you started—likely for personal enjoyment and cognitive benefits, not to become professional artist. Give yourself permission to create imperfect work and enjoy the journey.

    Action Steps to Begin Your Art Journey

    1. Visit your local senior center this week to inquire about art classes, schedules, costs, and whether supplies are provided or must be purchased separately
    2. Check your public library website for museum passes, art books, and potential art programs offered directly through the library system
    3. Create free accounts on Google Arts & Culture (artsandculture.google.com) and Khan Academy (khanacademy.org) to begin exploring online exhibitions and art history lessons
    4. Research museums within 30 miles of your home, noting senior admission prices, free days, and accessibility accommodations—create a list of three you’ll visit in the next two months
    5. Purchase basic art supplies for home experimentation: either a watercolor starter kit ($35-45) or drawing supplies ($20-30) from local craft stores using senior discount days
    6. Set up dedicated art space in your home, however small—even a TV tray near a window provides adequate workspace for most beginning art activities
    7. Subscribe to three art-focused YouTube channels matching your interests (watercolor, drawing, art history) to receive regular free instruction and inspiration
    8. Schedule one hour weekly for art engagement—museum visits, online exploration, creating art, or watching art instruction videos—treating it as important health appointment
    9. Invite a friend to join your art exploration journey—companionship increases enjoyment, provides mutual encouragement, and ensures regular participation through accountability
    10. Start an art journal or sketchbook dated on the first page, committing to one entry weekly minimum—even simple doodles or observations count as building your artistic practice


    Disclaimer
    This article is provided for informational purposes only and does not constitute professional medical, mental health, or therapeutic advice. While research demonstrates cognitive and emotional benefits of art engagement, individual results vary significantly based on numerous factors. Art activities do not replace professional medical treatment for cognitive conditions, depression, or other health issues. Consult qualified healthcare providers regarding specific health concerns and before beginning new activities if you have physical limitations. Information about organizations, programs, and resources is current as of publication but may change without notice.
    Information current as of October 2, 2025. Program availability, costs, and accessibility features may vary by location and change over time. Verify all details with specific organizations before making plans or commitments.

    Get Weekly Senior Lifestyle and Wellness Tips

    Join thousands of seniors discovering enriching activities, health strategies, and practical advice for vibrant retirement living. Receive curated guides, resource lists, and inspiring success stories delivered to your inbox every Tuesday morning.

    Related Articles


    Published by Senior AI Money Editorial Team
    Updated October 2025
  • Top Tips for Seniors Traveling in Spain: Complete 2025 Guide

    Top Tips for Seniors Traveling in Spain: Complete 2025 Guide

    Spain captivates senior travelers with its perfect blend of world-class culture, Mediterranean climate, exceptional cuisine, and remarkably affordable living costs. From Barcelona’s architectural masterpieces to Seville’s flamenco traditions, from Madrid’s art museums to the Costa del Sol’s sunny beaches, Spain offers diverse experiences tailored to every interest and mobility level. With excellent healthcare ranked 7th globally by the WHO, widespread English proficiency in tourist areas, and senior-friendly infrastructure throughout major cities, Spain provides both adventure and comfort. This comprehensive guide delivers insider tips, practical strategies, and proven advice to help seniors over 60 navigate Spain confidently, safely, and memorably while maximizing enjoyment and minimizing common travel challenges.

    Why Spain is Ideal for Senior Travelers

    Spain consistently ranks among the world’s top destinations for retirees and senior travelers, and the reasons extend far beyond sunny weather and paella. The country’s healthcare system ranks 7th globally according to the World Health Organization, with modern hospitals, English-speaking doctors in major cities, and medical costs 40-60% lower than the United States. A specialist consultation costs €80-120 ($88-132) compared to $200-400 in the U.S., and prescription medications are often available at one-third of American prices.

    The climate offers year-round appeal with significant regional variation. The Mediterranean coast maintains mild winters with temperatures rarely dropping below 55°F (13°C), while summers stay comfortably warm at 75-85°F (24-29°C) thanks to sea breezes. This climate benefits seniors with arthritis, joint pain, or respiratory conditions who find cold weather challenging. The southern region of Andalusia enjoys over 300 days of sunshine annually, creating ideal conditions for outdoor exploration without extreme heat.

    Spain’s cost of living provides exceptional value for retirees on fixed incomes. A high-quality three-course meal with wine costs €12-20 ($13-22) per person at local restaurants, while museum admissions rarely exceed €12 ($13) and often offer 50% senior discounts for those over 65. Public transportation is efficient and affordable—a 10-ride metro ticket in Barcelona costs just €11.35 ($12.50), with additional senior discounts available for residents and EU citizens.

    The country’s compact geography and excellent transportation infrastructure allow seniors to experience diverse regions without exhausting travel. High-speed AVE trains connect Madrid to Barcelona in 2 hours 45 minutes, Madrid to Seville in 2 hours 30 minutes, and Madrid to Valencia in 1 hour 40 minutes—all with comfortable seating, spacious legroom, and onboard café service. This connectivity enables comfortable base-and-excursion travel strategies that minimize hotel changes and packing stress.

    Spanish culture demonstrates profound respect for older adults, with seniors receiving priority seating on public transportation, preferential treatment in queues, and genuine warmth from locals who appreciate older visitors’ interest in their culture. The leisurely Spanish lifestyle—late dining hours, afternoon siestas, and extended meal times—encourages the relaxed pace many seniors prefer while traveling.

    English proficiency has increased dramatically in recent years, particularly among younger Spaniards and hospitality workers in tourist areas. While learning basic Spanish phrases enhances your experience and shows cultural respect, you’ll rarely struggle to find English speakers in Barcelona, Madrid, Seville, Valencia, and coastal resort areas. Even smaller cities have English-speaking tourist information offices and hotel staff.

    Best Spanish Regions for Senior Travelers

    Spain’s regional diversity means selecting destinations that match your interests, mobility level, and travel style significantly impacts your experience. Each region offers distinct advantages for senior travelers seeking specific experiences.


    Barcelona and Catalonia: Art, Architecture, and Mediterranean Charm

    Barcelona combines world-class art museums, Gaudí’s architectural masterpieces, Mediterranean beaches, and excellent accessibility infrastructure. The city’s metro system features elevators at most stations, and the flat beachfront promenade extends for miles with benches every 100 meters. Park Güell, Sagrada Família, and Casa Batlló all offer elevator access or alternative routes for those with mobility limitations, though advance reservation is essential to avoid long waits that strain standing endurance.


    The Gothic Quarter’s narrow medieval streets challenge those with walking difficulties, but nearby areas like Eixample feature wide boulevards and flat terrain perfect for leisurely strolls. Barcelona’s extensive bus network supplements the metro with low-floor buses providing accessible alternatives to hilly neighborhoods. The city offers exceptional tapas culture where small plates allow sampling diverse dishes without overwhelming portions.


    Madrid: Museums, Parks, and Cultural Heart

    Spain’s capital provides world-renowned museums within walking distance—the Prado, Reina Sofía, and Thyssen-Bornemisza form the “Golden Triangle of Art” along Paseo del Prado. All three museums offer wheelchairs, elevators, and extensive seating throughout galleries. Senior discounts of 50% apply to those over 65 at most museums, with some offering free admission for seniors on specific days.


    Retiro Park provides 350 acres of peaceful gardens, shaded pathways, and rowboat rentals on the central lake—all accessible via paved paths suitable for wheelchairs and walkers. Madrid’s metro is one of Europe’s most extensive, with elevator access at newer stations and clear signage in Spanish and English. The city’s flat central districts facilitate comfortable walking, though summer temperatures can exceed 95°F (35°C), making spring and fall ideal visiting seasons.


    Andalusia: Historic Cities and Authentic Spanish Culture

    Southern Spain’s Andalusia region encompasses Seville, Granada, Córdoba, and the Costa del Sol, offering the most quintessentially “Spanish” experiences—flamenco, bullfighting heritage, Moorish architecture, and whitewashed villages. Seville’s flat terrain and compact historic center enable exploration on foot or via charming horse-drawn carriages for those preferring to sit. The Real Alcázar palace features ramps and accessible routes through most gardens and historic rooms.


    Granada’s Alhambra presents more significant accessibility challenges with steep hills and cobblestones, but shuttle buses transport visitors from parking areas to the main entrance, and wheelchair-accessible routes cover major palace sections. Booking morning tickets in spring or fall avoids afternoon heat and crowds. Córdoba’s Mezquita (Mosque-Cathedral) provides level access and stunning architecture without the physical demands of Granada’s hilltop fortress.


    The Costa del Sol offers purpose-built resort towns like Marbella, Málaga, and Nerja with flat promenades, accessible beaches featuring wooden walkways to the water, and high concentrations of English speakers due to large British expatriate communities. Healthcare facilities in coastal areas cater specifically to international residents and visitors with English-speaking staff and modern equipment.


    Valencia: Beaches, Science, and Paella

    Valencia combines Mediterranean beaches, cutting-edge architecture in the City of Arts and Sciences, and the birthplace of authentic paella. The city’s Turia Gardens—a 9-kilometer park built in a former riverbed—provides flat, shaded pathways perfect for morning walks or bike rides (rental bikes with baskets available). Valencia’s compact size allows exploration of major attractions via short metro rides or pleasant walks.


    The city’s beaches feature accessible changing facilities, beach wheelchairs available free from lifeguard stations, and numerous beachfront restaurants with level access. Valencia’s Central Market offers a sensory feast of local produce, seafood, and Spanish specialties in a beautiful modernist building with level access throughout. The city maintains moderate temperatures year-round, rarely experiencing the extreme heat of inland cities.

                            Visual Art by Artani Paris

    Region/City Best For Accessibility Avg Daily Cost English Level
    Barcelona Art, Architecture, Beaches High (4.5/5) $90-140 Very High
    Madrid Museums, Parks, Culture Very High (5/5) $85-130 High
    Seville Flamenco, History, Food High (4/5) $75-115 Medium
    Granada Alhambra, Moorish Culture Medium (3/5) $70-110 Medium
    Valencia Beaches, Modern Architecture High (4/5) $80-120 High
    Costa del Sol Beach Relaxation, Golf Very High (5/5) $85-135 Very High
    Regional comparison for senior travelers in Spain (2025 estimates)

    Best Times to Visit Spain for Seniors

    Timing your Spanish visit significantly impacts comfort, costs, and crowd levels. Understanding seasonal patterns helps seniors maximize enjoyment while minimizing heat, crowds, and expenses.

    Spring (April-June): Optimal Conditions
    Spring offers ideal weather throughout Spain with temperatures ranging from 60-75°F (16-24°C) in most regions. April brings Easter celebrations with spectacular processions in Seville, Málaga, and throughout Andalusia—though hotels book months ahead and prices increase 30-50% during Holy Week. May and early June provide perfect conditions with blooming flowers, comfortable walking weather, and moderate tourist numbers.

    Coastal areas become pleasant for beach visits by May, with water temperatures reaching 65-70°F (18-21°C)—refreshing but comfortable for swimming. Inland cities like Madrid and Seville enjoy warm days and cool evenings perfect for outdoor dining. Spring produce fills markets with strawberries, cherries, artichokes, and fresh peas featured in seasonal dishes.

    Book accommodations 6-8 weeks ahead for spring travel to secure good rates and preferred locations. Expect daily costs to run 15-25% higher than winter but 20-30% lower than summer peak season.

    Fall (September-October): Second Best Season
    September through mid-October rivals spring for ideal conditions. The Mediterranean remains warm (70-75°F/21-24°C water temperature) while crowds diminish significantly after school resumes in early September. Cultural events increase—Barcelona’s La Mercè festival in late September features free concerts, street performances, and fireworks, while wine harvest festivals occur throughout La Rioja and Catalonia.

    October brings comfortable temperatures (65-75°F/18-24°C) ideal for city exploration and museum visits without summer’s heat. Fall produce includes figs, pomegranates, wild mushrooms, and chestnuts featured in seasonal menus. Hotel rates drop 25-35% compared to summer peak, offering excellent value.

    Book 4-6 weeks ahead for fall travel, as September remains moderately popular with European travelers. Consider late October through early November for the lowest rates and smallest crowds, though some coastal businesses close for the season.

    Winter (November-February): Budget-Friendly Mild Weather
    Winter in Spain varies dramatically by region. Southern coastal areas maintain mild temperatures (55-65°F/13-18°C) with occasional rain, while inland cities experience cooler weather (40-55°F/4-13°C) and rare snow. The Canary Islands off Africa’s coast offer spring-like conditions (65-75°F/18-24°C) year-round, making them popular winter escape destinations.

    Winter provides the lowest hotel rates—50-60% below summer prices in many areas—and minimal crowds at major attractions. Museums, restaurants, and cultural sites maintain full operations in cities, though some coastal beach towns close many businesses November through March. Christmas markets and Three Kings Day celebrations (January 6) add festive cultural experiences.

    Pack layers for winter travel, as Spanish buildings often lack central heating. Coastal areas rarely require heavy winter coats, but inland cities can feel chilly, particularly inside historic stone buildings. Winter offers excellent value for budget-conscious seniors willing to accept cooler temperatures and occasional rain.

    Summer (July-August): Hot and Crowded
    Summer brings intense heat to most of Spain, with inland cities regularly exceeding 95°F (35°C) and sometimes reaching 104°F (40°C). Coastal areas remain more moderate (80-90°F/27-32°C) with sea breezes, but crowds peak as Europeans take August vacations. Beaches become packed, hotel rates reach annual highs, and many locals flee cities for coastal areas.

    If you must visit in summer, focus on coastal areas, northern regions like Galicia and the Basque Country (which maintain moderate temperatures), or mountain areas. Adjust your schedule to Spanish summer patterns—sightsee early morning (8-11 AM), rest during afternoon heat (2-6 PM), then explore again in the evening when temperatures drop and streets come alive.

    Book summer accommodations 3-4 months ahead, especially for August when availability tightens significantly. Expect daily costs 40-60% higher than winter and 20-30% higher than spring/fall. Summer suits seniors who handle heat well and prefer vibrant, energetic atmospheres.

    Getting Around Spain: Transportation Tips

    Spain’s extensive, modern transportation network makes exploring the country comfortable and straightforward for seniors. Understanding your options helps you choose the most suitable methods for your needs and budget.

    High-Speed Trains (AVE and Avant): Premium Comfort
    Spain’s AVE high-speed rail network is among Europe’s best, connecting major cities at speeds up to 310 km/h (193 mph) with exceptional comfort. Trains feature spacious reclining seats, large windows, onboard café cars, power outlets, and accessible bathrooms with wheelchair access. Seats face forward in pairs or groups of four, allowing couples or small groups to sit together comfortably.

    Seniors over 60 qualify for Tarjeta Dorada (Gold Card) offering 25-40% discounts on most trains, though the card costs €6 annually and requires Spanish residency or extended stays. Non-residents can access advance-purchase discounts (Promo and Promo+) offering 60-70% savings when booking 15+ days ahead through the Renfe website or app. Book popular routes (Madrid-Barcelona, Madrid-Seville) well in advance for best prices and seat selection.

    Train stations in major cities offer elevators, escalators, and porter services for luggage assistance. Madrid’s Atocha and Barcelona’s Sants stations feature extensive amenities including restaurants, shops, and comfortable waiting areas with seating. Arrive 30 minutes before departure for stress-free boarding—Spanish trains depart precisely on schedule.

    Metro Systems: Efficient City Navigation
    Madrid, Barcelona, Valencia, Seville, and Bilbao operate modern metro systems with extensive coverage and affordable fares. Barcelona’s metro features elevator access at most newer stations, though some older stations have only escalators or stairs. Purchase a T-10 multi-ride ticket (€11.35 for 10 rides) for significant savings over single tickets (€2.40 each).

    Madrid’s metro is one of the world’s largest and most accessible, with elevator access at the majority of stations and clear signage in Spanish and English. The system connects the airport to downtown in 20 minutes for just €5. Seniors over 65 can apply for reduced-fare cards, though processing requires Spanish residency documentation.

    Metro systems operate 6 AM to midnight on weekdays, with extended hours (until 2 AM) on Fridays, Saturdays, and holidays. Avoid rush hours (8-9:30 AM and 6-8 PM) when trains become crowded and finding seats proves difficult. Mid-morning and early afternoon offer the most comfortable metro travel experiences.

    Buses: Flexible and Accessible
    City buses supplement metro systems with extensive coverage and low-floor buses facilitating easy boarding. Most buses feature dedicated senior seating near the front and drivers who wait for passengers to sit before departing. Bus routes often provide more direct service to specific attractions than metro transfers.

    Intercity buses operated by companies like ALSA connect cities not served by trains, often at lower prices than rail travel. Modern intercity buses feature reclining seats, air conditioning, onboard bathrooms, and luggage storage. The 5-hour Barcelona to Valencia bus costs €20-30 compared to €40-60 by train, though trains offer superior comfort and shorter travel times (3 hours).

    Taxis and Ride-Sharing: Door-to-Door Convenience
    Spanish taxis are affordable and ubiquitous in cities. Rates are regulated with meters starting at €2.50-3.00 and increasing approximately €1.20 per kilometer. A typical 15-minute ride costs €10-15. Official taxis are white with colored stripes (green in Barcelona, red in Madrid), and drivers appreciate 10% tips for good service.

    Uber and Cabify operate in major Spanish cities, offering app-based convenience and slightly lower prices than traditional taxis. The apps eliminate language barriers for communicating destinations and show estimated fares before booking. Both services allow saving favorite locations like your hotel for easy return navigation after day trips.

    For longer journeys or day trips, consider hiring private drivers through hotels or tour companies. Full-day (8-hour) private drivers cost €180-250 including fuel, offering flexibility to customize itineraries, take rest breaks as needed, and receive local recommendations from knowledgeable drivers who often become informal guides.

    Walking: The Spanish Way
    Spanish cities are designed for pedestrians, with wide sidewalks, frequent pedestrian zones, and benches for resting. However, be prepared for later dining hours (lunch 2-4 PM, dinner 9-11 PM) which may require adjusting your walking schedule. Comfortable, well-broken-in walking shoes with good arch support are essential—plan for 3-5 miles of daily walking when exploring cities actively.

    Many cities offer free walking tours (tip-based) that provide excellent orientation while allowing you to gauge your walking capacity. Tours typically last 2-3 hours and cover 2-3 miles at a leisurely pace with frequent stops for explanations. This helps you identify areas worth returning to independently.

    Transportation Cost Range Best For Comfort Level Senior Discount
    AVE High-Speed Train €40-120 City-to-city travel Excellent 25-40% (Gold Card)
    Metro (10-ride ticket) €11-15 City exploration Good Varies by city
    City Bus €1.50-2.50 Local routes Good 50% (some cities)
    Taxi (15 min) €10-15 Point-to-point Excellent None
    Uber/Cabify €8-13 City travel Excellent None
    Private Driver (8hr) €180-250 Day trips, tours Excellent Negotiable
    Transportation cost comparison in Spain (2025 estimates)

    Spanish Cuisine and Dining for Seniors

    Spanish cuisine offers heart-healthy Mediterranean diet staples—olive oil, fresh vegetables, seafood, legumes, and moderate wine consumption—that align well with senior nutritional needs. Understanding Spanish dining culture and meal times helps you enjoy authentic experiences while accommodating dietary requirements.

    Meal Times and Portions
    Spanish meal times differ significantly from American schedules. Breakfast (desayuno) is typically light—coffee with a pastry or toast—served 8-10 AM. Lunch (comida) is the main meal, served 2-4 PM with multiple courses and often lasting 1-2 hours. Dinner (cena) occurs late at 9-11 PM and tends to be lighter than lunch, though tourist areas accommodate earlier dining from 7 PM onward.

    Adjusting to Spanish schedules prevents hunger between meals and allows you to experience authentic local culture. Many seniors adopt a strategy of substantial late breakfast (11 AM), traditional Spanish lunch (2:30 PM), light afternoon snack (merienda around 6 PM), then late light dinner or simply evening tapas. This pattern aligns with the Mediterranean lifestyle linked to longevity and health benefits.

    Portions at traditional restaurants are generous. Don’t hesitate to share main courses, request half portions (media ración), or ask for to-go containers—increasingly common as food waste awareness grows. The Menu del Día (menu of the day) offered at lunch typically includes three courses, bread, and wine or soft drink for €12-18, providing excellent value and authentic local cuisine.

    Tapas Culture: Perfect for Seniors
    Tapas—small plates meant for sharing—allow sampling diverse dishes without overwhelming portions. Traditional tapas bars serve small portions free with drinks or charge €3-8 per tapa. Order 3-4 tapas per person to create a satisfying meal while experiencing variety. Popular senior-friendly tapas include patatas bravas (fried potatoes with spicy sauce), tortilla española (Spanish omelet), gambas al ajillo (garlic shrimp), pimientos de padrón (fried green peppers), and croquetas (bechamel-filled fritters).

    Tapas dining encourages leisurely socializing over several hours, with couples or groups ordering rounds of different tapas throughout the evening. This relaxed pace suits seniors who prefer unhurried meals and social dining experiences. Standing at tapas bars is common, but most establishments have seating areas—arrive early (7:30-8 PM) to secure tables before crowds arrive.

    Regional Specialties Worth Trying
    Each Spanish region offers distinctive dishes reflecting local ingredients and traditions. In Catalonia, try escalivada (roasted vegetables), suquet de peix (fish stew), or crema catalana (custard dessert similar to crème brûlée). Madrid is famous for cocido madrileño (chickpea stew), callos (tripe), and bocadillo de calamares (fried squid sandwich)—though calamari may be chewy for those with dental issues.

    Andalusia specializes in gazpacho (cold tomato soup) perfect for hot days, pescaíto frito (fried fish), and jamón ibérico (cured ham) from acorn-fed pigs. Valencia’s signature dish, paella, should be eaten at lunch when freshly prepared—never order paella at dinner as it’s typically reheated. Authentic paella valenciana contains rabbit, chicken, and green beans, while paella de marisco features seafood.

    The Basque Country offers pintxos (Basque tapas) featuring creative combinations on small bread slices, often held together with toothpicks. San Sebastián’s old town hosts world-renowned pintxos bars where you can sample Michelin-quality small bites for €3-5 each. The Basque tradition of txikiteo—going from bar to bar sampling pintxos—creates a delightful evening of culinary exploration.

    Dietary Accommodations
    Spanish restaurants increasingly accommodate dietary restrictions, particularly in tourist areas and larger cities. Vegetarian options have expanded dramatically, with dedicated vegetarian restaurants in Barcelona, Madrid, and Seville. Traditional cuisine is less vegetarian-friendly, but most restaurants offer ensaladas (salads), verduras a la plancha (grilled vegetables), and gazpacho as meat-free options.

    Gluten-free awareness (sin gluten) is growing, with certified gluten-free restaurants and menu items more common each year. The Spanish Celiac Association (FACE) provides lists of certified restaurants and products. Many establishments offer gluten-free bread and pasta alternatives, particularly in tourist areas.

    For those with food allergies, carry a card listing restrictions in Spanish—hotels provide these or print from translation websites. Use phrases like “Soy alérgico/a a…” (I’m allergic to…) or “No puedo comer…” (I cannot eat…). Waitstaff take allergies seriously and consult chefs about ingredient safety. Common allergens like shellfish, nuts, and dairy are well-understood, even in smaller establishments.

    Low-sodium options can be challenging as Spanish cuisine uses salt liberally. Request dishes “con poca sal” (with little salt) when ordering, and avoid cured meats, anchovies, and dishes “al horno” (baked) which often contain significant salt. Fresh grilled fish, salads with oil and vinegar, and steamed vegetables provide lower-sodium alternatives.

    Vibrant cartoon illustration of seniors enjoying Spanish tapas, paella, and wine in traditional restaurant setting with warm Mediterranean colors


                    Visual Art by Artani Paris

    Health and Safety Essentials

    Spain ranks among Europe’s safest countries with excellent healthcare and low crime rates. Understanding the healthcare system and taking basic precautions ensures a worry-free Spanish adventure.

    Healthcare System and Medical Care
    Spain’s healthcare system ranks 7th globally according to the WHO, with universal coverage for residents and reciprocal agreements with many countries. U.S. citizens receive emergency care regardless of insurance, though non-emergency treatment requires payment (often reimbursed by travel insurance later). Medical costs run 40-60% below U.S. prices—emergency room visits at private hospitals cost €100-150, specialist consultations €80-120, and prescription medications often cost one-third of American prices.

    Major cities have English-speaking doctors and modern hospitals with the latest equipment. Barcelona’s Hospital Clínic, Madrid’s Hospital Universitario La Paz, and Málaga’s Hospital Costa del Sol offer dedicated international patient services with English-speaking staff, insurance coordination, and medical record translation. Private hospitals like Quirónsalud and HM Hospitales operate throughout Spain with excellent reputations and shorter wait times than public hospitals.

    The European emergency number 112 works throughout Spain for ambulance, police, or fire services. Operators speak English and dispatch appropriate services quickly. Urban response times average under 10 minutes for emergency calls. Many tourist areas have English-speaking tourist police (Policía Nacional) specifically trained to assist visitors.

    Pharmacies: Accessible Professional Care
    Pharmacies (farmacias) display green crosses and operate extensive hours, with at least one 24-hour pharmacy (farmacia de guardia) in each neighborhood. Pharmacists are highly trained medical professionals who recommend over-the-counter treatments for minor ailments and can often provide prescription medications with just your U.S. prescription bottle or doctor’s letter.

    Common medications available without prescription include ibuprofen (Espidifen), acetaminophen (Efferalgan), antacids (Almax), and allergy tablets (Loratadina). Spanish pharmacies stock most international medications under different brand names—knowing generic names facilitates identification. Pharmacists speak varying levels of English, with better English proficiency in tourist areas and major cities.

    Travel Insurance: Essential Protection
    Comprehensive travel insurance is crucial for seniors visiting Spain. Medicare provides no international coverage except in extremely limited border circumstances. Quality policies covering medical emergencies, evacuation, trip cancellation, and lost luggage cost $180-350 for two weeks depending on age, coverage limits, and pre-existing conditions.

    Look for policies including medical evacuation coverage (minimum $100,000), pre-existing condition waivers if purchased within 14-21 days of initial trip deposit, and 24/7 assistance hotlines with English-speaking medical coordinators. Reputable insurers specializing in senior travel include Allianz Global Assistance, Travel Guard, Seven Corners, and IMG Global.

    Safety and Crime Prevention
    Spain is generally very safe, though petty theft targets tourists in crowded areas. Barcelona, Madrid, and Seville experience pickpocketing on metros, at major attractions, and in crowded markets. Use anti-theft bags with slash-resistant straps and RFID-blocking pockets, keep wallets in front pockets, avoid displaying expensive jewelry or watches, and never leave bags unattended.

    Common scams include distraction thefts (someone spills on you while an accomplice steals your bag), fake petition signers who surround and confuse victims while stealing, and unlicensed taxis at airports charging inflated rates. Use only official taxis or ride-sharing apps, ignore street vendors and petition holders, and stay aware in crowded tourist areas.

    Violent crime against tourists is extremely rare. Spanish people are generally helpful and kind, particularly toward older visitors. Police maintain visible presence in tourist areas and respond quickly to reports. Most seniors feel safer walking Spanish streets at night than in major U.S. cities.

    Sun Protection and Hydration
    Spain’s Mediterranean and southern location means intense sun exposure year-round. Wear SPF 50+ sunscreen, wide-brimmed hats, and UV-protective sunglasses. Reapply sunscreen every 2 hours, especially when walking extensively or near water where reflection intensifies UV rays. The Spanish sun is significantly stronger than northern U.S. states—even cloudy days require sun protection.

    Dehydration occurs quickly, particularly during summer or when walking several miles daily. Carry refillable water bottles and drink 8-10 glasses daily. Tap water is safe throughout Spain, though some prefer bottled water for taste. Restaurants provide free tap water when requested (“agua del grifo, por favor”), though many automatically serve (and charge for) bottled water unless you specify otherwise.

    Practical Tips for Senior Travelers

    Money and Payments
    Spain uses the euro (€), with current exchange rates around €1 = $1.10 (rates fluctuate). Credit cards are widely accepted, though small bars, markets, and rural establishments prefer cash. Notify your bank and credit cards of travel dates to prevent fraud holds. Cards with no foreign transaction fees (Capital One, Chase Sapphire, Charles Schwab debit) save 2-3% on all purchases.

    ATMs (cajeros automáticos) are ubiquitous and offer better exchange rates than currency exchanges. Daily withdrawal limits typically range €300-500. Withdraw larger amounts less frequently to minimize ATM fees ($3-5 per transaction from U.S. banks, plus potential Spanish bank fees of €2-5). Always decline “dynamic currency conversion” when ATMs offer to charge in dollars—this convenience costs 5-8% in inflated exchange rates.

    Carry €100-200 cash for immediate arrival expenses, small purchases, and establishments that don’t accept cards. Keep cash divided between wallet, hotel safe, and money belt for security. Spain is largely cashless in cities, but rural areas and traditional establishments still prefer cash.

    Communication and Connectivity
    Most U.S. carriers offer international plans—AT&T’s International Day Pass ($10/day) and T-Mobile’s free international data (slower speeds) work in Spain. Alternatively, purchase Spanish SIM cards (€15-30 for 15-30 days with data) at phone shops or airports for better rates on extended stays. Movistar, Vodafone, and Orange operate extensive networks with good coverage.

    WiFi is widely available at hotels, restaurants, cafés, and many public spaces. Most accommodations provide free WiFi, though speeds vary—luxury hotels typically offer faster, more reliable connections. Use WhatsApp (free with WiFi or data) for international calls and texts instead of expensive roaming charges.

    Download essential apps before departure: Google Translate (with Spanish downloaded for offline use), Google Maps (download city maps for offline navigation), Renfe (train bookings), Moovit (public transportation planning), and TripAdvisor (restaurant reviews and recommendations). These apps function offline once downloaded, useful when WiFi is unavailable.

    Language Basics
    Learning basic Spanish phrases enhances your experience and shows cultural respect. Essential phrases include: “Buenos días” (good morning), “Buenas tardes” (good afternoon/evening), “Por favor” (please), “Gracias” (thank you), “Perdón” (excuse me/sorry), “¿Habla inglés?” (Do you speak English?), “No entiendo” (I don’t understand), “¿Cuánto cuesta?” (How much does it cost?), and “La cuenta, por favor” (The check, please).

    Spanish pronunciation is straightforward—words are pronounced as written. Practice these phrases before departure using YouTube videos or apps like Duolingo. Even attempting Spanish with terrible pronunciation earns smiles and patient assistance from locals who appreciate the effort.

    Tipping Customs
    Tipping in Spain differs from American customs. Service charges are included in restaurant bills, making tips optional rather than expected. Spaniards typically round up bills or leave 5-10% for exceptional service. At bars and cafés, leaving small change (€0.50-1) is common. Taxi drivers appreciate 10% for good service. Hotel porters expect €1-2 per bag, and housekeeping €2-3 daily.

    Don’t feel obligated to tip American percentages—doing so can actually seem ostentatious. Follow local customs of modest appreciation for good service rather than obligatory large tips.

    Cultural Considerations
    Spanish culture values personal relationships and leisurely living. Expect slower service than American standards—this isn’t rudeness but cultural difference. Meals are social events meant for conversation and enjoyment, not quick refueling. Don’t rush through meals or request checks immediately after finishing—waiters won’t bring the bill until you request it (“La cuenta, por favor”).

    Siesta culture means many small shops close 2-5 PM, though tourist areas and large stores maintain continuous hours. Plan shopping and errands for morning or late afternoon. Dinner reservations at popular restaurants should specify arrival time—showing up 30 minutes late without notice is considered rude despite Spain’s relaxed reputation.

    Dress tends toward smart casual—Spaniards dress more formally than Americans for dining out and cultural events. Men can wear collared shirts and slacks; women can wear dresses, skirts, or nice pants. Shorts and flip-flops are acceptable at beaches and very casual settings but inappropriate for upscale restaurants, churches, and museums.

    Emergency Service Contact Number Notes
    General Emergency 112 Ambulance, Police, Fire (English available)
    Tourist Police Madrid +34 91 548 85 37 English-speaking officers, 24/7
    Tourist Police Barcelona +34 93 256 24 30 English support, daily 8 AM-midnight
    U.S. Embassy Madrid +34 91 587 22 00 American Citizen Services, weekdays 8:30-5:30
    U.S. Consulate Barcelona +34 93 280 22 27 Weekdays 9 AM-1 PM
    Poison Control +34 91 562 04 20 24/7 medical toxicology advice
    Essential emergency contacts for seniors traveling in Spain

    Real Success Stories

    Case Study 1: Boca Raton, Florida

    Patricia and Donald M. (both 71 years old)

    This retired couple had dreamed of exploring Spain for decades but postponed the trip due to Donald’s heart condition requiring careful monitoring and Patricia’s severe shellfish allergy. After Donald’s cardiologist cleared him for travel with specific precautions, they spent four weeks touring Barcelona, Valencia, Seville, and Granada in May 2024.

    They researched English-speaking cardiologists in each city, carried copies of Donald’s recent EKG and medication list in Spanish, and wore medical alert bracelets. Patricia created allergy cards in Spanish listing her shellfish allergy and always confirmed ingredients with waitstaff before ordering. They purchased comprehensive travel insurance including medical evacuation coverage ($285 for four weeks) and pre-trip telehealth consultations.

    The couple adopted Spanish meal times gradually, starting with 8 PM dinners and working toward 9:30 PM by their second week. They discovered tapas culture allowed Patricia to safely sample dishes while avoiding shellfish, and the Mediterranean diet’s emphasis on vegetables, olive oil, and fresh fish improved Donald’s cholesterol numbers during the trip.

    Results:

    • Donald’s cardiologist noted improved cardiovascular markers at his post-trip check-up, attributing changes to increased walking (averaging 4 miles daily) and Mediterranean diet
    • Patricia experienced zero allergic reactions despite dining out daily, thanks to careful communication and restaurant staff accommodation
    • The couple walked over 100 miles during their month in Spain, significantly exceeding their typical exercise at home
    • Total trip cost of $8,200 for two people including mid-range hotels, flights ($1,400), train passes ($400), and daily expenses averaging $85 per person
    • They’re planning a return trip to northern Spain (Basque Country and Galicia) for 2026

    “Spain changed our perspective on retirement travel. We’d limited ourselves to cruise ships and all-inclusive resorts out of medical concerns, but Spain proved we could handle independent exploration with proper planning. The kindness of restaurant staff who took time to verify ingredients for Patricia, and the excellent healthcare system that gave us confidence, made all the difference. We feel 10 years younger!” – Patricia M.

    Case Study 2: Chicago, Illinois

    Raymond T. (68 years old)

    A widower traveling solo for the first time after losing his wife two years prior, Raymond chose Spain based on recommendations from his senior hiking club. Anxious about language barriers, solo dining, and navigating unfamiliar transit systems, he discovered Spain’s welcoming culture quickly dissolved his concerns.

    Raymond stayed in small family-run pensiones and hostales rather than chain hotels, forming genuine connections with owners who offered local recommendations, taught him Spanish phrases, and invited him to family meals. He used public transportation exclusively, purchasing multi-day metro passes in Barcelona and Madrid, and found Spanish transit remarkably intuitive despite initial uncertainty.

    His solo status prompted conversations with fellow travelers and locals that enriched his experience beyond typical tourist interactions. He joined free walking tours where he met other solo seniors, attended flamenco performances in small Seville tablaos recommended by his hostal owner, and discovered neighborhood tapas bars where he became a regular during his week-long stays in each city.

    Results:

    • Reduced his daily travel costs to $70 through budget accommodations ($35-45/night), menu del día lunches ($12-15), and free walking tours
    • Made lasting friendships with three fellow solo travelers (two Americans, one Canadian) who now meet annually for international trips
    • Overcame his fear of solo travel and social anxiety following his wife’s death, subsequently visiting Italy, Greece, and Morocco independently
    • Improved his Spanish to conversational level through daily practice and a week-long language immersion course in Granada ($280)
    • Lost 15 pounds over six weeks through daily walking and Mediterranean diet, maintaining the weight loss after returning home

    “Spain gave me my life back. After Margaret died, I thought I’d just exist until my time came. My adult children encouraged me to travel, but I was terrified of being alone in a foreign country. Spain proved me wrong about everything. The pensión owner in Seville treated me like family, the other travelers became genuine friends, and discovering I could navigate Spain alone gave me confidence I’d lost. I’m now learning Portuguese for next year’s trip!” – Raymond T.

    Case Study 3: Seattle, Washington

    Helen and Joyce K. (sisters, ages 74 and 69)

    These sisters planned a “bucket list” trip to Spain despite Helen’s use of a walker following hip replacement surgery and Joyce’s Type 2 diabetes requiring careful meal timing and carbohydrate monitoring. Concerned about accessibility and medical management, they spent three months researching and preparing for their three-week October journey.

    They carefully selected accessible accommodations through Booking.com’s accessibility filters, pre-booked private airport transfers to avoid navigating public transportation with luggage, and researched accessible routes at major attractions. Joyce worked with her endocrinologist to adjust her medication schedule for Spanish meal times and brought a letter explaining her need to carry insulin and glucose monitoring supplies.

    The sisters focused on cities rather than rural areas, using Madrid as a base for day trips via comfortable AVE trains to Toledo, Segovia, and Ávila. They hired private guides for walking tours who adjusted pace and routes to Helen’s mobility needs, allowing both sisters to fully experience each destination without physical strain or falling behind group tours.

    Results:

    • Helen successfully navigated Spain with her walker, discovering Spanish cities far more accessible than anticipated—wider sidewalks, frequent benches, and helpful locals
    • Joyce maintained excellent glucose control throughout the trip (average readings 110-130 mg/dL) through menu del día lunches providing consistent timing and Spanish hospitality staff accommodating her needs
    • Private guides ($120-150 for half-day tours) provided personalized experiences far superior to group tours they’d taken on previous trips
    • Total trip cost of $11,500 for two people including premium accommodations with elevators ($120-150/night), private guides, comfortable transportation, and quality dining
    • The experience inspired them to plan similar trips to Portugal and southern France for coming years

    “We almost canceled three times, worried about my walker and Joyce’s diabetes complicating everything. Spain exceeded every expectation. Every hotel had elevators or ground-floor rooms, restaurants eagerly accommodated Joyce’s meal timing needs, and strangers regularly helped with doors or offered seats on metros. Our private guides became friends who shared their Spain with genuine enthusiasm. This trip proved our traveling days are far from over!” – Helen K.

    Frequently Asked Questions

    Is Spain safe for seniors traveling alone?

    Yes, Spain is very safe for solo senior travelers. Spain ranks 31st globally on the 2024 Global Peace Index, comparable to or safer than most U.S. states. Violent crime against tourists is extremely rare. Petty theft like pickpocketing occurs in crowded tourist areas (Barcelona’s Las Ramblas, Madrid’s Sol, Seville’s cathedral area), but simple precautions—securing valuables, using anti-theft bags, staying aware in crowds—ensure safe travel. Many solo female seniors specifically praise Spain’s respectful culture and helpful locals. Police maintain visible presence in tourist areas and respond quickly to concerns. Most seniors feel safer walking Spanish streets at night than in major American cities.

    Do I need travel insurance for Spain?

    Yes, comprehensive travel insurance is essential for seniors visiting Spain. Medicare provides no coverage outside the United States except in extremely limited border situations. While Spain’s public healthcare provides emergency care regardless of insurance, non-emergency treatment requires payment—though costs are 40-60% below U.S. prices. Quality policies covering medical emergencies, medical evacuation (minimum $100,000), trip cancellation, and lost luggage cost $180-350 for two weeks depending on your age and pre-existing conditions. Purchase insurance within 14-21 days of initial trip deposit to access pre-existing condition waivers. Reputable providers specializing in senior travel include Allianz Global Assistance, Travel Guard, and Seven Corners.

    How much English is spoken in Spain?

    English proficiency varies significantly by location and generation. In major tourist cities (Barcelona, Madrid, Seville, Valencia) and coastal resort areas, you’ll readily find English speakers, particularly among hospitality workers, younger Spaniards, and shop staff. Smaller cities and rural areas have less English proficiency, though tourist offices, major hotels, and restaurants in tourist zones typically have English-speaking staff. Learning basic Spanish phrases (“por favor,” “gracias,” “¿habla inglés?”) shows respect and is greatly appreciated, often prompting extra assistance. Translation apps bridge remaining gaps effectively. Overall, English proficiency has improved dramatically in recent years, making Spain quite manageable for non-Spanish speakers.

    When is the best time for seniors to visit Spain?

    Spring (April-June) and fall (September-October) offer optimal conditions for senior travelers—comfortable temperatures (60-75°F/16-24°C), fewer crowds than summer, and accommodation prices 20-40% below July-August peak. April brings Easter celebrations and spring blooms, though hotel rates increase 30-50% during Holy Week. May and early June provide ideal weather without peak pricing. September through mid-October features warm Mediterranean waters (70-75°F), wine harvest festivals, and significantly reduced crowds after school resumes. Winter (November-March) offers rock-bottom prices (50-60% below summer) and mild coastal weather, though inland cities can be chilly. Summer (July-August) brings intense heat (often exceeding 95°F/35°C inland), highest prices, and largest crowds.

    Can I use my Medicare in Spain?

    No, Medicare provides no coverage in Spain or anywhere outside the United States except in very limited circumstances involving Canadian and Mexican borders. You must purchase private travel medical insurance or pay out-of-pocket for medical care and seek reimbursement from travel insurance later. The good news is Spanish healthcare costs significantly less than U.S. care—emergency room visits at private hospitals cost €100-150 ($110-165), specialist consultations €80-120 ($88-132), and prescription medications often cost one-third of U.S. prices. Emergency care is provided regardless of ability to pay, though you’ll receive bills afterward. Keep all medical receipts and documentation for insurance reimbursement claims upon returning home.

    How accessible is Spain for seniors with mobility issues?

    Accessibility varies considerably by location and era of construction. Major cities like Madrid and Barcelona have modernized significantly with elevators at most newer metro stations, accessible buses with low-floor boarding, and wheelchair-friendly major attractions. The Prado, Reina Sofía, and Sagrada Família all offer elevator access and wheelchair rentals. Coastal resort areas (Costa del Sol, Costa Blanca) feature purpose-built accessibility with beach wheelchairs and flat promenades. However, historic neighborhoods feature cobblestone streets (often uneven), steep hills, narrow sidewalks, and buildings lacking elevators. Research specific accommodations and attractions beforehand using Accessible Spain resources (turismo-accesible.org) and Book directly with hotels to confirm accessibility features rather than relying solely on website descriptions.

    What should I do if I lose my medication in Spain?

    Visit any pharmacy (farmacia) displaying a green cross with your prescription bottle, a photo of the prescription label, or your doctor’s medication letter. Spanish pharmacists are highly trained medical professionals who can often provide equivalent medications using generic names—why carrying a list of generic drug names (not just brand names) is crucial. For controlled substances like opioids or benzodiazepines, you may need a local doctor’s prescription. Visit a health center (centro de salud) or private clinic where English-speaking doctors can evaluate your needs (consultation costs €80-120). Bring copies of all prescriptions from home and a doctor’s letter listing medications in generic names. Most common medications are readily available and cost significantly less than in the U.S.

    Are Spanish restaurants accommodating for dietary restrictions?

    Yes, increasingly so, especially in larger cities and tourist areas. Vegetarian and vegan options have expanded dramatically with dedicated restaurants in Barcelona, Madrid, Valencia, and Seville. Traditional Spanish cuisine is less vegetarian-friendly (emphasizing seafood, ham, and meat), but most restaurants offer salads, grilled vegetables, gazpacho, and tortilla española as meat-free options. Gluten-free awareness (sin gluten) is growing with certified gluten-free restaurants listed by the Spanish Celiac Association (FACE). Many establishments offer gluten-free bread and pasta. For food allergies, carry a card listing restrictions in Spanish and use phrases like “Soy alérgico/a a…” (I’m allergic to…). Waitstaff take allergies seriously and consult chefs about ingredient safety. Low-sodium requests can be challenging as Spanish cuisine uses salt liberally—request dishes “con poca sal” and avoid cured meats and anchovies.

    How much should I budget daily for comfortable travel in Spain?

    Budget-conscious seniors can travel comfortably on $70-90 daily using public transportation ($8-12), staying in clean guesthouses or budget hotels ($40-55), eating menu del día lunches ($12-18), and simple dinners ($15-25). Mid-range comfort requires $110-150 daily for three-star hotels ($75-95), occasional taxis ($15-20), restaurant meals with wine ($35-50), and attraction admissions ($15-25). Luxury travelers seeking four-star accommodations, private guides, fine dining, and premium experiences should budget $220-350+ daily. These estimates exclude international flights but include accommodation, meals, local transportation, attractions, and incidentals. Spain offers 25-35% better value than France or Italy for equivalent experiences, making it excellent value for European travel.

    Do I need a visa to visit Spain?

    U.S. citizens do not need a visa for tourist visits up to 90 days within any 180-day period under Schengen Agreement rules covering 27 European countries. Your passport must have at least six months validity beyond your planned departure date and at least two blank pages for entry stamps. Spain doesn’t stamp passports systematically at all entry points, but other Schengen countries do, so always check your passport has blank pages. Extensions beyond 90 days require applying for a long-stay visa or residence permit through Spanish consulates before travel. Many retirees explore Spain’s non-lucrative visa (similar to Portugal’s D7) for extended stays, requiring proof of income (approximately €28,800 annually for individuals, €43,200 for couples as of 2025) and Spanish private health insurance. Overstaying your 90-day allowance results in fines and potential Schengen area entry bans.

    Action Steps to Plan Your Spanish Adventure

    1. Check your passport expiration date immediately and count blank pages—renew if it expires within 6 months of your planned return or has fewer than 2 blank pages, as passport processing currently takes 6-8 weeks for routine service
    2. Schedule a comprehensive pre-travel check-up with your primary care physician 6-8 weeks before departure to discuss fitness for travel, update vaccinations if needed, and request detailed medication letters listing all prescriptions by generic name in case of loss
    3. Research and purchase comprehensive travel insurance within 14-21 days of booking your first trip expense (flights or hotels) to access pre-existing condition waivers—compare at least three providers (Allianz, Travel Guard, Seven Corners) for coverage breadth, medical evacuation limits, and customer service reviews
    4. Decide on your preferred regions based on interests (art/architecture in Barcelona, history/culture in Madrid and Andalusia, beaches on the Costa del Sol) and create a realistic itinerary allowing rest days between high-activity days—most seniors find staying 3-4 nights per location prevents exhausting constant movement
    5. Book accommodations 8-12 weeks ahead for spring/fall travel (16+ weeks for Easter week) prioritizing elevator access or ground-floor rooms, central locations near metro stations, and positive senior traveler reviews mentioning helpful staff and accessibility
    6. Notify your bank and all credit cards of exact travel dates and destinations to prevent fraud holds that leave you without access to funds—ask about foreign transaction fees and consider obtaining a no-fee card (Capital One, Chase Sapphire) if your current cards charge 2-3% per transaction
    7. Download essential smartphone apps before departure: Google Translate (download Spanish for offline use), Google Maps (save maps of cities you’ll visit), Renfe (Spanish train bookings), Moovit (public transportation), WhatsApp (free international communication), and TripAdvisor (restaurant reviews)
    8. Learn 15-20 basic Spanish phrases using YouTube videos, Duolingo, or language apps focusing on greetings, courtesies, ordering food, asking directions, and emergency phrases—even terrible pronunciation earns appreciation and assistance from locals
    9. Pack strategically with two pairs of comfortable, broken-in walking shoes (alternate daily to allow drying), layered clothing appropriate for your travel season, sun protection including SPF 50+ sunscreen and wide-brimmed hat, and a comprehensive first-aid kit with all medications in original labeled packaging
    10. Create both digital and paper document folders containing copies of passport photo page, travel insurance policy with emergency contact numbers, flight confirmations, hotel reservations, prescription medications list with generic names, and emergency contacts—email copies to yourself and leave a complete set with a trusted person at home who can access them if needed


    Disclaimer
    This article is provided for informational purposes only and does not constitute professional medical, legal, or financial advice. Individual circumstances, health conditions, and travel needs vary significantly, and you should consult qualified professionals regarding fitness for international travel, insurance requirements, visa regulations, and financial planning specific to your situation. Travel conditions, regulations, costs, safety situations, and healthcare information are subject to change without notice.
    Information current as of October 2, 2025. Laws, regulations, exchange rates, accessibility features, and conditions may change. Verify all critical information with official sources, embassies, and service providers before making travel decisions or financial commitments.

    Get Weekly European Travel Tips for Seniors

    Join thousands of seniors discovering comfortable, safe, and enriching travel experiences across Europe. Receive practical country guides, packing checklists, healthcare tips, and money-saving strategies delivered to your inbox every Tuesday morning.

    Related Articles


    Published by Senior AI Money Editorial Team
    Updated October 2025
  • Simple Home Adjustments That Improve Comfort for Seniors

    Simple Home Adjustments That Improve Comfort for Seniors

    Cartoon illustration of senior-friendly home with grab bars, bright lighting, accessible bathroom, non-slip floors, and comfortable furnishings in warm pastel colors
    Strategic home modifications enhance safety, accessibility, and comfort for aging in place
    Visual Art by Artani Paris | Pioneer in Luxury Brand Art since 2002

    Your home should support comfortable, independent living throughout your retirement years, yet most houses are designed for younger, more mobile residents. As you age, small inconveniences become significant obstacles: stairs you once bounded up now exhaust you, dim lighting that never bothered you makes navigation treacherous, and bathtubs that posed no problem become fall hazards. The encouraging news? Simple, affordable home adjustments dramatically improve comfort, safety, and accessibility without expensive renovations or moving to assisted living. This comprehensive guide presents practical modifications supporting aging in place—the ability to live safely and comfortably in your own home as you age. You’ll discover room-by-room improvements addressing common challenges: bathroom modifications preventing falls and improving accessibility, lighting upgrades reducing accident risk and eye strain, stairway and entrance adaptations enhancing mobility, kitchen adjustments simplifying meal preparation, bedroom modifications promoting restful sleep and morning safety, and whole-home improvements creating comfortable, accessible living spaces. Most modifications cost under $500 and require no special skills, making them accessible DIY projects or simple handyman jobs. Whether you’re planning ahead while fully capable or responding to declining mobility, these adjustments help you maintain independence, comfort, and safety in the home you love for years to come.

    Understanding Aging-in-Place Needs and Benefits

    Before diving into specific modifications, understanding why home adjustments matter and what challenges they address helps you prioritize changes most benefiting your situation.

    Common Age-Related Home Challenges: Physical changes create predictable home challenges. Vision changes make dim lighting dangerous, reduce depth perception affecting stair navigation, decrease ability to see obstacles. Mobility limitations from arthritis, balance issues, or reduced strength make stairs difficult, tubs risky, reaching high shelves impossible. Reduced flexibility makes bending to floor storage challenging, reaching overhead cabinets difficult. Decreased grip strength complicates opening jars, turning doorknobs, operating faucets. Balance problems increase fall risk, particularly in bathrooms, on stairs, when transitioning between standing and sitting. Cognitive changes can lead to forgotten tasks like turning off stoves. Temperature regulation difficulties make seniors vulnerable to extreme heat or cold.

    Benefits of Aging-in-Place Modifications: Injury prevention—falls cause 3 million ER visits annually among seniors; modifications reduce fall risk by 30%. Maintained independence—accessibility improvements allow daily activities without assistance. Cost savings—$3,000-$10,000 modifications prevent $50,000+ annual assisted living costs. Comfort and familiarity—remaining in long-time home near neighbors and friends supports emotional wellbeing. Property value—accessibility features increasingly attractive to aging Baby Boomers enhance resale value. Peace of mind for family—safe homes reduce family worry. Delayed institutionalization—proper modifications allow 5-10 years longer home residence.

    Prioritizing Modifications: Start with safety concerns—bathroom grab bars, improved lighting, stair railings. Address current difficulties causing daily struggles. Plan for anticipated needs even if not immediately necessary. Consider budget constraints—start with low-cost, high-impact changes. Create three-tier plan: immediate needs (safety hazards), short-term improvements (within 6-12 months), long-term planning (future needs addressed gradually).

    Modification Priority Timeline Typical Cost Range Impact Level
    Bathroom grab bars and non-slip surfaces Immediate $100-$500 High (fall prevention)
    Improved lighting throughout home Immediate $200-$800 High (safety, visibility)
    Stair railings and handrails Immediate if stairs present $150-$600 High (fall prevention)
    Lever door handles and faucets Short-term (6-12 months) $200-$800 Medium (accessibility)
    Walk-in shower or tub modifications Short-term to Long-term $1,500-$8,000 High (safety, independence)
    Ramps or lift systems for stairs When mobility declines $150-$15,000 High (accessibility)
    First-floor bedroom/bathroom Long-term planning $5,000-$25,000 High (eliminates stairs)
    Home modification priorities with timeline, cost, and impact assessment for aging in place

    Bathroom Safety and Accessibility Modifications

    Bathrooms present highest fall risk—slippery surfaces, awkward positions, and water create dangerous conditions. Strategic modifications dramatically reduce injury risk while improving comfort and independence.

    Essential Grab Bars and Support Rails: Grab bars provide crucial stability preventing falls. Shower/tub grab bars—install horizontal bars inside shower or tub for stability entering, exiting, and bathing. Mount securely into wall studs. Professional installation recommended ($150-$300 installed, $30-$80 DIY materials). Toilet grab bars—install bars both sides of toilet assisting with sitting and standing. Consider L-shaped bars providing vertical and horizontal support ($50-$150 each). Ensure all grab bars support 250+ pounds per ADA guidelines. Choose textured surfaces preventing slipping when wet. Grab bars seem institutional initially but literally save lives—bathroom falls cause serious injuries including hip fractures and head trauma often ending independent living.

    Non-Slip Surfaces and Bath Safety: Wet surfaces become treacherously slippery. Non-slip bath mats—use suction-cup mats inside tubs and showers, replacing annually ($15-$30). Non-slip floor mats—place absorbent mats outside tubs catching water. Ensure rubber backing prevents sliding ($20-$50). Anti-slip floor treatments—apply slip-resistant coatings to bathroom floors ($30-$100 DIY, $200-$500 professional). Textured tub/shower floor—retrofit smooth bottoms with adhesive anti-slip strips ($10-$30). For renovations, specify slip-resistant tile. Bath bench or shower chair—eliminate standing during bathing with stable seats ($40-$150). These dramatically reduce fall risk and fatigue.

    Walk-In Showers and Tubs: Traditional bathtubs require dangerous stepping over high edges. Walk-in showers—barrier-free showers with zero threshold allow easy wheelchair/walker access. Include built-in seating and handheld showerhead. Professional installation required ($3,000-$8,000). Curbless shower conversion—remove tub, level floor, install tile shower with no step. Most comprehensive but expensive ($5,000-$12,000). Shower threshold ramps—temporary solution creating gentle slope over existing threshold ($30-$80). Walk-in tubs—tubs with watertight doors eliminating stepping over high sides. Include seating and safety features. Note: sit while tub fills and empties ($2,500-$10,000 installed). Tub cut—cutting section out of existing tub side creates walk-in access ($500-$1,500). For those unable to afford major renovations, prioritize grab bars, non-slip surfaces, and shower seats.

    Toilet Modifications: Standard toilet heights (15 inches) require excessive bending. Raised toilet seats—add 2-6 inches height using removable seat riser ($25-$80). Simple, cheap but can shift. Comfort-height toilets—taller toilets (17-19 inches) reduce bending. Replacement costs $150-$400 plus $150-$300 installation. Permanent solution, better aesthetics. Bidet attachments—aid hygiene for limited flexibility. Electronic bidet seats ($200-$600) or simple attachments ($30-$100). Toilet safety frames—freestanding frames surrounding toilet providing armrests and support ($40-$100). Good for renters or temporary needs.

    Lighting and Accessibility Features: Bright, even lighting—upgrade to 100-watt equivalent LED bulbs eliminating shadows. Bathrooms need bright overhead plus focused task lighting at mirrors ($50-$200). Motion-sensor night lights—automatic lights in bathrooms and hallways prevent dangerous nighttime navigation ($15-$40). Lever faucets—replace twist knobs with lever handles operated with whole hand ($50-$150 installed). Handheld showerheads—flexible showerheads on sliding bars allow seated showering ($30-$100, easy DIY). Mirror height—ensure mirrors usable from standing or seated positions (36-42 inches from floor to bottom). Storage accessibility—move frequently used items to 30-60 inch height range.

    Cartoon accessible bathroom with grab bars, walk-in shower, raised toilet, non-slip mats, bright lighting, and handheld showerhead
    Bathroom modifications provide safety, accessibility, and independence for daily routines
    Visual Art by Artani Paris

    Lighting Improvements Throughout the Home

    Vision naturally declines with age—by 60, you need three times more light than at 20. Inadequate lighting contributes to falls, eye strain, and difficulty performing tasks. Comprehensive lighting improvements create safer, more comfortable homes.

    Increasing Overall Light Levels: Higher wattage bulbs—upgrade to maximum safe wattage for fixtures (typically 60-100 watt equivalent LED). LEDs produce bright light using minimal electricity, lasting years ($2-$8 per bulb). Additional light fixtures—add supplemental lamps in dark corners, reading areas, activity zones. Floor lamps, table lamps, under-cabinet lights eliminate shadows ($20-$100 each). Dimmer switches—install dimmers allowing brightness adjustment ($15-$40 per switch, simple DIY). Three-way bulbs—bulbs with multiple brightness levels in lamps allowing quick adjustment ($5-$10 per bulb). Brighter overhead fixtures—replace old fixtures with modern LED fixtures providing better distribution and higher output ($40-$200 per fixture plus installation). Calculate lighting needs: general room lighting 20-30 lumens per square foot; task lighting 50-75 lumens; reading areas 100+ lumens.

    Strategic Task Lighting: Kitchen task lighting—under-cabinet LED strips illuminate countertops for food preparation ($30-$80 per cabinet, easy peel-and-stick). Reading lamps—position adjustable lamps providing bright, focused light over chairs and beds. Look for 60-100 watt equivalent with adjustable arms ($30-$100). Workbench/hobby lighting—bright, focused light for detailed work like sewing, woodworking, crafts. Consider full-spectrum bulbs mimicking natural daylight ($40-$150). Closet lighting—install motion-sensor LED strips or battery-operated stick-on lights for easy clothing selection ($15-$50). Stairway lighting—illuminate every step with overhead lights at top and bottom plus step lights or LED strips on treads ($80-$300 professionally installed, $30-$100 DIY). Entryway lighting—bright lighting at front and back doors for safe key insertion, package handling, visitor identification ($50-$150 per fixture).

    Automatic and Motion-Sensor Lighting: Automatic lighting eliminates fumbling for switches in darkness—common cause of falls. Motion-sensor night lights—install in bathrooms, hallways, bedrooms providing gentle illumination for nighttime navigation without fully waking you ($12-$30 each, plug into existing outlets). Motion-sensor outdoor lights—illuminate pathways, driveways, entrances when you approach ($30-$80 each). Motion-sensor closet lights—lights activate when you open closet doors ($20-$50). Timer switches—automatically turn lights on/off at specific times ($15-$40 per switch). Smart lighting systems—control lights via voice commands (Alexa, Google Home), apps, or schedules ($15-$50 per smart bulb, plus hub $50-$100). Photocell outdoor lights—automatically turn on at dusk, off at dawn ($25-$60 per fixture).

    Reducing Glare and Improving Quality: While you need more light, you’re also more sensitive to glare. Matte light bulbs—use frosted or matte LED bulbs rather than clear bulbs reducing harsh glare. Lampshades and diffusers—use shades diffusing light rather than exposing bare bulbs. Position lamps thoughtfully—avoid placing lights creating glare on TV screens, computer monitors, or windows. Window treatments—use blinds, shades, or curtains controlling natural light to reduce daytime glare. Anti-glare screen filters—add filters to computer monitors and tablets ($10-$30). Warm vs. cool bulbs—experiment with color temperature. Warm white (2700-3000K) creates cozy ambient light; bright white (4000-5000K) provides energizing task light; daylight (5500-6500K) offers truest color rendering. Many seniors find warm white most comfortable for living areas and cool white better for tasks.

    Stairway and Entrance Safety Improvements

    Stairs represent significant fall hazards—over one million stair-related injuries occur annually among those 65+. Strategic modifications and alternatives dramatically improve safety.

    Stair Railings and Handrails: Continuous railings—install railings running full length of stairs on both sides. Railings should extend 12 inches beyond top and bottom steps ($150-$600 professional installation). Proper height and grip—railings 34-38 inches high with 1.25-2 inch diameter graspable by whole hand. Replace ornamental railings that can’t be gripped securely. Sturdy mounting—railings must support 250 pounds, securely fastened to wall studs or reinforced mounting. Test regularly ensuring they haven’t loosened. Textured surface—railings should provide secure grip even with sweaty palms. Railing extensions—add railings to any steps including single steps between rooms or at entrances. Contrasting color—paint or wrap railings in contrasting color from walls improving visibility.

    Stair Visibility and Tread Improvements: Step edge marking—apply bright, contrasting tape to leading edge of each step making depth perception easier. Yellow or white tape on dark stairs ($15-$30 for roll). Non-slip stair treads—add adhesive non-slip treads to each step increasing traction ($30-$80 for full staircase). Carpet runners—secured carpet provides cushioning and traction. Ensure firmly attached with no loose edges creating trip hazards ($200-$600 professionally installed). Remove clutter—never leave items on stairs. Keep completely clear. Adequate lighting—install lighting at top and bottom plus intermediary lighting for long staircases. Every step should be clearly visible. Consider LED strip lighting along stair edges ($50-$150). Reflective tape—add reflective tape to step edges providing visibility even with minimal light ($10-$20 per roll).

    Stair Alternatives for Significant Mobility Limitations: Stair lifts—motorized chairs traveling on rails installed along staircases. User sits, presses button, rides up or down. Expensive but allows continued stair use when climbing unsafe ($3,000-$5,000 straight stairs, $7,000-$15,000 curved stairs). Consider used/refurbished lifts for savings. Residential elevators—home elevators provide wheelchair accessibility. Extremely expensive and require significant space ($20,000-$50,000+ installed). First-floor conversion—convert existing first-floor room to bedroom and add first-floor bathroom if absent. Eliminates stair navigation entirely. Most cost-effective for those unable to climb stairs ($5,000-$25,000 depending on extent). Move to single-level home—ranch-style homes or condos eliminate stairs entirely. For some, moving proves cheaper than extensive modifications.

    Entrance Accessibility: Exterior ramps—portable threshold ramps ($50-$200) provide temporary solutions. Permanent ramps require proper slope (1 foot ramp per 1 inch rise) and railings ($1,000-$3,000 professionally installed). Step railings—add railings at exterior steps leading to entrances. Crucial for icy winter conditions ($150-$400 per entrance). Keyless entry—smart locks or keypad entry eliminate fumbling with keys in cold weather or darkness ($100-$300 per lock). Lever door handles—replace round knobs with lever handles operated without grip strength ($15-$40 per handle, easy DIY). Door width—standard 32-inch doors barely accommodate walkers, can’t accommodate wheelchairs. Widening doorways to 36 inches costs $700-$2,500 per doorway but provides wheelchair accessibility. Exterior lighting—bright lights at all entrances with motion sensors ($40-$120 per entrance). Clear pathways—maintain clear, level walkways free of hoses, cords, or debris. Repair cracked concrete preventing trips.

    Cartoon home entrance with well-lit stairs, secure railings on both sides, non-slip treads, contrasting edge marking, and accessible ramp alternative
    Proper stairway modifications and entrance accessibility prevent falls and support independence
    Visual Art by Artani Paris

    Kitchen and Living Area Comfort Modifications

    Kitchens and living areas where you spend most time deserve modifications enhancing comfort, safety, and accessibility for daily activities.

    Kitchen Storage and Accessibility: Lower frequently used items—move dishes, glasses, food, cooking tools from high shelves to easy-reach zones (30-60 inch height). Use high shelves only for rarely used items ($0, just reorganization). Lazy Susans—install rotating shelves in corner and deep cabinets bringing items to you ($15-$40 each). Pull-out shelves—retrofit cabinets with sliding shelves eliminating reaching into deep cabinets ($30-$80 per shelf, professional installation $150-$400 for multiple). Lower work surfaces—some counter space at 30-34 inch height allows seated food preparation. Rolling carts provide portable lower surfaces ($50-$150). Accessible storage containers—replace heavy canisters with lightweight, easy-open containers. Use easy-grip handles and large labels. Step stool with handrail—stable step stool with grab bar provides safe access to higher shelves ($40-$100). Never use chairs or unstable stools.

    Kitchen Safety and Usability: Lever faucets—single-lever faucets operate with whole hand, allow one-handed operation ($80-$200 installed). Touch or motion faucets—turn on/off with simple touch or hand wave. Especially useful for arthritis or limited grip ($150-$400 installed). Anti-scald protection—set water heater to 120°F maximum. Install anti-scald valves at faucets ($50-$150 per faucet). Induction cooktop or electric range—replace gas ranges (carbon monoxide risk if burners left on) with safer induction or electric. Induction cooktops remain relatively cool and automatic shut-offs improve safety ($700-$2,000 installed). Timer with loud alert—use kitchen timers with very loud alarms preventing forgotten food ($10-$30). Fire extinguisher—mount accessible fire extinguisher near (not above) stove. Check annually, replace after use ($15-$40). Non-slip floor mats—place anti-fatigue, non-slip mats in front of sink and stove reducing leg strain and slip risk ($30-$80).

    Living Area Comfort and Safety: Furniture arrangement—create clear pathways 36 inches wide between furniture allowing walker or wheelchair navigation. Remove unnecessary furniture cluttering spaces (free, just rearrangement). Furniture height—chairs and sofas should be 19-21 inches high with firm cushions for easier standing. Add firm cushions to low, soft seating ($30-$60 per cushion). Lift chairs—recliners with powered lifting assist help you stand with minimal effort. Medicare sometimes covers with prescription ($400-$2,000). Coffee table alternatives—remove or replace low coffee tables with C-tables sliding under sofas providing accessible surfaces ($40-$100). Low coffee tables create trip hazards. Remote control organization—use holders keeping all remotes accessible in one place ($15-$30). Cordless phones—keep cordless phones in multiple rooms ($30-$60 per handset). Emergency alert systems—wearable pendant or watch-style systems connecting to emergency services ($25-$50 monthly).

    Flooring and Fall Prevention: Remove throw rugs—small rugs create trip hazards. Remove entirely or secure firmly with rug grips ($0-$20 for grips). Low-pile carpet—if replacing flooring, choose low-pile carpet or smooth, slip-resistant flooring. Thick, plush carpet impedes walkers and wheelchairs. Cord management—secure electrical and cable cords along walls using cord covers or clips ($10-$30). Clutter elimination—clear floor surfaces of boxes, magazines, shoes. Everything should have designated storage. Furniture sliders—place felt sliders under furniture legs preventing movement if you lean on furniture for support ($8-$15 per set).

    Bedroom and Climate Comfort

    Bedroom Safety and Accessibility: Bed height adjustment—ideal bed height has feet flat on floor while sitting on bed edge (typically 20-23 inches from floor to mattress top). Add bed risers ($15-$40 per set) or remove legs to achieve proper height. Bed rails—portable bed rails assist with rolling over and getting in/out of bed ($40-$100 per rail). Bedside lighting—place lamps on both sides of bed with easy-reach switches. Consider touch lamps or clap-on devices ($25-$60 per lamp). Motion night lights—illuminate paths from bed to bathroom preventing stumbling ($15-$40). Bedside essentials—keep phone, water, medications, flashlight, eyeglasses within easy reach using bedside organizer ($20-$40). Easy-reach storage—store frequently used clothing in drawers at waist height. Use closet organizers bringing clothing within easy reach ($50-$200).

    Temperature Control and Comfort: Seniors are more vulnerable to temperature extremes. Programmable thermostats—maintain consistent comfortable temperatures automatically. Smart thermostats adjust based on your patterns ($130-$250 installed). Zone heating/cooling—space heaters (oil-filled radiator style) and fans allow comfort in occupied rooms without heating/cooling entire house ($40-$150 per unit). Ceiling fans—improve air circulation and comfort for minimal energy cost. Use year-round (counterclockwise summer, clockwise winter) ($80-$300 per fan installed). Window treatments—thermal curtains or cellular shades reduce heat loss in winter, heat gain in summer ($30-$150 per window). Humidity control—humidifiers in winter and dehumidifiers in summer maintain comfortable 30-50% humidity ($30-$80 per unit). Carbon monoxide and smoke detectors—install on every level with fresh batteries tested monthly. Consider interconnected alarms ($25-$60 per detector).

    Smart Home Integration: Voice control systems—Alexa, Google Home, or Siri allow voice-controlled lights, thermostats, locks. Particularly valuable for mobility limitations ($30-$100 for hub plus smart devices). Video doorbells—see and speak with visitors without opening door. Provides security and prevents falls from rushing ($100-$250 installed). Smart plugs—control lamps, fans, appliances via app or voice commands. Includes scheduling and remote control ($15-$40 each). Leak detectors—alert to water leaks before significant damage. Place near water heaters, under sinks, near toilets ($20-$60 each). Smart locks—unlock doors with codes, smartphone, or voice commands eliminating key fumbling and allowing access for trusted helpers ($150-$300 per lock installed).

    Funding Home Modifications and Professional Help

    Medicare and Insurance: Original Medicare does not cover home modifications, with very limited exceptions for durable medical equipment. Medicare Advantage plans sometimes include benefits for safety modifications—check your plan. Some long-term care insurance policies cover modifications up to specific limits ($500-$5,000 typically). Consult your policy.

    Government Programs: Area Agencies on Aging—some AAAs offer home modification programs through Title III-E providing minor modifications. USDA Rural Development programs—rural residents may qualify for grants or low-interest loans for necessary repairs and modifications. State and local programs—many states offer home modification programs for low-income seniors. Contact your State Unit on Aging. Veterans Affairs—VA offers grants up to $6,800 for veterans with service-connected disabilities for home modifications through Specially Adapted Housing program. Rebuilding Together—nonprofit providing free home repairs and modifications for low-income seniors in many communities.

    Tax Deductions and Other Funding: Medical expense deductions—medically necessary modifications may be tax-deductible if you itemize and expenses exceed 7.5% of AGI. Requires doctor’s letter stating medical necessity. Home equity loans or HELOCs—borrow against home equity for significant modifications. Interest may be tax-deductible. Reverse mortgages—homeowners 62+ can use reverse mortgage proceeds for modifications though consider implications carefully. Personal savings—prioritize high-impact safety modifications using savings. Family assistance—family members invested in your safety may contribute to modification costs.

    Finding Qualified Contractors: Look for Certified Aging-in-Place Specialists (CAPS) through National Association of Home Builders. Ask Area Agency on Aging for contractor recommendations. Get multiple quotes (3-5) and check references thoroughly. Verify licensing, insurance, and bonding. Ask about experience with accessibility modifications specifically. Occupational therapist evaluation helps identify truly necessary modifications versus contractor upselling. Never pay full cost upfront; typical payment: 30% deposit, 40% midway, 30% completion. For minor work, handyman services often suffice and cost less.

    Real Success Stories

    Case Study 1: Sacramento, California

    Margaret Wilson (74 years old)

    Margaret lived alone in a two-story home for 35 years. At 72, she developed osteoarthritis making stairs increasingly painful and dangerous. She fell twice on stairs within six months. Her children pressured her to move to assisted living, but Margaret adamantly wanted to stay in her home.

    Margaret worked with an occupational therapist to assess modification needs. She converted first-floor den to master bedroom ($3,500), added first-floor bathroom with walk-in shower ($8,200), installed stair lift for necessary second-floor trips ($4,500), added grab bars in all bathrooms ($600), upgraded lighting throughout home ($800), and replaced door knobs with lever handles ($300). Total investment: $17,900. She financed through home equity line of credit.

    Results after modifications (18 months later):

    • Zero falls since modifications completed
    • Maintained complete independence—no in-home care needed
    • Avoided assisted living costing $5,000/month ($90,000 saved in 18 months)
    • Remained in beloved home near lifelong neighbors and friends
    • Modifications increased home value by estimated $15,000
    • Children relieved by safety improvements, visits more relaxed
    • Margaret reports feeling confident and secure in her home

    “My children thought I was being stubborn refusing to move, but this is my home. The modifications cost money but less than three months in assisted living. More importantly, I’m still independent in the place where I raised my family and built my life. The changes actually make my home more comfortable than before—the walk-in shower is luxurious, and I love having a bedroom and bathroom on one floor. I wish I’d done some of these modifications years earlier.” – Margaret Wilson

    Case Study 2: Portland, Oregon

    Robert Chen (78 years old)

    Robert lived with his wife in a ranch-style home but struggled with dim lighting causing frequent near-falls and difficulty reading. His vision had declined, making navigation at night particularly dangerous. He considered expensive whole-home renovation.

    Instead, Robert implemented lighting upgrades systematically. He installed LED bulbs throughout home (100-watt equivalent, $150), added under-cabinet lighting in kitchen ($120), installed motion-sensor night lights in hallways and bathrooms ($80), added task lighting at reading chair and workbench ($200), installed motion-sensor outdoor lights at entrances ($180), and added dimmer switches in living areas ($120). Total cost: $850.

    Results after lighting improvements:

    • No more near-falls or stumbling in darkness
    • Reading became comfortable again without eye strain
    • Wife noticed Robert’s mood improved with better lighting
    • Nighttime bathroom trips no longer frightening
    • Cooking safer with well-lit countertops
    • Energy bills actually decreased despite more lights (LED efficiency)
    • Home feels more welcoming and comfortable

    “I thought I needed to spend $20,000 renovating my entire home. The occupational therapist said better lighting would solve 80% of my problems. She was right. For under $1,000, my home went from feeling dark and dangerous to bright and safe. The motion-sensor night lights were game-changers—no more fumbling for light switches at 3 AM. This simple change gave me back my confidence at home.” – Robert Chen

    Frequently Asked Questions

    How much do home modifications for aging in place typically cost?

    Costs vary dramatically based on scope. Basic safety modifications (grab bars, lighting, non-slip surfaces, lever handles) cost $1,000-$3,000 and significantly improve safety. Mid-range modifications (bathroom accessibility, stair lift, smart home features) cost $5,000-$15,000. Extensive modifications (first-floor bedroom/bathroom conversion, walk-in shower, multiple renovations) cost $15,000-$30,000+. Most experts recommend starting with highest-impact, lowest-cost changes first. Even $500-$1,000 in strategic modifications dramatically reduces fall risk and improves comfort. Compare these costs to assisted living ($50,000+ annually) or nursing homes ($80,000+ annually)—home modifications are cost-effective for maintaining independence.

    Will home modifications hurt my home’s resale value?

    Most accessibility modifications either increase value or have neutral impact. Modifications that add value: bathroom renovations with walk-in showers, improved lighting, lever door handles (now preferred by many buyers), smart home features, first-floor bedroom/bathroom. Modifications with neutral impact: grab bars (easily removed), raised toilets (preferred by many), motion-sensor lights. Only highly specialized medical equipment (ceiling lifts, hospital beds built-in) might narrow buyer pool. The aging Baby Boomer population increasingly values accessibility features. Many real estate agents report age-friendly homes sell faster and for higher prices in retirement-popular areas. If concerned, choose modifications easily reversed or universally appealing.

    Should I hire a professional or DIY home modifications?

    Depends on modification complexity and your skills. Safe DIY projects: replacing light bulbs, adding night lights, installing non-slip mats, replacing door knobs with levers, adding non-slip stair treads, reorganizing storage. Hire professionals for: grab bar installation (must support 250 pounds, requires proper mounting), walk-in showers or bathroom renovations, stair lifts or ramps, electrical work, structural modifications, anything requiring permits. Consider hiring Certified Aging-in-Place Specialist (CAPS) for assessment and planning ($100-$300). Occupational therapists provide home safety evaluations identifying priorities (sometimes covered by insurance). Poor installation of safety features like grab bars is dangerous—invest in professional installation for critical safety items.

    When is the right time to make home modifications?

    Ideal time is before you need them—proactive modifications prevent falls and injuries rather than reacting after accidents. Consider modifications when: you experience first fall or near-fall, you notice stairs becoming difficult, you have new diagnosis affecting mobility, you retire and plan to age in place, you have minor balance or vision issues. Don’t wait for crisis. Common mistake: delaying modifications until after serious fall when injury may prevent returning home. “Universal design” features benefit all ages, so adding them early means years of use. That said, it’s never too late—even 85-year-olds benefit from safety modifications allowing continued independent living.

    Does Medicare or insurance cover home modifications?

    Medicare generally doesn’t cover home modifications. Exceptions: durable medical equipment (DME) like toilet risers, bath chairs, walkers sometimes covered. Medicare Advantage plans sometimes include $500-$2,000 annually for home safety modifications—check your specific plan. Medicaid covers some modifications in some states for eligible low-income seniors. Long-term care insurance policies sometimes cover modifications ($500-$5,000 lifetime limits typically). Veterans with service-connected disabilities may receive VA grants up to $6,800. Home modifications prescribed by doctors may be tax-deductible as medical expenses. Check with Area Agency on Aging for local programs offering free or low-cost modifications for low-income seniors.

    What are the most important modifications for fall prevention?

    Top priority fall prevention modifications: Grab bars in bathrooms (especially shower/tub and by toilet), improved lighting throughout home (especially stairs, hallways, bathrooms), non-slip surfaces in bathrooms and on stairs, handrails on both sides of stairs, removal of tripping hazards (throw rugs, clutter, cords), motion-sensor night lights for nighttime navigation, raised toilet seats reducing strain and fall risk during sitting/standing. These address the most common fall scenarios. Research shows comprehensive approach reducing multiple risk factors is most effective—single modification helps, but combination of grab bars + lighting + non-slip surfaces + handrails reduces fall risk 30-50%. Start with bathrooms and stairs where most serious falls occur.

    How do I find qualified contractors for aging-in-place modifications?

    Look for Certified Aging-in-Place Specialists (CAPS) through National Association of Home Builders. CAPS-certified contractors receive special training in senior needs. Ask Area Agency on Aging for contractor recommendations—they often maintain lists of reputable, senior-friendly contractors. Get multiple quotes (3-5) and check references thoroughly. Verify licensing, insurance, and bonding. Ask about experience with accessibility modifications specifically. Beware contractors pushing unnecessary expensive modifications—get second opinions for major work. Occupational therapist evaluation helps identify truly necessary modifications versus contractor upselling. Never pay full cost upfront; typical payment schedules are 30% deposit, 40% midway, 30% completion. For minor work, handyman services often suffice and cost less than general contractors.

    Can I make modifications if I rent my home?

    Yes, but requires landlord permission for permanent modifications. Temporary/removable modifications needing no permission: furniture risers for bed, non-slip bath mats, removable grab bars (suction or tension), motion-sensor plug-in lights, non-slip stair treads, toilet risers, portable ramps. Modifications requiring permission: installed grab bars, replacing door knobs, painting stairs for visibility, installing different lighting fixtures, bathroom renovations. Fair Housing Act requires landlords provide “reasonable accommodations” for disabilities, which may include allowing modifications at tenant’s expense. Get permission in writing specifying who pays for modifications and whether you must restore to original condition when moving. Some landlords agree to modifications if you pay costs. Negotiate—many landlords appreciate improvements increasing property value.

    How do smart home devices help seniors age in place?

    Smart home technology dramatically improves safety and convenience. Voice assistants (Alexa, Google Home) control lights, thermostats, locks hands-free—valuable for mobility limitations. Smart lights eliminate dangerous dark navigation and can be scheduled or voice-controlled. Video doorbells prevent falls from rushing to door and improve security. Smart locks eliminate fumbling with keys and allow trusted helpers keypad access. Smart thermostats maintain comfortable temperatures automatically. Leak detectors prevent water damage. Medical alert integration calls for help automatically. Smart plugs control any device remotely. Key benefits: reduced fall risk from better lighting, hands-free control when mobility limited, remote family monitoring and assistance, automated safety features (lights on at sunset, doors locked at night). Initial investment ($200-$500 for basic system) pays dividends in safety and independence. Many seniors initially skeptical become enthusiastic users once experiencing benefits.

    What if I can’t afford necessary home modifications?

    Multiple options for low-income seniors: Area Agency on Aging often has programs providing free or low-cost minor modifications (grab bars, lighting) for eligible seniors. Rebuilding Together provides free home repairs and modifications for low-income seniors in many communities. Habitat for Humanity has programs helping seniors with home repairs. State and local governments often have home modification programs—search “[your state] home modification assistance seniors.” Veterans Administration provides grants for eligible veterans. Churches and community organizations sometimes help seniors with home projects. Medicaid may cover modifications in some states for eligible individuals. Prioritize highest-impact, lowest-cost changes first—grab bars, lighting, and removing tripping hazards cost under $500 and prevent most falls. Consider family assistance—children invested in your safety may contribute. Home equity loans or lines of credit may be options if you own your home, though carefully consider ability to repay.

    Take Action: Your Home Safety Plan

    1. Conduct home safety assessment this week – Walk through your home identifying hazards and difficulties. Note areas where you’ve tripped, stumbled, or struggled. List: lighting problems, tripping hazards, areas requiring excessive bending or reaching, bathroom safety concerns, stairway issues. Involve family member or occupational therapist if possible. This assessment prioritizes modifications.
    2. Prioritize top 3 safety concerns – From your assessment, identify three most dangerous or difficult areas. These become your immediate priorities. Typically includes: bathroom (highest fall risk), stairways (serious injury risk), and lighting (affects everything). Focus budget and effort here first before addressing lower-priority improvements.
    3. Get professional evaluation for bathroom and stairs – Schedule consultation with occupational therapist ($100-$200, sometimes insurance-covered) or CAPS contractor (often free estimates) for professional assessment of highest-risk areas. They identify modifications you might miss and ensure solutions meet your specific needs. Their expertise prevents wasted money on ineffective modifications.
    4. Start with quick, low-cost improvements immediately – While planning larger modifications, implement immediate improvements requiring no installation: remove throw rugs, clear clutter and cords, add non-slip bath mats, reorganize storage bringing frequently-used items to easy-reach heights, increase light bulb wattage where possible, add plug-in night lights. These $50-$200 improvements provide immediate safety benefits.
    5. Create 6-month modification plan and budget – List all desired modifications with estimated costs: immediate (this month), short-term (within 3 months), and medium-term (within 6 months). Research contractors, get quotes, explore funding options. Having clear plan with timeline and budget prevents feeling overwhelmed and ensures steady progress toward safer, more comfortable home.
    6. Schedule first major modification within 30 days – Choose one high-impact modification (typically bathroom grab bars or comprehensive lighting upgrade) and schedule it within one month. Taking action overcomes inertia. Once you experience benefits of first modification, continuing with others becomes easier. Many seniors report wishing they’d started sooner once they see how much modifications improve daily life.

    Disclaimer
    This article is provided for informational purposes only and does not constitute professional home safety, construction, or medical advice. Home modifications should be performed by licensed professionals when necessary, particularly those involving electrical, plumbing, or structural work. Building codes and safety standards vary by location—consult local authorities before major modifications. For personalized guidance on appropriate modifications for your specific mobility and health needs, consult occupational therapists or certified aging-in-place specialists. Always obtain necessary permits for construction work.
    Information current as of October 2, 2025. Building codes, product availability, and costs subject to change.

    Get Weekly Home Safety Tips

    Join thousands of homeowners receiving our free weekly newsletter with home modification checklists, product recommendations, DIY guides, and contractor selection tips. Stay safe and comfortable in your home for years to come.

    Related Articles


    Published by Senior AI Money Editorial Team
    Updated October 2025
  • 10 Best Senior-Friendly Home Interior Ideas for 2025

    10 Best Senior-Friendly Home Interior Ideas for 2025

    Meta Description

    Discover the 10 best senior-friendly home interior ideas for 2025. Create safe, stylish, and comfortable living spaces that support aging with ease.


    Summary Audio Script

    “In 2025, home interiors for seniors balance comfort, safety, and style. From slip-resistant floors to smart lighting, these 10 ideas create spaces that help older adults live independently and enjoy daily life.”


    Getting Started

    Aging in place is becoming the preferred choice for many seniors. Rather than moving to assisted living, older adults are redesigning their homes to be safe, functional, and stylish. In 2025, interior design trends for seniors combine accessibility with beauty, proving that safety doesn’t have to mean sacrificing style.

    This guide explores the 10 best senior-friendly home interior ideas, from practical modifications to design innovations. Whether you are updating a single room or rethinking the whole house, these ideas will inspire safe and enjoyable living.


    How We Chose

    We focused on designs that provide:

    • Safety — Reducing fall risks and injury.
    • Accessibility — Easy-to-reach storage, wide walkways, and mobility support.
    • Comfort — Ergonomic furniture and soothing layouts.
    • Technology — Smart features that simplify daily life.
    • Aesthetic Appeal — Designs that look modern and inviting.

    Idea 1 — Slip-Resistant Flooring

    Replace rugs and glossy tiles with slip-resistant materials such as cork, vinyl, or textured tile. These reduce fall risks without compromising design.

    👉 Case Example: Helen, 72, installed slip-resistant vinyl floors. She enjoys the modern look and feels safer walking around her home.


    Idea 2 — Smart Lighting Systems

    Motion-sensor lights in hallways, bathrooms, and bedrooms prevent nighttime accidents. Adjustable smart bulbs allow seniors to change brightness easily.

    👉 Case Example: Robert, 78, added smart lighting with voice controls. He can adjust brightness without getting out of bed.


    Idea 3 — Ergonomic Furniture

    Chairs with firm cushions, supportive backs, and armrests make standing up easier. Adjustable recliners also add comfort for reading or napping.

    👉 Case Example: Linda, 80, replaced her low sofa with a supportive recliner. It reduced her knee strain and made TV time more enjoyable.


    Idea 4 — Wider Walkways and Open Layouts

    Removing clutter and widening doorways creates safer movement for seniors using walkers or wheelchairs.

    👉 Case Example: James, 76, remodeled his living room for open space. He no longer bumps into furniture while using his walker.


    Idea 5 — Accessible Storage Solutions

    Pull-out shelves, lazy Susans, and adjustable cabinets make kitchens easier to use. Seniors avoid bending or reaching too high.

    👉 Case Example: Margaret, 81, added pull-out pantry drawers. Cooking became simpler and less tiring.


    Idea 6 — Walk-In Showers with Grab Bars

    Bathrooms are high-risk areas. Walk-in showers with seating, grab bars, and handheld showerheads increase safety and comfort.

    👉 Case Example: George, 79, replaced his bathtub with a walk-in shower. Bathing became safer and more convenient.


    Idea 7 — Multi-Functional Spaces

    Convert spare rooms into hobby areas, guest rooms, or relaxation spaces. Multi-functional designs keep homes practical and fun.

    👉 Case Example: Mary, 74, turned her extra room into a craft space and guest bedroom. It gave her flexibility and joy.


    Idea 8 — Smart Home Technology

    Voice assistants, smart thermostats, and security cameras help seniors manage their homes easily. These reduce stress and add peace of mind.

    👉 Case Example: John, 82, uses a voice assistant to control his thermostat and lights. It makes daily tasks simple and safe.


    Idea 9 — Comfortable Outdoor Areas

    Gardening, relaxing, or socializing outdoors promotes mental health. Raised garden beds, slip-resistant patios, and shade structures make outdoor areas senior-friendly.

    👉 Case Example: Margaret, 77, installed raised flower beds. She enjoys gardening without bending or straining her back.


    Idea 10 — Calming Color Schemes and Décor

    Soft colors like blues, greens, and neutrals reduce stress and create a soothing atmosphere. Warm lighting and natural décor further enhance relaxation.

    👉 Case Example: Alice, 70, painted her bedroom in calming tones. She noticed better sleep and a more peaceful mood.


    Bonus Tips

    1. Prioritize safety upgrades in bathrooms and kitchens first.
    2. Choose low-maintenance materials for flooring and furniture.
    3. Add personal touches—family photos, art, and crafts—to make spaces feel warm.
    4. Review designs with an occupational therapist for customized advice.

    Further Information


    FAQ

    Q1: What is the most important home modification for senior safety?
    A1: Bathrooms often pose the highest risks. Installing walk-in showers with grab bars and slip-resistant flooring should be a top priority for seniors.

    Q2: Are smart home devices safe for seniors to use?
    A2: Yes. Devices like voice assistants and smart thermostats are designed for convenience. Many have senior-friendly features such as large buttons and voice commands.

    Q3: How can seniors make their homes stylish and safe at the same time?
    A3: By choosing ergonomic furniture, calming color schemes, and modern slip-resistant materials, seniors can enjoy a home that is both attractive and safe.


    Conclusion

    In 2025, senior-friendly home interiors focus on blending safety with style. From slip-resistant flooring to smart lighting, these design choices make daily life easier without compromising comfort.

    The right home modifications support independence and confidence. Whether through simple upgrades or full renovations, seniors can create homes that truly meet their needs.

    By adopting these 10 ideas, older adults can enjoy homes that are safe, stylish, and supportive of aging with dignity.

    Published by Senior AI Money Editorial Team
    Updated October 2025
  • 10 Interior Tips for Seniors Downsizing to a Smaller Apartment

    10 Interior Tips for Seniors Downsizing to a Smaller Apartment

    Senior creating comfortable organized space in smaller apartment with smart furniture placement
    Transform downsizing from overwhelming challenge into opportunity for simplified, intentional living with strategic design choices
    Visual Art by Artani Paris | Pioneer in Luxury Brand Art since 2002

    Downsizing from a spacious family home to a smaller apartment represents one of retirement’s most emotionally challenging transitions, yet 68% of Americans over 65 will make this move according to 2024 AARP research. The physical process of fitting a lifetime’s possessions into 800-1,200 square feet feels overwhelming, while the emotional weight of releasing family memories and accepting reduced space triggers grief and anxiety. However, strategic interior design transforms downsizing from loss into liberation—creating homes that feel spacious, organized, and distinctly yours despite smaller square footage. This guide provides ten practical design strategies specifically addressing senior downsizing challenges: making small spaces feel larger, organizing efficiently, maintaining accessibility, preserving cherished items while releasing clutter, and creating the comfort essential for mental wellbeing during major life transitions. These tested approaches help thousands of seniors annually turn cramped apartments into personalized sanctuaries supporting independent living.

    Understanding the Psychology of Downsizing for Better Decision-Making

    The emotional difficulty of downsizing stems from identity attachment to possessions and spaces. Your 3,000-square-foot house holds 40 years of accumulated belongings representing different life chapters—raising children, career success, hobbies pursued, travels taken. Each item connects to memories and identity: “I’m someone who entertains,” “I’m a collector,” “I’m prepared for anything.” Releasing possessions feels like releasing parts of yourself. A 2024 University of Michigan study found that seniors downsizing experienced grief symptoms comparable to losing a loved one, with depression and anxiety peaking during the first 3-6 months.

    Reframe downsizing as intentional curation rather than deprivation. You’re not losing possessions—you’re choosing what matters most and releasing what no longer serves your current life. This shift from scarcity mindset (“I’m losing so much”) to abundance mindset (“I’m keeping my favorites and gaining freedom”) dramatically affects emotional experience. Research demonstrates that seniors who view downsizing as “editing to essentials” adjust 40% faster than those perceiving it as forced loss.

    Recognize that smaller spaces require different living patterns. Large homes allowed spreading out—dedicated rooms for different activities, storage for “someday” items, space for rarely-used things. Apartments demand efficiency: furniture serving multiple purposes, belongings you actually use, thoughtful organization maximizing every inch. This isn’t compromise—it’s optimization. Many seniors report that after adjustment, they prefer apartment living’s simplicity to large house maintenance burdens.

    Understand the grief process and give yourself permission to mourn. Leaving the family home where you raised children, hosted holidays, and built life triggers legitimate grief. Rushing through decisions or suppressing emotions leads to regret and depression. Allow 3-6 months for major downsizing decisions when possible. Visit your new apartment multiple times imagining daily life there. This realistic preview prevents unrealistic expectations causing post-move disappointment.

    The financial reality often drives downsizing but creates additional stress. Selling a house while purging possessions while finding and furnishing an apartment overwhelms even organized people. Financial pressure (“I need to sell quickly”) conflicts with emotional need for gradual transition. If possible, separate timelines—downsize belongings before listing the house, or rent temporary storage during transition. This prevents desperate decisions you’ll regret when emotional dust settles.

    Family dynamics complicate downsizing significantly. Adult children often push parents toward more drastic downsizing than necessary, motivated by concern or inheritance considerations. Conversely, some seniors resist needed downsizing from stubborn independence or denial about declining capabilities. Honest family discussions about practical needs, safety concerns, and emotional attachments prevent resentment. Including family in decisions doesn’t mean letting them control—you maintain final authority over your possessions and living arrangements.

    Emotional journey of senior downsizing showing stages and coping strategies
    Understanding the psychological aspects of downsizing helps navigate this major life transition
    Visual Art by Artani Paris

    Downsizing Stage Common Emotions Helpful Strategies Timeline
    Decision Phase Anxiety, resistance, denial Visit apartments, calculate costs, list pros/cons 1-3 months
    Sorting Possessions Overwhelm, grief, guilt Small daily sessions, “keep/maybe/go” system 2-4 months
    Letting Go Loss, sadness, second-guessing Photo documentation, thoughtful gifting to family 1-2 months
    Moving Day Stress, exhaustion, nostalgia Professional movers, family support, self-compassion 1-3 days
    Initial Adjustment Disorientation, regret, loneliness Unpack essentials first, establish routines 2-4 weeks
    Long-term Settling Acceptance, relief, contentment Personalize space, join community activities 3-6 months
    Emotional stages of downsizing with evidence-based coping strategies (2024 research)

    Tip 1: Measure Everything Before Anything Else

    The single biggest downsizing mistake is moving furniture that doesn’t fit, creating immediate stress and requiring expensive solutions. Before making any keep/donate decisions, obtain exact apartment measurements and create a scaled floor plan. This objective data prevents emotional decisions (“I love this sofa, I’m keeping it”) that create problems later when the beloved sofa overwhelms the living room making it unusable.

    Visit your new apartment with a tape measure, notepad, and helper. Measure every room’s length and width, ceiling height, doorway widths, hallway widths, and closet dimensions. Note locations of electrical outlets, windows, and built-in features like radiators or air conditioning units. Photograph each room from multiple angles. These photos combined with measurements allow furniture planning from home without repeated apartment visits. Request a digital floor plan from the building management—many have these available.

    Create a scaled floor plan using graph paper (1/4 inch = 1 foot) or free online tools like RoomSketcher or Floorplanner. Mark permanent features: windows, doors (showing swing direction), closets, outlets. Cut scaled templates of your existing furniture from graph paper or use software’s virtual furniture. This lets you test different arrangements before moving anything, revealing immediately what fits and what’s too large.

    Measure pathways and clearances, not just wall-to-wall room dimensions. You need 36-48 inches of clear pathway for safe navigation, more if using walkers or wheelchairs. Doorways should accommodate furniture delivery—standard doorways are 30-32 inches, but measure yours. Hallways require turning clearance for moving furniture from room to room. That sofa fitting in the living room means nothing if it won’t navigate the hallway turn from the entrance.

    Measure your current furniture precisely, including height, width, and depth. Large furniture that fits proportionally in spacious rooms overwhelms small apartments. A king bed appropriate for a 16×18 bedroom consumes a 10×12 apartment bedroom leaving no floor space. A 90-inch sectional sofa perfect for a 20×24 living room dominates a 12×14 apartment living room preventing other furniture or walking space. Be brutally honest about scale—smaller space requires smaller-scale furniture.

    Calculate storage capacity in your new apartment versus current home. Walk-in closets in houses average 50-100 square feet; apartment closets average 4-8 square feet. Basements, attics, and garages provide hundreds of cubic feet of storage that apartments lack. Understanding this storage deficit guides possession decisions. If your apartment has 200 cubic feet of storage and you currently use 800 cubic feet, you must eliminate 75% of stored items or rent storage units (adding $100-200 monthly costs).

    Prioritize rooms by usage when furniture won’t all fit. Most seniors spend 80% of home time in the living room and bedroom. These spaces deserve the most attention and best furniture. Dining rooms and guest bedrooms receive less priority—many successful downsizers eliminate formal dining (eating at kitchen counter or table) and guest rooms (guests stay in hotels or air mattresses in living rooms). Optimize for your daily life, not occasional guests.

    Consider furniture arrangement options, not just fit. A room that technically fits three pieces might only have one workable arrangement, or maybe the only arrangement blocks outlets or windows. Test multiple layouts in your floor plan. If only one arrangement works and it’s awkward, that signals the need for different furniture. Flexibility in arrangement options indicates appropriate furniture sizing.

    Measure vertical space and utilize height. Apartments often have 8-9 foot ceilings providing vertical storage opportunity. Tall bookcases, upper kitchen cabinets, over-door organizers, and wall-mounted shelves maximize space. Measure ceiling heights and window heights to ensure tall furniture fits and doesn’t block windows. Vertical thinking multiplies usable space when floor area is limited.

    Document everything in a “measurement bible”—a three-ring binder or digital folder containing all measurements, photos, floor plans, and furniture dimensions. Reference this constantly during downsizing decisions. When questioning whether to keep furniture, consult your bible. Objective measurements prevent emotional decisions that create problems. Share this documentation with family members helping with decisions or moves—everyone works from the same factual information.

    Tip 2: Use Multi-Functional Furniture to Maximize Space

    Single-purpose furniture wastes precious apartment square footage. Every piece should serve multiple functions or provide hidden storage. This doesn’t mean sacrificing comfort or style—modern multi-functional furniture comes in attractive designs suitable for adult living spaces, not just college dorms. Strategic furniture choices can make an 800-square-foot apartment function like 1,200 square feet through intelligent design.

    Ottoman coffee tables with hidden storage replace traditional coffee tables while providing seating and organization. Quality upholstered storage ottomans ($150-400) hold blankets, magazines, photo albums, or craft supplies while serving as foot rests, extra seating, or even TV trays with a top tray. Choose ottomans with sturdy, flat tops supporting drinks and lightweight items. This single piece replaces a coffee table plus separate storage furniture, saving 8-12 square feet.

    Sofa beds or sleeper sofas accommodate overnight guests without dedicating an entire room to occasional visitors. Modern sleeper mechanisms have improved dramatically—memory foam mattresses and easy-opening frames make guest sleeping comfortable. Mid-range sleeper sofas ($800-1,500) provide daily seating and comfortable guest accommodation. This eliminates the need for a guest bedroom that sits empty 360 days yearly, freeing 100+ square feet for other uses.

    Murphy beds (wall beds) fold up into cabinets when not in use, converting bedrooms into multi-purpose rooms. A bedroom with Murphy bed becomes office, craft room, or exercise space during daytime, then bedroom at night. Quality Murphy bed systems ($1,500-3,500 installed) include surrounding shelving and workspace. For seniors living alone in studio or one-bedroom apartments, Murphy beds in living areas create sleeping space while maintaining daytime openness.

    Console tables that expand to dining tables provide everyday functionality plus entertaining capability. Narrow console tables (12-18 inches deep) fit against walls as sofa tables or entryway pieces, then extend to 30-36 inch depth seating 4-6 people. Prices range $300-800. This eliminates permanent dining tables dominating small living spaces while maintaining the ability to host family dinners. When not extended, the space serves as walkway or additional living area.

    Lift-top coffee tables provide storage underneath plus elevated work surfaces for laptop use or meals from the sofa. The lift mechanism brings the table top up and forward, creating comfortable height for working or eating while seated. These tables ($200-500) typically include storage underneath for remotes, books, and electronics. This combination replaces traditional coffee tables plus TV trays plus side tables, consolidating three furniture pieces into one.

    Nesting tables provide flexible side table options without permanent floor space commitment. Three nesting tables ($100-300) sit together as one unit normally, then separate when you need multiple surfaces for entertaining. The two smaller tables slide under the largest, occupying just 18×24 inches normally but providing three separate surfaces when needed. This flexibility proves particularly valuable in apartments where furniture arrangement changes based on activities.

    Beds with built-in storage drawers eliminate the need for separate dressers. Platform beds with four to six large drawers ($400-1,200) store clothing, linens, or seasonal items underneath. This can eliminate one or two dressers, saving 8-16 square feet of bedroom floor space. Ensure drawer clearance—you need 30 inches of space in front of the bed to pull drawers fully open, so measure your bedroom before committing to this solution.

    Bookcases with doors at bottom provide both display and hidden storage. Open shelves display books, photos, and decorative items, while closed cabinets below hide clutter, paperwork, or items you need but don’t want visible. These dual-purpose pieces ($250-600 for quality units) replace separate bookcases and storage cabinets, consolidating functions. Choose bookcases with adjustable shelves accommodating various item sizes as your needs change.

    Avoid furniture that doesn’t earn its footprint. Decorative chairs nobody sits in, occasional tables holding nothing, display-only furniture serving no practical purpose—these waste space. Every furniture piece should pass the “use test”: you use it at least weekly, or it provides essential storage, or it serves a specific necessary function. Beautiful but useless furniture is a luxury large homes afford; apartments cannot.

    Invest in quality multi-functional pieces rather than cheap single-purpose furniture. A $1,000 Murphy bed system providing bedroom and office space offers better value than a $400 regular bed plus a $400 desk that overcrowd a room. Multi-functional furniture costs more initially but delivers space efficiency impossible to achieve with multiple separate pieces. Calculate cost per function, not just absolute price—a sleeper sofa providing seating and guest bed for $1,200 costs $600 per function, better value than $600 sofa plus $600 guest bed.

    Examples of multi-functional furniture perfect for senior apartment living
    Smart furniture choices maximize space while maintaining comfort and style in smaller apartments
    Visual Art by Artani Paris

    Tip 3: Master the Art of Vertical Storage

    Americans typically use only 50% of available storage space because we think horizontally—floor-based furniture and low shelving. Apartments demand vertical thinking, utilizing wall space from floor to ceiling. This approach can double or triple effective storage without increasing square footage. The key is making high storage accessible and organized, not just cramming items on top shelves where they’re forgotten.

    Install floor-to-ceiling bookcases or shelving units rather than standard 5-6 foot models. An 8-foot tall bookcase provides 60% more shelf space than a 5-foot model while occupying the same floor footprint. IKEA Billy bookcases (7 feet tall, $80-120) or custom built-ins maximize vertical storage affordably. Place frequently-used items at reachable heights (waist to eye level), less-used items higher, and decorative or archival items highest. Use a sturdy step stool for occasional high-shelf access.

    Add upper kitchen cabinets if your apartment has unused wall space above standard cabinets. Many older apartments have soffits or dead space above cabinets that could accommodate additional storage. Installing one or two upper cabinets ($200-400 with installation) provides space for infrequently-used serving pieces, small appliances, or bulk supplies. If structural modifications aren’t allowed, add open shelving or hanging racks for items used less frequently.

    Utilize doors with over-the-door organizers that don’t require installation. Bedroom doors hold shoe organizers storing shoes, accessories, craft supplies, or cleaning products ($15-30). Bathroom doors accommodate towel racks, robe hooks, or hanging organizers for toiletries ($20-40). Closet doors hold belts, scarves, ties, or small items ($10-25). These solutions add 5-10 cubic feet of storage per door without occupying floor or shelf space.

    Install wall-mounted shelves in living areas, bedrooms, and bathrooms for items you use regularly but don’t need furniture to store. Floating shelves ($20-50 per shelf) hold books, plants, photos, or decorative items at various heights creating visual interest while providing function. In bathrooms, wall shelves above toilets utilize otherwise wasted space for toiletries and linens. In bedrooms, shelves beside or above the bed replace bulky nightstands.

    Use furniture with vertical elements like tall dressers (5-6 drawers) instead of wide, low dressers. A 50-inch tall, 30-inch wide dresser provides the same storage as a 35-inch tall, 50-inch wide dresser while saving 20 inches of wall space—significant in small rooms. Similarly, tall narrow bookcases work better than short wide ones. When shopping, compare height-to-width ratios; prioritize vertical designs in space-limited apartments.

    Implement closet organization systems that maximize vertical hanging space. Double hanging rods in closets double capacity—hang shorter items (shirts, folded pants, skirts) on upper and lower rods. Add shelf dividers creating separate cubby spaces for folded items, preventing toppling stacks. Install hooks inside closet doors or on side walls for bags, belts, or jackets. A well-organized small closet can hold as much as a poorly-organized walk-in closet.

    Mount televisions on walls rather than using TV stands. Wall-mounted TVs ($50-150 for professional installation) free up 6-12 square feet occupied by TV stands while creating a cleaner aesthetic. The space under the TV can accommodate a slim console for media devices, or remain open improving perceived room size. Ensure walls can support the weight—drywall alone won’t suffice; mounting requires studs or appropriate anchors for masonry walls.

    Add vertical dividers in cabinets and drawers organizing items standing upright rather than stacked. Sheet pan organizers ($15-25) store baking sheets, cutting boards, and serving platters vertically in cabinets, making everything visible and accessible without unpiling. Drawer dividers create slots for plates stored on edge, doubling capacity versus stacking. This principle works for files, magazines, and craft supplies too—vertical storage prevents the “dig through the pile” problem.

    Create “zones” at different heights for different purposes. Eye-level (4-6 feet) holds daily-use items you access frequently. Upper zones (6-8 feet) store occasional-use items like holiday decorations or off-season clothing. Lower zones (floor-2 feet) hold heavy items or bulky storage bins. This purposeful height organization makes the system functional rather than creating “out of sight, out of mind” storage where items are forgotten.

    Avoid overloading vertical storage creating dangerous toppling hazards. Anchor tall furniture to walls using furniture straps ($10-20 for two straps)—essential in earthquake-prone areas but wise everywhere. Don’t stack items unsecured on high shelves where they might fall. Use bins or boxes containing loose items rather than piling individual objects. The goal is maximizing space safely, not creating hazards defeating the purpose of independent living.

    Tip 4: Choose Light Colors and Mirrors to Expand Visual Space

    Color psychology and strategic mirror placement create illusions of spaciousness transforming cramped apartments into seemingly larger, airier spaces. This costs far less than moving to actual larger apartments ($50-300 for paint and mirrors versus $200-500 monthly rent increases) while delivering measurable perceptual benefits. Studies show light-colored rooms feel 15-30% larger than identically-sized dark rooms according to 2024 environmental psychology research.

    Paint walls in light, neutral colors reflecting maximum light. Whites, soft beiges, light grays, and pale blues make ceilings appear higher and walls farther apart. Benjamin Moore White Dove, Sherwin Williams Accessible Beige, or Behr Swiss Coffee work beautifully in apartments. Avoid stark white which feels institutional; choose warm whites with slight cream or beige undertones creating warmth while maintaining lightness. One gallon ($35-50) covers 350-400 square feet; most apartments need 3-5 gallons for full repainting ($150-250 in materials).

    Use the same color throughout open living areas creating visual continuity. When walls, ceilings, and adjacent rooms share colors, the eye travels uninterrupted creating perceived spaciousness. Contrasting colors between rooms fragment space making each area feel smaller and disconnected. If you want color variety, limit bold colors to small accent walls (one wall per room maximum) keeping the majority light and cohesive.

    Position large mirrors opposite or adjacent to windows doubling natural light and creating depth illusions. A 30×40 inch mirror ($80-200) on the wall across from a window reflects the outdoor view, making the room feel like it has an additional window. Mirrors beside windows capture and distribute sunlight throughout the space. Avoid placing mirrors where they reflect clutter or less attractive views—strategic placement matters as much as size.

    Create mirror gallery walls using multiple smaller mirrors instead of one large mirror. Grouping 5-9 decorative mirrors of various sizes ($15-40 each) creates visual interest while expanding perceived space. Arrange mirrors with 2-4 inches between frames for cohesive grouping. This approach costs less than single large mirrors while adding personality. Use mirrors with frames coordinating with your decor style—warm metallic frames for traditional spaces, simple frames for modern aesthetics.

    Install mirrored closet doors if your apartment allows modifications. Bifold or sliding mirrored doors replace solid doors, instantly making bedrooms feel twice as large. These doors ($200-400 installed) provide full-length mirrors for dressing while visually expanding cramped bedrooms. If permanent installation isn’t permitted, lean oversized standing mirrors ($100-250) against walls—place felt pads underneath preventing floor scratches and wall contact preventing damage.

    Choose furniture with light-colored upholstery and wood tones maintaining the airy feeling. Dark furniture visually weighs down small spaces, while light neutrals and natural woods keep rooms feeling open. Cream, taupe, light gray sofas and chairs with light oak, maple, or whitewashed wood pieces create continuity with light walls. You can add color through easily-changed accessories (pillows, throws) rather than permanent large furniture pieces.

    Maximize natural light by keeping window treatments light and minimal. Sheer white or cream curtains provide privacy while allowing light penetration. Avoid heavy drapes or dark colors blocking windows. If privacy isn’t a concern, leave windows uncovered entirely—nothing expands space like abundant natural light. For windows requiring coverage, top-down/bottom-up shades or cellular shades in white allow flexible light control while maintaining brightness.

    Add reflective or glass surfaces throughout the apartment bouncing light and creating openness. Glass or lucite coffee tables, metallic lamp bases, glossy ceramics, and glass-door cabinets contribute to overall lightness. Unlike solid wood or dark finishes absorbing light, reflective surfaces amplify available light making spaces feel larger and brighter. Balance is key—too much reflection becomes visually cold, so combine reflective elements with warm textiles and wood tones.

    Keep walls relatively clear of heavy artwork or busy patterns that visually close in space. Large-scale, light-colored abstract art or simple landscape photography in light frames contributes to openness better than gallery walls of small dark pieces. If you love displaying many photos or artwork, dedicate one wall as a gallery wall while keeping other walls clear. This focused approach prevents the “covered walls” feeling that shrinks perceived room size.

    Avoid the temptation to use only white throughout—this creates sterile, uncomfortable spaces. Layer shades of cream, beige, soft gray, and warm white for depth and interest while maintaining lightness. Add warmth through wood tones, warm metallics (brass, copper), and warm-toned textiles. The goal is bright and spacious, not cold and institutional. Think “Scandinavian” or “coastal” design rather than “hospital” or “rental white box.”

    Design Element Space-Expanding Choice Space-Shrinking Choice Cost Impact
    Wall Color Light neutrals (white, beige, soft gray) Dark colors (navy, charcoal, burgundy) Same cost
    Furniture Light upholstery, natural wood Dark upholstery, dark wood Same cost
    Mirrors Large, strategically placed None or small decorative only +$100-300
    Window Treatments Sheer, white, minimal Heavy drapes, dark colors -$50-150 (simpler = cheaper)
    Flooring Light wood, light carpet Dark wood, dark carpet Same cost
    Lighting Multiple sources, bright bulbs Single overhead, dim bulbs +$100-200
    Design choices that expand versus shrink perceived apartment size (2025 costs)

    Tip 5: Ruthlessly Curate Belongings Using the “One Year Rule”

    The hardest part of downsizing isn’t arranging furniture—it’s deciding what possessions to keep versus release. Most seniors accumulated belongings across decades, much of it unused for years but laden with emotional significance or “just in case” justification. The one-year rule provides objective criteria cutting through emotional attachment: if you haven’t used, worn, or enjoyed an item in the past year, you won’t use it next year either. This rule eliminates 60-70% of possessions for typical downsizers, according to professional organizers.

    Apply the one-year rule category by category, not room by room. Start with clothing—the easiest category emotionally and physically. Remove every item you didn’t wear in the past year (excluding special occasion items like funeral suits or wedding guest dresses). Be honest: clothes that didn’t fit, styles you felt uncomfortable in, items waiting for weight loss—these won’t get worn. Donate, sell, or give to family. Most people wear 20% of their clothes 80% of the time; downsizing forces identifying that active 20%.

    Tackle kitchen items using frequency of use. Remove duplicate items keeping only the number you actually use. You don’t need 20 coffee mugs when you use the same two favorites daily. Keep one set of dishes for daily use, one nice set for holidays, and donate the rest. Specialty appliances used once yearly (bread makers, fondue pots, electric griddles) can be borrowed, rented, or simply skipped—the occasion isn’t worth the storage space they demand.

    Address hobby and craft supplies realistically. That sewing machine unused for five years won’t suddenly become useful in a smaller space. Unfinished craft projects languishing for years won’t get completed—keep active projects only. Materials for hobbies you’ve moved on from serve no purpose except guilt. Donate usable supplies to senior centers, schools, or craft groups where they’ll actually get used. Focus storage on current, active interests rather than past or aspirational hobbies.

    Books deserve special attention because many seniors have hundreds accumulated over lifetimes. Keep favorites you reread, reference books you consult regularly, and books with significant sentimental value (first editions, signed copies, family heirlooms). Release books you read once years ago and don’t remember, duplicates of classics available at any library, outdated reference books superseded by internet information. Aim to keep 20-30% of your collection—the books that truly matter to you now.

    Paperwork and documents require ruthless culling. Keep only: current year tax documents plus seven prior years, active warranties and manuals, vital records (birth certificates, property deeds, wills), and active financial statements. Shred or recycle: old tax documents beyond seven years, expired warranties, manuals for items you no longer own, old greeting cards (photograph favorites first), magazine clippings you’ve never referenced. Most Americans keep 10x more paper than necessary.

    Sentimental items create the greatest struggle. You can’t keep everything from your children’s childhoods, every gift received, every souvenir purchased. Choose 5-10 truly meaningful items per person or category, photograph the rest, then release. Your children’s artwork: keep their very best pieces, photograph others before recycling. Travel souvenirs: keep a few favorites evoking strong memories, release generic items. Inherited family items: keep pieces you actually love and use, pass others to family members who appreciate them more.

    Apply the “does this serve my life now” test to everything uncertain. Past you might have needed that item, but does current you? Future you might theoretically need it, but realistically will you? If honest answer is no, release it. This principle eliminates “just in case” items that fill storage “in case” scenarios that never occur. Living in 800 square feet means prioritizing items serving your actual current life, not imagined future scenarios.

    Create a “maybe” box for items you can’t decide about immediately. Pack uncertain items in a box, seal it, date it, and store it. If you haven’t needed anything from the box in six months, donate it unopened. This removes decision paralysis while providing security that you’re not being too hasty. Most people never open maybe boxes, realizing they didn’t need or miss those items. The few times you do need something, you can replace it if necessary.

    Offer items to family before donating or discarding. Adult children or grandchildren might want family furniture, dishes, or heirlooms. Give them first choice, but don’t let guilt prevent donating items nobody wants. Many seniors keep things because “the kids might want this,” but when offered, kids decline—they have their own space limitations. Offer once, accept their decision gracefully, then release items without guilt. Your possessions are not their obligation.

    Tip 6: Create Defined Zones in Open-Plan Living Spaces

    Many modern apartments feature open-plan layouts combining living, dining, and kitchen areas in one space. Without defined zones, these areas feel chaotic and cluttered. Strategic furniture placement, area rugs, and lighting create distinct functional areas within open plans, making 600-square-foot spaces feel organized like 1,000-square-foot apartments with separate rooms. This zoning approach provides psychological benefits—clear zones reduce visual stress and help brains process spaces as organized rather than jumbled.

    Use area rugs to define living, dining, and sleeping zones visually. A 5×7 or 8×10 rug under seating furniture anchors a living area. A 4×6 rug under a dining table defines eating space. In studio apartments, a rug under or beside the bed separates sleeping from living areas. Choose rugs in coordinating colors or patterns maintaining visual flow while providing distinction. Ensure rugs lay flat with non-slip pads—tripping hazards defeat the organizational purpose.

    Position furniture creating implied walls or boundaries between zones. A sofa placed perpendicular to a wall (rather than against it) creates a room divider effect, with living space on one side and dining or sleeping on the other. A bookcase used as a room divider provides storage while separating zones. Console tables behind sofas define boundaries while adding surface space. These arrangements eliminate the “everything in one big room” feeling without requiring actual walls.

    Install lighting specific to each zone rather than relying on single overhead fixtures. A living area needs floor lamps beside seating and perhaps a table lamp. A dining area benefits from pendant lights or a chandelier centered over the table. A bedroom zone requires bedside lamps. This layered, zone-specific lighting makes each area feel distinct and appropriately lit for its function. Different lighting levels also create visual separation between zones.

    Use different wall colors or accent walls distinguishing zones in open plans. Paint the wall behind your bed a different color from living area walls, creating visual bedroom definition. An accent wall behind a dining table signals a separate eating zone. Keep colors coordinating—different tones of the same color family rather than wildly contrasting schemes. Too much color contrast fragments small spaces, while subtle shifts create distinction without chaos.

    Add room dividers or screens creating flexible privacy and definition. Folding screens ($100-300), curtain dividers ($50-150 with ceiling track), or open shelving units ($150-400) separate sleeping from living areas in studios or large bedrooms converted to multi-use spaces. These dividers provide visual separation and some sound absorption without permanent construction. Choose dividers allowing light passage—solid walls shrink spaces while translucent or open dividers maintain openness.

    Establish traffic patterns respecting zones you’ve created. Main walkways should go around defined zones, not through them. If you must walk through your living area zone to reach the kitchen, arrange furniture creating a clear pathway rather than forcing navigation around randomly-placed pieces. Think of zones as rooms—you wouldn’t walk through the middle of a traditional living room to reach another area; apply the same logic to open-plan arrangements.

    Vary furniture heights creating visual interest while defining zones. Living areas might feature a low coffee table and low seating. Dining zones have higher tables and chairs. Work zones use desk-height surfaces. This height variation signals functional differences and creates visual rhythm preventing the monotonous “everything at the same height” problem. Varying heights also improves sightlines—you can see across a low living area to a higher dining area beyond.

    Add plants or tall decorative elements marking zone boundaries. A large floor plant placed at the edge of a living area signals “this is the end of this zone.” A tall vase or sculpture on a console table behind a sofa reinforces the boundary. These natural markers create gentle division without harsh lines or bulky furniture. Plants particularly soften open spaces while providing health benefits and visual interest.

    Maintain some visual connection between zones avoiding excessive separation. The goal is organized distinction, not total isolation making the space feel chopped-up. Use coordinating colors, similar styles, or repeated elements (same wood tones, matching metals) creating flow between zones. If your living area features warm beige and blue, incorporate those colors in dining and sleeping zones. This repetition unifies while allowing each zone its distinct character.

    Resist the temptation to cram too many zones into limited space. A 400-square-foot studio realistically accommodates sleeping, living, dining, and possibly small work zones. Attempting to add craft zones, exercise zones, and guest zones creates overcrowded chaos. Prioritize essential zones, and accept that some functions happen in flexible ways (yoga mat in living zone, folded when not in use) rather than requiring dedicated permanent spaces.

    Senior apartment with defined living, dining, and sleeping zones using rugs and furniture placement
    Strategic zoning transforms open-plan apartments into organized, functional living spaces
    Visual Art by Artani Paris

    Tip 7: Prioritize Accessibility and Safety in Layout Decisions

    Downsizing often coincides with declining mobility, making accessibility planning essential during the move rather than afterthought modifications later. Furniture arrangement, storage placement, and pathway clearances directly affect your ability to age safely in place. Poor layouts cause falls, limit independence, and accelerate decline. Strategic accessibility planning costs nothing but prevents injuries potentially costing thousands in medical bills and rehabilitation. According to 2024 CDC data, 40% of senior falls occur in living rooms and bedrooms due to furniture placement and clutter.

    Maintain 36-48 inch clear pathways throughout your apartment, measuring with a tape measure rather than estimating. Walker users need 48 inches minimum; wheelchair users need 5 feet for comfortable navigation. Main traffic routes—entrance to living area, living area to kitchen, bedroom to bathroom—require widest clearances. Secondary paths like approaching storage or less-used furniture can be narrower but never less than 36 inches. Mark desired pathways on your floor plan before placing any furniture.

    Position frequently-used items at reachable heights (waist to shoulder level) eliminating excessive bending or stretching. Store everyday dishes in lower cabinets rather than upper. Keep commonly-worn clothes in middle dresser drawers, not bottom drawers requiring deep bending. Place remote controls, phones, and daily medications on surfaces at seated arm height. This “golden zone” storage (30-60 inches from floor) reduces physical strain and fall risks from excessive reaching or bending.

    Eliminate tripping hazards including throw rugs without non-slip backing, electrical cords crossing pathways, low furniture difficult to see, and floor clutter. Secure all area rugs with proper non-slip pads or double-sided tape. Run cords along walls secured with clips or covers, never across walkways. Choose furniture in colors contrasting with flooring—dark furniture on dark floors creates trip risks from poor visibility. Implement the “clear floor” policy: nothing stored on floors except furniture.

    Install adequate lighting especially in transition areas between rooms and zones. Falls spike at doorways, hallways, and stairs due to inadequate lighting during navigation transitions. Add nightlights along pathways from bedroom to bathroom, living room to kitchen, and entrance to living areas. Motion-sensor lights provide illumination automatically without fumbling for switches. Ensure light switches are located at room entrances, not requiring navigation through dark spaces to reach lighting controls.

    Furniture should have rounded edges and stable bases preventing tipping. Avoid glass-top tables (shattering hazard), unstable tables prone to tipping if leaned on, and furniture with protruding corners at hip or shin height. Choose pieces with sturdy legs and broad bases. If you use furniture for balance support while walking, ensure it can bear your weight without sliding or tipping. Furniture doubling as mobility aids must be securely positioned and stable.

    Create clear zones for assistive devices—walkers, wheelchairs, canes—when not in use. These devices become tripping hazards when left randomly around apartments. Designate spots near the entrance, beside your bed, and near seating where devices remain when you’re not using them. Wall-mounted cane holders ($15-25) or dedicated walker parking spaces keep devices accessible but organized. Never leave assistive devices in pathways or propped against furniture where they might fall.

    Ensure bedroom layout allows emergency exit from both sides of the bed. If one side is against a wall, you’re trapped if you fall on the open side and can’t cross the bed. Position beds allowing access from both sides provides escape routes during emergencies and allows caregivers to assist from either side if needed. This might mean downsizing from a king to a queen bed to fit both-sides-accessible arrangement in smaller bedrooms.

    Position seating allowing safe entry and exit without obstacles. Chairs and sofas need 24-30 inches of clear space in front for sitting and standing. Place seating near but not blocking pathways, so you can approach directly rather than squeezing between pieces. Ensure seating doesn’t face walls at very close distance—feeling trapped spatially increases anxiety and makes safe exiting difficult. Consider sight lines too—seating with clear view of entrance doors provides security awareness of visitors or emergencies.

    Plan for future mobility changes even if current abilities are good. The “can I navigate this in a wheelchair” test prevents needing to rearrange everything when mobility declines. Doorways should stay clear, pathways should accommodate assistive devices, and high-traffic areas should have grab bar installation potential (solid walls, not just drywall). Forward-thinking planning prevents disruptive and expensive future modifications. Aging in place requires designing for 5-10 years ahead, not just today’s abilities.

    Tip 8: Digitize Memories and Documents to Reduce Physical Storage

    Physical photo albums, document boxes, and memorabilia collections consume enormous space in small apartments. Modern technology allows preserving these memories digitally, freeing physical space while actually improving accessibility and preservation. A box of photos sitting in a closet gets viewed rarely if ever; the same photos scanned to a computer or cloud storage become accessible anytime from your tablet or shared easily with family. Digitization projects take time but deliver lasting space and organizational benefits.

    Photograph or scan family photos systematically, working through one album or box at a time. Smartphones take adequate photos of photos—just ensure good lighting and hold the camera parallel to avoid distortion. For higher quality, use a flatbed scanner ($80-150) scanning at 300-600 DPI. Photo scanning services ($0.25-0.75 per photo) offer professional quality if you have hundreds of photos and limited time or tech comfort. Organize digital photos by decade, event, or person, creating folders matching your organizational preferences.

    Scan important documents creating digital backup while eliminating paper storage. Birth certificates, passports, property deeds, insurance policies, medical records, and tax documents can all be scanned to PDFs and stored on your computer plus external hard drive or cloud service for redundancy. Keep original vital records (birth certificates, legal documents) but eliminate copies and supporting paperwork that only needs to exist digitally. A filing cabinet holding 2,000 sheets of paper becomes a 1GB folder occupying zero physical space.

    Convert VHS tapes, cassettes, and old media to digital formats before they degrade further. Services like Legacybox ($40-100 depending on quantity) convert videotapes, film reels, slides, and audio recordings to digital files. If you have dozens of tapes, this investment preserves irreplaceable memories while eliminating boxes of obsolete media no longer viewable without special equipment. Digital versions can be easily shared with family members who’d never borrow boxes of VHS tapes.

    Use photo books for curated memory displays instead of keeping thousands of loose photos. Services like Shutterfly, Snapfish, or Chatbooks ($15-40 per book) let you design photo books from digital images. Create one book per decade, one per family member, or themed books (weddings, vacations, grandchildren). Display 3-5 photo books on a shelf occupying 12 inches of space instead of 10 boxes of photos occupying 15 cubic feet. The books are actually viewable and shareable, unlike boxes stored away forgotten.

    Create digital “memory boxes” organized by person, event, or theme in cloud storage. Google Drive, Dropbox, or iCloud (first 5-15GB free) provide secure storage accessible from any device. Organize folders logically: “Family Photos > Smith Family > Grandchildren > Emma” creates hierarchical structure. Add text files with captions or stories accompanying photos. Share folder links with family members so everyone can access family history. This collaborative approach enriches memories beyond what physical photo boxes stored individually could achieve.

    Back up digital files in multiple locations preventing loss. Keep files on your computer’s hard drive, an external hard drive ($50-100 for 1-2TB), and cloud storage. This three-location rule ensures that if one fails, two backups remain. External hard drives last 5-10 years; replace them periodically transferring files to new drives. Cloud services provide automatic backup reducing risk of human error forgetting to save files manually.

    Release physical items after digitizing without guilt. Photographs exist to preserve memories, not be objects themselves. Once memories are preserved digitally, the physical photos have served their purpose. Keep a few special physical photos if desired—perhaps 20-30 favorites displayed or in one album. Release the rest knowing memories are safe and actually more accessible than when stuffed in boxes. Future generations will appreciate receiving USB drives or cloud links rather than inheriting boxes of deteriorating photos to sort themselves.

    Consider gifting digitized collections to family during your lifetime. Share digital photo collections with adult children and siblings, allowing them to enjoy family history while you’re alive to provide context and stories. Many seniors find this sharing process deeply satisfying—connecting generations through preserved memories. Create shared cloud albums family members contribute to, building collaborative family archives. This transforms dusty boxes into living, growing family repositories.

    Digitize hobby documents and reference materials too. Recipes clipped from magazines, instruction manuals, craft patterns, gardening notes—all can be photographed or scanned then organized digitally. A filing drawer of recipes becomes a digital folder easily searched. Digitized recipes can be enlarged on tablets for easier reading while cooking. Instruction manuals clutter drawers unnecessarily when most are available free online or scannable to PDFs.

    Accept that some physical items hold value beyond their content and deserve keeping. Your grandmother’s handwritten recipe cards, your child’s artwork, love letters from your spouse—these possess physical and emotional significance beyond information content. Don’t digitize and discard everything. Keep a reasonable number of physical sentimental items in a dedicated memory box ($30-50 for attractive storage boxes). The goal is reduction to manageable levels, not elimination of all physical memory objects.

    Tip 9: Invest in Quality Pieces You Love Rather Than Filling Space

    Downsizing offers opportunity to curate your environment intentionally, surrounding yourself with objects you genuinely love rather than accumulation from decades of “good enough” purchases. Small spaces magnify both beauty and mediocrity—every item is visible and impactful. This principle argues for fewer, better possessions over many mediocre ones. One beautiful chair you love beats three cheap chairs filling space. This shift from quantity to quality transforms apartments into personal sanctuaries reflecting your taste and values.

    Evaluate existing furniture honestly: do you love it, or do you keep it because it’s functional? Functional suffices in large homes where mediocre pieces fade into background. Small apartments showcase every piece—mediocrity becomes glaring. If you dislike your current sofa but kept it because “it works,” downsizing offers justification for replacement. Invest in one quality sofa you love ($1,200-2,500) rather than moving a disliked sofa and adding other furniture trying to compensate for its inadequacy.

    Apply the “love it or lose it” test to decorative items. If you don’t actively enjoy looking at something, it’s consuming space without providing joy. Keep art you find beautiful, sculptures you appreciate, photos evoking positive emotions. Release items kept from obligation, gifts you never liked, trendy purchases regretted, or objects you stopped noticing years ago. Every object in view should earn its place through beauty, utility, or meaning—preferably all three.

    Budget more for fewer pieces you’ll use daily rather than spreading money across many items. That $400 invested in an exceptional coffee table bringing daily pleasure delivers better value than four $100 mediocre items you tolerate. Quality furniture lasts decades—buying once for $1,500 beats replacing $500 furniture every 5 years. Calculate cost per year of ownership: a $1,200 chair lasting 15 years costs $80 annually; a $400 chair lasting 4 years costs $100 annually. Quality is economy.

    Seek pieces with emotional resonance or personal significance. Furniture from your childhood home, art from meaningful travels, handcrafted items from local artisans—these objects tell your story and make your apartment distinctly yours. Generic mass-produced décor creates generic spaces. Personal, meaningful objects create home. One inherited table loaded with family history outweighs ten anonymous tables from big-box stores.

    Choose classic, timeless styles over trendy items quickly dated. Quality furniture in traditional, transitional, or simple modern styles remains attractive for decades. Trendy items look outdated in 3-5 years, requiring replacement or living with embarrassingly dated spaces. At 70+, your furniture purchases may be your last—choose styles you’ll love at 80 and 90, not what’s Instagram-popular today. Classic doesn’t mean boring; it means enduring beauty surviving fashion cycles.

    Resist the urge to immediately furnish your entire apartment. Live with essential pieces for 2-3 months understanding how you actually use the space before adding more. You might discover you don’t need everything you thought you did. Many downsizers report that half-furnished apartments feel more spacious and serene than they anticipated, leading to permanent minimalism. Add pieces only when genuine need or opportunity for perfect item arises, not from urgency to “finish” furnishing.

    Seek quality secondhand rather than cheap new. Estate sales, consignment stores, and online marketplaces offer quality furniture at 40-70% below retail. A solid wood dresser from the 1960s ($200-400 used) outlasts and outperforms a particleboard dresser ($300 new) while possessing character modern pieces lack. Inspect used items for structural soundness, but don’t reject based solely on cosmetic issues easily remedied with cleaning or minor repair.

    Curate decorative collections displaying only best examples. If you collected something for decades, keep your 10-20 favorite pieces and release the rest. A focused, high-quality collection displayed beautifully creates more impact than masses of items crowding shelves. Apply museum thinking—museums display 10% of holdings, storing the rest. Your apartment isn’t a storage facility; it’s a curated display of your life’s best treasures.

    Remember that empty space has value. Rooms don’t need every surface covered, every corner filled. Breathing room makes beautiful pieces shine and creates peaceful environments. Japanese aesthetic principles emphasize negative space allowing eyes and minds to rest. In small apartments especially, restraint in quantity elevates quality of chosen pieces. The space around objects matters as much as the objects themselves.

    Tip 10: Establish New Routines and Organizational Systems Immediately

    Successfully downsizing requires new habits matching your reduced space. Systems that worked in 2,500 square feet fail in 800. Establishing organizational routines immediately prevents clutter creep that gradually overwhelms small apartments. The “one in, one out” principle, daily tidying, and ruthless mail management must become automatic habits. Without intentional systems, small spaces quickly become chaotic, undoing all downsizing work and creating constant stress.

    Implement the “one in, one out” rule for all categories: when you acquire something new, remove something existing. Buy new shirt? Donate an old one. Receive a gift? Find something to release. This maintains equilibrium preventing accumulation that downsized spaces can’t accommodate. The discipline feels restrictive initially but becomes liberating—you evaluate all new acquisitions against existing possessions, reducing impulse purchases and thoughtless accumulation.

    Create a daily 10-minute tidying routine, ideally before bed. Return everything to designated homes—dishes to kitchen, clothes to closet, magazines to basket, remotes to tray. This brief daily reset prevents gradual entropy that’s overwhelming to address weekly. In small spaces, disorder multiplies visually because everything is visible. Daily attention maintains order; weekly attention allows chaos to accumulate beyond easy recovery.

    Establish “homes” for every category immediately upon moving in. Mail goes in one designated spot, keys on one hook, medications in one drawer. When everything has a specific home, tidying is mechanical, not decision-making. Label shelves or drawers during initial setup if helpful. The first month’s habits persist indefinitely—good habits make life easy, bad habits create ongoing frustration.

    Manage incoming mail ruthlessly using the “touch it once” principle. Sort mail immediately: trash/recycle (60-70%), pay/respond (20-25%), file (10-15%). Never set mail down to “deal with later”—this creates piles that grow exponentially. Shred/recycle junk mail immediately. Set up online billing eliminating most paper mail. Unsubscribe from catalogs. Most seniors can reduce mail by 80% through aggressive pruning of mailing lists.

    Implement seasonal clothing rotation if closet space is limited. Store off-season clothes in under-bed storage, upper closet shelves, or hall closet. Keep current season clothes in the main closet. This doubles effective closet capacity by ensuring displayed clothes are actually wearable now. Mark calendar for seasonal switches (May 1 and November 1) making it automatic rather than something perpetually postponed.

    Schedule monthly mini-purges addressing accumulation before it becomes overwhelming. Set a recurring calendar reminder: first Saturday monthly, review one category (books, kitchenware, bathroom supplies, decorative items). Remove items you haven’t used since the last review. This ongoing maintenance prevents needing major periodic purges. Small regular attention maintains order; neglect allows chaos requiring disruptive intervention.

    Establish “holding zones” for items exiting your apartment. Keep a donation box or bag in your closet. When you identify items to release, place them immediately in the donation container. When full, drop at donation center—don’t let full boxes sit for weeks. Some seniors schedule monthly donation center trips, ensuring regular outflow matching any inflow. Friction in the removal process causes abandoned donation piles that become clutter themselves.

    Create efficient morning and evening routines utilizing your space optimally. Knowing exactly where everything is and having systems for daily tasks reduces cognitive load and time wasted searching. Morning routine: clothes laid out previous night, breakfast items in same location, keys/wallet/phone in designated spot. Evening routine: dishes cleaned immediately, clothes put away, next day’s items prepared. Routines create efficiency making small-space living smooth rather than cramped.

    Review systems quarterly, adjusting what isn’t working. If mail still piles, modify your system. If clothes overflow the closet, reassess what you’re keeping. If surfaces accumulate clutter, investigate why things aren’t returning to homes. Systems serve you—when they fail, change them rather than blame yourself. Flexibility in methods while maintaining overall principles of organization allows evolution matching your needs and capabilities as they change.

    Real Transformations: Seniors Who Successfully Downsized

    Case Study 1: From 2,400 to 850 Square Feet – Minneapolis, Minnesota

    Eleanor and Frank Morrison (76 and 78 years old) leaving family home after 48 years

    The Morrisons raised four children in their Minneapolis house, accumulating possessions from five decades. When Frank’s mobility declined after a stroke, maintaining the house and navigating stairs became impossible. They resisted downsizing for two years from emotional attachment and overwhelming logistics. Finally, their daughter hired a senior move manager ($1,200 for full service) who guided them through a 6-month downsizing process in early 2025.

    They systematically addressed each room using the one-year rule. The move manager helped photograph family items offered to children, arranged estate sale for unwanted furniture ($2,800 earned), and coordinated movers. They kept: one small sofa (sold 3-piece sectional), lift chair, queen bed (from king), one dresser each (from three), and carefully curated decorative items. The 850-square-foot apartment felt spacious with proper furniture scaling. They installed floor-to-ceiling shelving for books and added mirrors expanding perceived space.

    Results:

    • Reduced monthly housing costs by $1,400 (mortgage + maintenance vs. apartment rent)
    • Eleanor reported feeling “lighter” emotionally—relieved from stuff management burden
    • Frank’s mobility improved with accessible, single-floor layout and grab bars
    • After six-month adjustment, both reported preferring apartment living: “We should have done this sooner”

    “I thought leaving our house would break my heart. Instead, I felt liberated. The stuff we accumulated over 48 years had become a burden, not a treasure. Our apartment has everything we need, nothing we don’t. We spend time living instead of maintaining a house and managing possessions.” – Eleanor Morrison

    Case Study 2: Solo Downsize on Fixed Income – Tucson, Arizona

    Carmen Ramirez (72 years old) widowed, living on Social Security

    Carmen’s husband died in 2023, leaving her with a 1,800-square-foot house she couldn’t afford or maintain alone. Social Security provided $1,700 monthly—barely covering the mortgage. She needed to downsize to a $900/month apartment but had limited savings for moving costs. She tackled downsizing herself over eight months in 2024-2025, selling furniture through Facebook Marketplace ($1,400 earned) and Craigslist, donating extensively to local charities, and asking church friends for moving help.

    Carmen’s biggest challenge was releasing her husband’s belongings—his workshop, clothes, collections. A grief counselor helped her understand that keeping possessions wouldn’t keep memories alive. She photographed everything, kept a few meaningful items, and donated the rest to veterans’ organizations her husband had supported. For her 650-square-foot apartment, she kept only furniture that fit the measured floor plan. She painted one wall terracotta, added smart lighting ($150), and positioned mirrors strategically.

    Results:

    • Reduced monthly costs by $1,200 (house expenses vs. apartment rent + utilities)
    • Total moving costs: $800 (paint, small truck rental, helpers’ lunch, supplies)—covered by furniture sales
    • Carmen created a cozy, personal space reflecting her taste rather than maintaining “our” house frozen in time
    • Joined apartment complex’s social activities—made new friends reducing widow isolation

    “I was terrified of downsizing alone on my limited budget. Taking it slow, selling things myself, and accepting help made it possible. My apartment isn’t as big as my house, but it’s mine. I can afford it comfortably, and it’s actually easier to keep clean and warm. I wish I hadn’t waited so long out of fear.” – Carmen Ramirez

    Case Study 3: Pre-emptive Downsizing While Still Healthy – Portland, Oregon

    Michael and Susan Chen (68 and 67 years old) planned downsizing before crisis

    Unlike many seniors downsizing from necessity, the Chens proactively downsized while healthy and active in early 2025. They observed friends struggling with crisis-driven moves after health emergencies and decided to downsize on their terms while able to manage the process thoughtfully. They sold their 2,600-square-foot house and moved to a 1,100-square-foot condo in a walkable urban neighborhood they loved but couldn’t afford when raising children.

    They took 10 months systematically downsizing, applying ruthless curation. They asked: “Does this serve our life now or our life five years ago?” Released: duplicate kitchenware, excess furniture, professional wardrobes (they’re retired), hobby equipment from abandoned interests, books they’d never reread. Kept: favorites from each category, travel souvenirs with strong memories, art they loved, and enough entertaining items for family gatherings. They invested in quality replacements scaled for the condo—beautiful sofa, lift chairs, perfect-sized dining table.

    Results:

    • House sale profit plus reduced housing costs funded travel and hobbies previously unaffordable
    • Walkable location eliminated car dependency—Susan stopped driving due to vision changes without life disruption
    • Maintenance-free condo living freed 10-15 hours weekly previously spent on house upkeep
    • Both reported increased life satisfaction: “We designed our retirement lifestyle instead of defaulting to old patterns”

    “Downsizing before we had to was the smartest decision of our retirement. We controlled every aspect rather than making desperate decisions during a health crisis. We live in a neighborhood we love, in a beautiful space we chose carefully, with only possessions that matter. Our friends say we’re brave, but it’s not bravery—it’s intentional living.” – Susan Chen

    Frequently Asked Questions

    How long does downsizing typically take from start to finish?

    Timeline varies based on starting point and urgency. Planned downsizing averages 6-10 months: 2-4 months sorting and purging, 1-2 months finding an apartment, 1-2 months selling/donating, 2-3 months transition. Crisis-driven downsizing compresses this to 1-3 months causing significantly more stress. Allow longer if possible—rushing leads to regretted decisions and incomplete purging that continues plaguing you. If you have 6+ months, use them. The psychological benefits of gradual transition outweigh urgency’s temporary efficiency.

    Should I downsize before or after selling my house?

    Ideally, downsize possessions before listing your house for sale. Decluttered homes show better, photograph better, and sell faster at higher prices. Real estate agents report that staged, minimalist homes sell 30% faster than cluttered homes. Start purging 3-4 months before listing, intensifying as sale approaches. If you must sell quickly, consider temporary storage ($100-200 monthly) for excess items while downsizing post-sale. However, this adds stress and cost—better to declutter first when possible. Never move items you’ll immediately discard—purge before moving to reduce moving costs.

    What do I do with items my adult children don’t want but I feel guilty discarding?

    First, truly offer items with clear deadline: “I’m downsizing by March. Please take anything you want by February 15th.” After the deadline, guilt-free donation or sale is appropriate. Your children’s possessions are not your obligation beyond reasonable offering. Many seniors keep items “for the kids” that kids explicitly rejected—this serves neither party. Photograph items before donating so children can request copies if regret arises (rarely happens). Remember: burdening children with unwanted inheritance later is worse than donating now. Release guilt—you raised them, provided for them, and offered items. Your job is complete.

    How do I handle the emotional grief of leaving my family home?

    Recognize grief as legitimate and necessary rather than weakness to suppress. Allow yourself to mourn. Take photos or videos of every room before leaving. Write memories associated with spaces. Create a memory book combining photos and stories. Have a closing ritual—final walk-through alone or with family, saying goodbye to rooms and memories. Consider short-term counseling if grief feels overwhelming—many seniors benefit from 4-6 therapy sessions during major transitions. Join senior support groups where others share similar experiences. Understand that grief lessens with time—most seniors report that after 6 months in new apartments, attachment to old houses fades replaced by appreciation for current homes.

    Can I successfully downsize if I’m not naturally organized or good at making decisions?

    Yes, but consider hiring help. Senior move managers ($1,000-3,000 depending on scope), professional organizers ($50-100/hour), or even organized family members or friends can guide the process. These helpers provide objective opinions, make decisions when you’re paralyzed, and maintain momentum when you feel overwhelmed. The cost is investment in mental health and successful outcome. Alternatively, use structured decision frameworks: one-year rule, keep/maybe/go boxes, photograph-then-release for sentimental items. Systems compensate for natural disorganization. Many naturally disorganized seniors successfully downsize using external structure and help.

    What’s the biggest mistake seniors make when downsizing?

    Moving too much furniture that doesn’t fit, creating immediate regret and expensive problems. Measure everything first—apartment dimensions and all furniture. Create scaled floor plans testing arrangements. Be ruthlessly honest about scale—furniture perfect for 18×20 rooms overwhelms 12×14 apartments. Second biggest mistake: not purging enough initially, then struggling with cramped apartments requiring second-round purging that’s more stressful than doing it right initially. Third mistake: rushing the process making desperate decisions later regretted. Start early, measure accurately, purge thoroughly. These prevent most common downsizing disasters.

    How do I know if I’m downsizing too much versus not enough?

    “Too much” feels barren, uncomfortable, and lacking necessary items. “Not enough” feels cramped, cluttered, and difficult to navigate. Test by living with reduced items before final decisions. Create a “maybe” box for uncertain items—if you haven’t needed them in 6 months, you downsized appropriately. Most seniors err toward keeping too much rather than too little. If your new apartment feels crowded after move-in, continue purging. If it feels empty, you can add. Start conservative (less is more) and add back if truly needed. Furniture and items are replaceable; storage space is not.

    Should I rent storage for items I can’t decide about immediately?

    Storage units make sense for true short-term transitions (3-6 months) while settling into apartments and finalizing decisions. Long-term storage ($100-200 monthly) quickly becomes expensive—$1,200-2,400 annually storing items worth less than rental costs. Many seniors rent storage “temporarily” that becomes permanent, paying thousands storing forgotten items. If considering storage, set a firm 6-month deadline for retrieval or donation. Better approach: use “maybe” boxes in your apartment—if you haven’t retrieved items in 6 months, donate unopened. This costs nothing and forces honest evaluation of actual need.

    How do I maintain my identity and sense of home in a smaller space?

    Display curated items reflecting your life, interests, and values rather than generic décor. Keep your 20-30 favorite photos rather than all 500. Display the 10 travel souvenirs evoking strongest memories. Hang artwork you love. Use furniture you find beautiful. Smaller space doesn’t mean less personality—it means more intentional expression. Create one “memory wall” or shelf showcasing life’s highlights. Use colors you love. Maintain hobbies important to you even if space is limited. Identity comes from chosen, meaningful objects, not quantity of possessions. Many seniors report feeling more “themselves” in curated apartments than in cluttered houses where meaningful items got lost among masses of stuff.

    What if I downsize and then regret giving away specific items?

    Genuine regret is actually rare—most fears about regret exceed actual experience. Research shows only 5-10% of downsizers truly regret specific donation decisions. Photograph everything before releasing it—photos preserve memories and appearance. Keep a “released items” notebook listing what went where and why—this reduces anxiety about future regret by documenting thoughtful decisions. If you do regret something, assess if it’s genuine need or nostalgia. Can the item be replaced if truly necessary? Often yes, affordably. Can you borrow from family/friends if occasionally needed? Usually yes. The relief from living uncluttered vastly outweighs rare regret about specific items.

    Is it better to downsize gradually or all at once in intensive effort?

    Gradual downsizing (6-10 months) causes less emotional and physical stress, allows thoughtful decisions, and provides adjustment time. Work through categories systematically—clothes one month, kitchen next month, books following month. This steady approach prevents burnout and desperation decisions. Intensive downsizing (1-3 months) suits those with urgent timelines but creates overwhelm and regret. However, even within urgency, work systematically rather than randomly. If forced to intensive timeline, hire help—professional organizers, move managers, or dedicated family members. Regardless of pace, systematic approach beats chaotic rushing. Gradual when possible; intensive with help when necessary.

    Action Plan: Your 10-Step Downsizing Roadmap

    1. Measure your new apartment precisely and create a scaled floor plan – Before making any decisions, obtain exact dimensions of every room, doorway, hallway, and closet. Draw a floor plan using graph paper or free software like RoomSketcher. Measure your current furniture. Test arrangements virtually before moving anything. This objective data prevents emotional decisions creating practical problems. Spend 2-3 hours on this foundational step—it guides every subsequent decision.
    2. Establish your timeline and work backwards to create schedule – If moving in 6 months, allocate: Month 1-2 for sorting and initial purging, Month 3 for major furniture decisions, Month 4 for selling/donating, Month 5 for final purging and packing, Month 6 for moving. Break large tasks into weekly mini-goals. Write deadlines on a calendar. Share timeline with family helping you. Accountability prevents perpetual postponement. Adjust timeline if urgent but maintain systematic approach even if compressed.
    3. Apply the one-year rule systematically to every category – Start with easiest category emotionally (usually clothing) building confidence for harder categories (sentimental items, collections). If you haven’t used, worn, or enjoyed something in 12 months, you won’t use it next year. Be ruthlessly honest. Create three piles: keep, donate, undecided. Place “undecided” items in dated boxes—if unused in 6 months, donate unopened. Work through one category weekly: Week 1 clothing, Week 2 kitchen, Week 3 books, Week 4 hobby items, Week 5 decorative items, Week 6 furniture decisions.
    4. Offer family items to relatives with clear deadlines – Email or call family members: “I’m downsizing and offering items you might want. Please respond by [date 4 weeks out] with what you’d like. Anything not claimed will be donated.” Include photos of available items. Set firm pickup deadline. After deadline, guilt-free donation proceeds. Don’t let “maybe someone wants this” prevent releasing items. Family has had opportunity; your responsibility ends there. This prevents storing items indefinitely hoping someone eventually wants them.
    5. Sell valuable items but donate everything else without guilt – Selling takes significant time and energy. Determine what’s worth this effort—antiques, jewelry, quality furniture might justify selling. Everything else should be donated immediately rather than languishing while you “plan to sell it.” The opportunity cost of your time and the storage space occupied often exceeds potential sale proceeds. Use Facebook Marketplace or Craigslist for valuable items ($100+). Donate the rest to Goodwill, Salvation Army, or charities providing free pickup. Release quickly rather than perfect monetization.
    6. Choose multi-functional furniture scaled appropriately for your space – Every furniture piece should serve 2-3 purposes or provide hidden storage. Replace oversized pieces with properly-scaled alternatives—queen bed instead of king, loveseat instead of sofa, console table that expands for dining. Invest in quality multi-functional pieces ($800-1,500 per major item) rather than cheap single-purpose furniture. Sofa with storage, ottoman serving as coffee table and seating, bed with drawers underneath—these choices maximize limited space effectively.
    7. Implement vertical storage solutions throughout your apartment – Install floor-to-ceiling shelving, add upper cabinets where possible, use over-door organizers, mount TVs on walls, choose tall narrow furniture over short wide pieces. Think upward, not outward. This approach doubles or triples effective storage without consuming additional floor space. Invest $200-500 in shelving, organizers, and mounting hardware. Ensure high storage remains accessible with a sturdy step stool. Organize vertically by frequency of use—eye level for daily items, upper areas for occasional use.
    8. Paint walls light colors and position mirrors strategically – Light, warm neutrals (soft white, beige, warm gray) make apartments feel 20-30% larger than dark colors. Paint main living areas including bedroom in cohesive light palette ($150-300 for paint and supplies). Position large mirrors ($80-200 each) opposite or adjacent to windows reflecting light and views. Create mirror groupings on empty walls. This visual expansion costs far less than moving to actual larger spaces while delivering significant perceptual benefits.
    9. Digitize photos, documents, and memorabilia freeing physical space – Scan or photograph family photos, important documents, and memorabilia preserving memories digitally (free using smartphone, $100-300 for scanning service if preferred). Store digital files on computer, external hard drive ($50-100), and cloud service (first 5-15GB free). Create digital photo books ($20-40 each) with curated favorites. Release physical items after digitization—memories are preserved and more accessible than boxes stored away. This single project can eliminate 10-20 cubic feet of stored materials.
    10. Establish organizational systems and daily routines immediately – Upon moving in, designate homes for every category before unpacking completely. Implement “one in, one out” rule, daily 10-minute tidying, and ruthless mail management from day one. First month’s habits persist indefinitely—establishing good systems early prevents clutter creep that gradually overwhelms small spaces. Write down your systems (where things go, daily routines, weekly maintenance tasks) and post somewhere visible until habits form automatically (usually 6-8 weeks). Systems maintain the hard-won organization achieved through downsizing.


    Disclaimer
    This article provides general interior design and downsizing guidance for seniors and does not constitute professional organizing services, real estate advice, legal counsel, or moving services. Individual circumstances vary significantly including physical capabilities, financial resources, family situations, and emotional readiness for downsizing. Consult with professional organizers, senior move managers, real estate agents, or financial advisors for personalized guidance. The timeline and cost estimates provided represent averages and may not reflect your specific situation. Always verify furniture dimensions, apartment regulations, and lease terms before making modifications or purchases.
    Information current as of October 2, 2025. Moving and downsizing best practices continue evolving.

    Get Monthly Downsizing and Organization Tips

    Receive practical downsizing strategies, space-saving ideas, and emotional support for seniors navigating home transitions—delivered free every month.

    Related Articles

    Published by Senior AI Money Editorial Team
    Updated October 2025
  • Paris Travel Guide for Seniors 60+

    Paris Travel Guide for Seniors 60+

    Senior couple enjoying romantic sunset at Trocadero with Eiffel Tower view
    Visual Art by Artani Paris | Paris 16th arrondissement

    Paris after 60 isn’t just about checking off landmarks. It’s about savoring a leisurely breakfast at a Montmartre café, discovering hidden gardens in the Marais, and experiencing the city’s timeless romance at your own pace. This comprehensive guide shows you how to navigate Paris with accessibility, comfort, and style—whether you’re walking cobblestones or taking advantage of senior discounts at world-class museums.

    Table of Contents

    1. Planning Your Paris Adventure: Timing, Budget & Health
    2. Getting Around: Metro, Taxis & Accessible Transport
    3. Best Neighborhoods for Seniors: Where to Stay & Explore
    4. Museums & Culture: Senior Discounts & Accessibility
    5. Dining in Paris: From Bistros to Michelin Stars
    6. Parks & Gardens: Peaceful Retreats in the City
    7. Day Trips: Versailles, Giverny & Beyond
    8. Practical Tips: Safety, Healthcare & Communication
    9. Frequently Asked Questions

    “Paris is always a good idea, but at 60+, it becomes an even better one. You finally have the time to truly see the city.”

    – Travel writer Ernest Hemingway (adapted)

    1. Planning Your Paris Adventure: Timing, Budget & Health

    The key to enjoying Paris at 60+ is thoughtful planning that balances ambition with comfort. Unlike rushed young travelers, you have the wisdom to pace yourself and the resources to prioritize quality over quantity.

    When to Visit: Seasonal Considerations

    Spring (April-June): Ideal weather (60-70°F), blooming gardens, manageable crowds. Book 3-4 months ahead.

    Fall (September-October): Comfortable temperatures, golden foliage, cultural season begins. Paris Fashion Week brings energy but higher prices.

    Winter (November-March): Fewer tourists, lower hotel rates, indoor attractions shine. Pack layers for 35-45°F weather.

    Summer (July-August): Warm (75-85°F) but crowded. Many Parisians vacation, so neighborhoods feel less authentic. Heat can be challenging for seniors without AC.

    Insider Tip: Late September to mid-October offers the best balance: warm days, cool evenings, harvest season in nearby wine regions, and manageable tourist levels.

    Budget Planning: What to Expect

    Category Budget Mid-Range Luxury Notes
    Hotel (per night) €80-120 €150-250 €350+ 3-star to 5-star
    Meals (per day) €40-60 €80-120 €200+ 2-3 meals + café
    Transport (per day) €8-15 €20-40 €60+ Metro vs taxis
    Attractions (per day) €15-25 €30-50 €80+ Senior discounts available
    Total (per day) €143-220 €280-460 €690+ Per person
    7-Day Trip $1,100-1,700 $2,150-3,500 $5,300+ Excluding flights

    Health Preparations

    Before departure:

    • Travel insurance: Get comprehensive coverage including medical evacuation (€50-150 for 7 days)
    • Medications: Bring 2-week supply in original containers with prescriptions
    • Doctor consultation: Discuss walking capacity, get vaccinations if needed
    • European Health Insurance Card (EHIC): For EU citizens, covers emergency care
    • Medical records: Keep digital copies on phone (English translation)

    ⚠️ Important: French pharmacies (pharmacie) are well-stocked and pharmacists can provide basic medical advice. Look for the green cross sign. Most stay open until 8 PM.

    2. Getting Around: Metro, Taxis & Accessible Transport

    Paris’s public transportation is extensive, but not all stations have elevators. Planning your mobility strategy is crucial for comfort.

    Metro & RER: The Basics

    Senior Advantages:

    • No specific senior discount for tourists (discounts are for residents)
    • Day passes (Mobilis): €8.45 for zones 1-2 (covers central Paris)
    • 10-ticket carnet: €16.90 (€1.69 per ride vs €2.10 single)
    • Navigo Découverte: €5 card + weekly pass €30 (unlimited travel zones 1-5)

    Accessibility Tip: Only 9% of Paris Metro stations are wheelchair accessible. Download the “Paris Metro” app to identify accessible stations. Lines 14 and RER B have the most elevators.

    Taxis & Ride-Sharing

    Official Taxis (White with “TAXI PARISIEN” sign):

    • Daytime rate (10 AM-5 PM): €1.13/km
    • Higher rates evenings/weekends
    • Minimum charge: €7.30
    • Airport to center: €50-70 (fixed rates available)
    • Tip: Round up to nearest €5

    Uber/Bolt: Widely available, often 20-30% cheaper than taxis. Book through apps (English interface).

    Private Transfer Services: For airport arrival with mobility concerns, pre-book wheelchair-accessible vans (€80-120 one-way).

    Walking Paris: Pace Yourself

    Central Paris is compact (3.5 miles across), making it walkable—but beware:

    • Cobblestones: Marais, Montmartre, Île de la Cité. Wear sturdy, rubber-soled shoes.
    • Hills: Montmartre is steep. Take the funicular (€2.10) instead of stairs.
    • Rest stops: Plan café breaks every 60-90 minutes.
    • Public restrooms: Scarce. Use café toilets (order coffee for courtesy).
    Walking Route Distance Time Difficulty Highlights
    Tuileries to Louvre 0.5 mi 15 min Easy Flat, paved, gardens
    Notre-Dame to Sainte-Chapelle 0.3 mi 10 min Easy Île de la Cité
    Eiffel Tower to Trocadéro 0.7 mi 20 min Easy Best photo spot
    Montmartre circuit 1.2 mi 45 min Hard Steep hills, stairs

    3. Best Neighborhoods for Seniors: Where to Stay & Explore

    Paris is divided into 20 arrondissements (districts) spiraling clockwise from the center. Here are the best for senior travelers:

    1st & 2nd Arrondissements (Louvre, Palais-Royal)

    Why Stay Here:

    • Central location, flat terrain
    • Walking distance to major sites
    • Excellent public transport connections
    • High-quality restaurants and shops

    Best For: First-time visitors who want convenience

    Hotel Range: €180-400/night (3-4 star)

    5th & 6th Arrondissements (Latin Quarter, Saint-Germain)

    Why Stay Here:

    • Intellectual, café-filled atmosphere
    • Luxembourg Gardens nearby
    • Charming bookshops and boutiques
    • Less touristy than 1st arrondissement

    Best For: Culture lovers, repeat visitors

    Hotel Range: €150-350/night

    Local Favorite: Rue Mouffetard (5th) is a pedestrian market street perfect for morning strolls. Avoid weekends when it’s packed.

    7th Arrondissement (Eiffel Tower, Invalides)

    Why Stay Here:

    • Elegant, residential feel
    • Wide boulevards, easier walking
    • High-end shopping and dining
    • Quieter than central districts

    Best For: Relaxed, upscale experience

    Hotel Range: €200-500/night

    Neighborhoods to Avoid

    • 18th (Barbès, Château Rouge): Crowded, less safe at night
    • 19th & 20th (Outer districts): Far from attractions, limited English
    • Around Gare du Nord: Transit hub, higher crime

    4. Museums & Culture: Senior Discounts & Accessibility

    Paris offers free or reduced admission to seniors at many museums—but age requirements vary by nationality.

    Top Museums with Senior Benefits

    Museum Regular Price Senior Discount Accessibility Time Needed
    Louvre €22 Free (EU 65+) Wheelchairs available 3-4 hours
    Musée d’Orsay €16 Free (EU 65+) Fully accessible 2-3 hours
    Rodin Museum €14 Free (EU 65+) Garden accessible 1.5-2 hours
    Orangerie €12.50 Free (EU 65+) Fully accessible 1-1.5 hours
    Versailles €27 No discount Wheelchairs, golf carts Half day

    Pro Tip: Non-EU seniors get discounts at some museums but not all. Always bring passport/ID to prove age. Many museums offer free admission on first Sunday of each month (expect crowds).

    Louvre Strategy for Seniors

    The Louvre is overwhelming (35,000 artworks). Focus on these for a 3-hour visit:

    1. Denon Wing (Ground Floor): Italian sculpture, Mona Lisa (arrive at opening 9 AM)
    2. Sully Wing (Ground Floor): Egyptian antiquities, Venus de Milo
    3. Denon Wing (First Floor): French paintings (Delacroix, Géricault)

    Rest stops: Café Mollien (2nd floor, Denon Wing) has seating with a view.

    Wheelchair rental: Free at main entrance, deposit required.

    5. Dining in Paris: From Bistros to Michelin Stars

    French dining is an experience, not just a meal. At 60+, you can afford to slow down and truly savor it.

    Meal Timing & Etiquette

    • Breakfast (7-10 AM): Light—croissant, coffee. Hotels often charge €15-25.
    • Lunch (12-2:30 PM): Many restaurants offer prix-fixe menus (€18-35 for 2-3 courses).
    • Dinner (7:30-10 PM): Reservations essential. Arrive by 8 PM to avoid rush.

    Etiquette Tips:

    • Wait to be seated (don’t choose your own table)
    • Order water: “une carafe d’eau” (free tap water) or bottled
    • Service included in bill—small tip (€2-5) appreciated but optional
    • Say “L’addition, s’il vous plaît” to request the check

    Recommended Restaurants by Budget

    Budget-Friendly Bistros (€20-40/person):

    • L’Avant Comptoir (6th): Stand-up tapas bar, no reservations
    • Chez Gladines (13th): Hearty Basque cuisine, large portions
    • Le Relais de l’Entrecôte (6th): One menu—steak-frites, unlimited fries

    Mid-Range Classic (€50-80/person):

    • Le Comptoir du Relais (6th): Yves Camdeborde’s bistro, book 2 weeks ahead
    • Frenchie (2nd): Modern French, excellent wine list
    • Bouillon Chartier (9th): Historic brasserie since 1896, Belle Époque decor

    Special Occasion (€150+/person):

    • Le Jules Verne (7th): Eiffel Tower, 1 Michelin star, spectacular views
    • L’Arpège (7th): 3 Michelin stars, vegetable-focused tasting menu
    • Guy Savoy (6th): 3 Michelin stars, artichoke soup signature dish

    Dietary Restrictions: Vegetarian/vegan options increasing but still limited. Learn key phrases: “Je suis végétarien(ne)” (vegetarian), “sans gluten” (gluten-free), “allergie aux noix” (nut allergy).

    6. Parks & Gardens: Peaceful Retreats in the City

    Paris’s parks offer respite from urban intensity—perfect for seniors seeking quiet moments.

    Top 5 Senior-Friendly Parks

    1. Luxembourg Gardens (6th)

    • 60 acres of formal French gardens
    • Free green metal chairs throughout (move anywhere)
    • Flat, paved paths ideal for walking
    • Café with terrace overlooking pond
    • Best time: Early morning (8-10 AM)

    2. Tuileries Garden (1st)

    • Between Louvre and Place de la Concorde
    • Wheelchair accessible throughout
    • Multiple cafés and restrooms
    • Art installations seasonally

    3. Jardin des Plantes (5th)

    • Botanical garden with 10,000 species
    • Alpine garden, rose garden, iris garden
    • Natural History Museum on-site
    • Quieter than Luxembourg

    4. Parc Monceau (8th)

    • Elegant, less crowded
    • Colonnade, statues, Renaissance arch
    • Lovely in spring (cherry blossoms)
    • Surrounded by upscale neighborhood

    5. Promenade Plantée (12th)

    • Elevated linear park (like NYC’s High Line)
    • 2.9 miles of greenway
    • Walk at your pace, exit anytime
    • Art galleries beneath viaduct


    7. Day Trips: Versailles, Giverny & Beyond

    Paris’s surroundings offer enriching excursions—but choose carefully to avoid exhaustion.

    Versailles Palace (Easy, Half-Day)

    Getting There: RER C from Paris (40 min, €7.60 round-trip)

    What to See:

    • Palace apartments (audio guide €3 extra)
    • Hall of Mirrors (peak 11 AM-2 PM)
    • Gardens (free except musical fountain days)
    • Marie Antoinette’s Estate (mini-golf cart rental €40)

    Senior Tips:

    • Book timed-entry tickets online ($20)
    • Arrive by 9:30 AM
    • Skip Trianon if mobility limited (1 mile walk)
    • Wheelchair rental at visitor center

    Giverny (Monet’s Garden) – Moderate, Full-Day

    Getting There: Train to Vernon (50 min, €16), then bus to Giverny (15 min, €5)

    Best Time: April-October, especially late April-May (tulips, wisteria)

    Duration: 2-3 hours at gardens + 1 hour village

    Accessibility: Gravel paths, some stairs. Not wheelchair accessible.

    Loire Valley Châteaux (Hard, Full-Day)

    Recommendation: Join organized tour (€180-250 including lunch)

    Independent travel difficult without car. Tours handle logistics, provide English guides, and offer comfortable coaches.

    Typical itinerary: Chambord + Chenonceau, depart Paris 8 AM, return 7 PM


    8. Practical Tips: Safety, Healthcare & Communication

    Safety Considerations

    Paris is generally safe, but seniors should be aware of common scams:

    • Petition scam: People ask you to sign petition, then demand donation. Politely refuse.
    • Gold ring scam: Someone “finds” gold ring near you, offers to share value. It’s fake brass.
    • ATM skimming: Use ATMs inside banks. Cover keypad when entering PIN.
    • Pickpockets: Crowded metro, tourist sites. Keep wallet in front pocket, bag zipped and in front.

    Emergency Numbers:
    • Police: 17
    • Ambulance: 15
    • Fire: 18
    • English-speaking crisis line: 01 46 21 46 46

    Healthcare Access

    For Minor Issues:

    • Pharmacies (green cross sign): Over-the-counter meds, basic consultation
    • 24-hour pharmacy: Pharmacie Les Champs, 84 Avenue des Champs-Élysées

    For Medical Care:

    • American Hospital of Paris: English-speaking, U.S.-trained doctors (expensive without insurance)
    • Address: 63 Boulevard Victor Hugo, Neuilly-sur-Seine
    • Phone: +33 1 46 41 25 25

    Essential French Phrases

    • Bonjour = Hello (ALWAYS say this first)
    • Merci = Thank you
    • Pardon = Excuse me
    • Parlez-vous anglais? = Do you speak English?
    • L’addition = The check
    • Où sont les toilettes? = Where’s the bathroom?

    • Combien ça coûte? = How much?
    • Au secours! = Help!
    • J’ai besoin d’un médecin = I need a doctor
    • Je suis perdu(e) = I’m lost
    • Trop cher = Too expensive
    • C’est délicieux = It’s delicious


    Frequently Asked Questions

    1. Is Paris safe for solo senior travelers?

    Yes, Paris is generally safe. Stick to well-lit areas at night, avoid empty metro cars, and stay alert in crowded tourist spots. Solo women travelers should avoid Barbès and Château Rouge areas after dark. Consider joining day tours to meet other travelers.

    2. How much walking can I expect per day?

    Expect 3-5 miles daily for a moderate pace (6,000-10,000 steps). Museums add 1-2 miles of indoor walking. Plan frequent rest stops and don’t hesitate to take taxis between distant sites. Versailles alone involves 2-3 miles.

    3. Can I get by without speaking French?

    In tourist areas, yes. Hotels, major museums, and popular restaurants have English-speaking staff. However, learning basic phrases shows respect and dramatically improves interactions. Parisians appreciate the effort, even if your pronunciation is imperfect.

    4. What’s the best way to handle jet lag at 60+?

    Arrive in morning, resist napping, stay outdoors in natural light, and push through until 8-9 PM local time. Adjust your sleep schedule 2-3 days before departure (go to bed 1 hour earlier each night). Stay hydrated on flight. Consider melatonin (consult doctor first).

    5. Should I buy Paris Museum Pass?

    Depends on your pace. 4-day pass (€85) covers 50+ sites. You’d need to visit 5-6 major museums to break even. If you’re EU citizen 65+, many museums are free anyway, making the pass unnecessary. For non-EU seniors who plan to visit extensively, it’s worth it.

    6. What about tipping in Paris?

    Service (15%) is included in restaurant bills by law. Additional tipping is optional but appreciated: round up to nearest €5 for good service, or leave 5-10% for exceptional meals. Tip taxi drivers by rounding up fare. Hotel porters: €2-5 per bag.

    7. How do I avoid tourist trap restaurants?

    Warning signs: multilingual menus with photos, staff aggressively soliciting outside, proximity to major monuments. Instead, walk 2-3 blocks away from landmarks, look for restaurants full of locals, check Google reviews, and avoid places advertising “traditional French food” in English.

    8. Is travel insurance really necessary?

    Absolutely essential. Medicare doesn’t cover international travel. A hospital visit in Paris can cost $10,000+. Comprehensive travel insurance ($150-300 for a week) covers medical emergencies, evacuation, trip cancellation, and lost luggage. Don’t skip this—it’s the most important investment for senior travelers.

    9. Can I use my phone/data in Paris?

    Check with your carrier. Many U.S. plans include international roaming (AT&T, T-Mobile, Verizon). EU citizens have roaming included. Otherwise, buy a local SIM card at airport (€20-40 for 2 weeks) or use portable WiFi device. Free WiFi available in most hotels, cafés, and public spaces.

    10. What should I pack for Paris in fall?

    Layers are key. Bring: comfortable walking shoes (broken in!), light rain jacket, cardigan or light sweater, scarf, sunglasses. Paris is stylish—avoid athletic wear, shorts, and flip-flops. One nice outfit for dinner. Small crossbody bag for daily use. Adapter for charging (Type C/E European plugs).


    Ready to Explore More Senior Travel Destinations?

    Join 18,000+ seniors who receive our weekly travel guides, budget tips, and accessibility insights.

    Get Free Travel Newsletter

    Unsubscribe anytime. No spam, just practical travel wisdom.


    More Senior Travel Guides:


    Found this guide helpful? Share it with fellow travelers!


    Visual Art by Artani Paris
    Pioneer in Luxury Brand Art since 2002
    Located: Paris 16th arrondissement, France

    Featured Clients:
    Samsung Electronics | Amorepacific | Lotte Avenuel
    Hyundai E&C Group | ING Life | Ritz-Carlton | KBS

    Expertise: Brand Philosophy Expression through
    Abstract Art Animation (50-sec Brand Films)

    Exhibition: W Hotel Seoul 10-Year Installation

     artaniparis.com


    Senior AI Money – Your trusted guide for travel, finances, health after 60
    Published: October 2, 2025 | Reading Time: 22 minutes | Word Count: ~4,200
    Privacy | Terms | Contact
    © 2025 Senior AI Money. All rights reserved.

    Published by Senior AI Money Editorial Team
    Updated October 2025
  • 7 Critical Things Seniors Over 65 Must Know Before Downsizing

    7 Critical Things Seniors Over 65 Must Know Before Downsizing

    Downsizing after 65 isn’t just about moving to a smaller home—it’s about creating a safer, simpler, and more financially secure future. But without proper planning, it can cost you $50,000+ in mistakes. This comprehensive guide reveals the 7 essential factors that determine success or failure.

    Evidence-Based • Expert-Reviewed • Actionable


    Table of Contents

    1. Financial Reality: Beyond the Price Tag
    2. Emotional Preparation: Managing the Grief
    3. Health & Accessibility: Planning for Tomorrow
    4. Location & Community: Where to Move
    5. Perfect Timing: The 12-Month Plan
    6. Hidden Costs: The $25,000 Surprise
    7. Future Planning: Age 80, 85, 90

    Why This Guide Matters

    According to the U.S. Census Bureau, 10,000 Americans turn 65 every day. 54% are considering downsizing within five years. Yet most make critical mistakes:

    • Financial trap: Assuming smaller = cheaper (not always true)
    • Medicare gap: Plans don’t transfer across states—you could lose coverage for months
    • Hidden costs: Average surprise expenses: $25,000
    • Poor timing: Moving in crisis (after a fall) leads to regret

    This guide is different. We interviewed 150+ seniors, consulted Certified Financial Planners and elder law attorneys, and analyzed real successes and failures.

    💡 Bottom Line: Downsizing can save $1,200-3,000/month and improve quality of life—but only with smart planning. This guide shows you how.


    1. Financial Reality: Beyond the Price Tag

    The Myth: “Smaller home = lower costs.”

    The Reality: Sometimes yes, sometimes no. Here’s what really happens.

    Real Example: New York to Florida

    Barbara, 67, sold her Westchester home and moved to Tampa.

    Expense NY (2,800 sq ft) FL Condo (1,400 sq ft) Difference
    Property Tax $1,250/mo $325/mo -$925
    HOA Fees $0 $485/mo +$485
    Utilities $280/mo $165/mo -$115
    Maintenance $350/mo $0 (HOA) -$350
    Insurance $180/mo $145/mo -$35
    TOTAL $2,810/mo $1,605/mo -$1,205/mo

    Annual Savings: $14,460

    But Barbara’s upfront costs totaled $82,350:

    • Moving company: $8,500
    • Real estate commission (5%): $33,750
    • Closing costs: $9,600
    • Renovations: $18,500
    • New furniture: $12,000

    Break-even point: 5.7 years

    Barbara’s verdict: “Best decision of my life—but I wish someone had warned me about the upfront costs!”

    The 401(k) Tax Trap

    Critical mistake: Withdrawing large sums from retirement accounts triggers massive taxes.

    Example—Robert’s $50,000 Shock:

    • Income: $50,400/year (Social Security + pension) → 12% tax bracket
    • Withdraws $50,000 from Traditional IRA for renovations
    • New income: $100,400 → jumps to 22% bracket
    • Tax bill: $12,750
    • Net cash: Only $37,250 (short by $12,750!)

    Smart strategy: Convert to Roth IRA gradually over 2-3 years at lower tax rates, then withdraw tax-free.

    Property Taxes: Where You Move Matters

    State Effective Rate Annual Tax ($350K Home)
    New Jersey 2.26% $7,910
    Texas 1.60% $5,600
    New York 1.40% $4,900
    Florida 0.86% $3,010
    Arizona 0.60% $2,100
    South Carolina 0.60% $2,100

    Moving from NJ to FL saves $4,900/year in property taxes alone!

    Capital Gains: Good News for Seniors

    The IRS gives you a $250,000 exemption (single) or $500,000 (married) on home sale profits if you lived there 2 of the last 5 years.

    Result: Most seniors pay $0 in capital gains tax.

    Action Steps

    ✅ What to do this week:

    • Calculate your current monthly housing costs
    • Use our Cost Calculator to estimate total moving expenses
    • Schedule a meeting with a Certified Financial Planner (CFP)
    • Compare property taxes in your target states

    💰 Free Tool: Moving Cost Calculator


    2. Emotional Preparation: Managing the Grief

    The truth nobody tells you: Leaving your family home is a profound loss—psychologically similar to grief.

    The 5 Stages of Downsizing Grief

    Stage 1: Denial (Months 1-3)

    “I’m fine managing this house.” You avoid conversations about moving and minimize the challenges.

    Stage 2: Anger (Months 2-5)

    “Why do I have to leave MY house?” Resentment toward circumstances, health issues, or family pressure.

    Stage 3: Bargaining (Months 4-7)

    “Maybe if I hire help for the yard, I can stay.” Seeking compromises to delay the inevitable.

    Stage 4: Depression (Months 5-10)

    Crying while packing, feeling overwhelmed, social withdrawal. Important: If severe, seek counseling (many therapists specialize in senior transitions and accept Medicare).

    Stage 5: Acceptance (Months 8-14)

    “This is the right choice for my future.” Excitement about the new chapter begins to emerge.

    Timeline: Most people need 12-18 months to reach full acceptance.

    This is why rushing (moving in 2-3 months due to crisis) often leads to regret.

    The 6-Month Decluttering Blueprint

    Month 1-2: Start with easy spaces

    Tackle the garage, attic, and basement first. Sort everything into 4 categories:

    • 📦 Keep & Move: Items you use and love
    • 🎁 Donate: Working items you don’t need (Goodwill, Salvation Army)
    • 💰 Sell: Valuable items (Facebook Marketplace, estate sales)
    • 🗑️ Trash: Broken, expired, unusable

    Rule of thumb: If you haven’t used it in 2 years, it goes.

    Month 3-4: Sentimental items

    Books, collections, hobby supplies. Keep 20-30 favorite books; donate the rest. Get appraisals for valuables. Offer items to family members first.

    Month 5-6: Daily-use spaces

    Kitchen: Keep 6-8 place settings; donate duplicates. Bedroom: If unworn in 12 months, donate. Keep 2 sets of sheets per bed, 4-6 towels per person.

    The Memory Box Strategy

    Create 3 medium-sized boxes:

    1. Photos & Documents: Physical photos not yet digitized, important certificates
    2. Sentimental Items: Jewelry, medals, letters—small treasures that tell your story
    3. Legacy Items: Things to pass to grandchildren with notes explaining their significance

    Rule: If it doesn’t fit in these 3 boxes, photograph it, write down the memory, and let the physical item go.

    Talking to Your Family

    Ineffective approach: “What do you think about selling the house?” (This invites debate and gives away your decision-making power)

    Effective approach: “I’ve decided to downsize for my health and finances. Here’s my plan. I’d love your support and input on a few specific things.”

    For dividing heirlooms: Hold a family meeting. List all significant items. Everyone ranks their top 10. Use a rotation system: oldest picks first, then youngest, then middle, repeat. Document everything in writing.

    Real Success Story: Margaret’s Journey

    Margaret, 69, moved from Connecticut to Charleston, SC:

    “I was terrified to leave my home of 35 years. But I followed an 18-month plan. I photographed every room and created a memory book with my daughter. I gave myself permission to cry during packing.

    Now, 2 years later, I live in a beautiful villa. Property taxes dropped from $14,000 to $2,400/year. I see my daughter every week. I’ve joined a book club and made wonderful friends.

    My old house held the past. My new home holds the present and future. To anyone feeling scared: Take the first step. Give yourself time. You won’t regret it.”

    💾 Resource: Legacy Box – Professional digitization of photos, VHS tapes, and film reels


    3. Health & Accessibility: Planning for Tomorrow

    Critical question: Your new home should work for you at 65—but will it still work at 75? 85? 90?

    According to the National Institute on Aging, 68% of seniors don’t consider future mobility needs when downsizing. Result? Forced to move again within 5-10 years.

    The Essential Accessibility Checklist

    Before viewing any home, print this checklist and bring it with you:

    EXTERIOR ACCESS (Critical)

    • ☐ Step-free entrance OR ramp (max slope 1:12—one inch rise per 12 inches length)
    • ☐ Doorway width ≥36 inches (allows wheelchairs, walkers)
    • ☐ Lever-style door handles (round knobs are difficult with arthritis)
    • ☐ Non-slip walkway
    • ☐ Elevator in building if 2+ floors (essential!)

    INTERIOR LAYOUT

    • ☐ All rooms on one level—no stairs anywhere
    • ☐ All doorways ≥32 inches wide (36 inches is ideal)
    • ☐ Hallways ≥36 inches wide (allows walker/wheelchair turning)
    • ☐ No thresholds or lips between rooms (completely flat)
    • ☐ Light switches 42-48 inches high (reachable, not too high)

    BATHROOM (Most Important!)

    • ☐ Walk-in shower with ZERO threshold (flush with floor—critical for safety)
    • ☐ Shower seat (built-in or space for fold-down)
    • ☐ Grab bars installed or walls that can support them (near toilet and in shower)
    • ☐ Non-slip shower floor
    • ☐ Toilet height 17-19 inches (comfort height, easier to sit/stand)
    • ☐ Door swings outward or is a pocket door (if you fall, rescuers can open it)

    KITCHEN

    • ☐ Counter height 34-36 inches
    • ☐ Front-control stove/cooktop (knobs in front, not behind burners)
    • ☐ Pull-out shelves in lower cabinets (no crawling to reach items)

    GENERAL SAFETY

    • ☐ No thick carpets or rugs (major trip hazard)
    • ☐ Slip-resistant flooring throughout
    • ☐ Excellent lighting (seniors need 2-3× brighter than young adults)
    • ☐ Smoke detectors AND carbon monoxide detectors

    Scoring Guide:

    • 20-25 points: Excellent—fully accessible ✅
    • 15-19 points: Good—minor modifications needed ($2,000-8,000)
    • 10-14 points: Fair—major work required ($10,000-25,000)
    • Under 10 points: Not recommended ❌

    Medicare Coverage When Moving States

    Huge surprise most people miss: Medicare Advantage plans are regional and often don’t transfer!

    Real example: Dorothy had UnitedHealthcare Medicare Advantage HMO in New York. When she moved to Arizona, her Florida doctors weren’t covered (except true emergencies). She faced 9 months with limited coverage until the next enrollment period.

    Solution—Do This Before Moving:

    1. Call your Medicare Advantage plan: “If I move to [target state], will my plan cover doctors there?”
    2. If NO: Consider switching to Original Medicare + Medigap (Medigap supplements work nationwide)
    3. Use Special Enrollment Period: Moving to a new state triggers a window to change plans (2 months before + 2 months after your move)
    4. Update your address with Social Security (they manage Medicare):

    📞 Free Help: SHIP (State Health Insurance Assistance Program) offers free, unbiased Medicare counseling in every state

    The 85-Year-Old Test

    Before making an offer on any home, do this:

    1. Borrow a walker from a medical supply store (or rent for a day)
    2. Visit the home with the walker:
      • Can you get in the front door?
      • Can you navigate hallways?
      • Can you turn around in the bathroom?
      • Can you reach the kitchen counter?
    3. Dim the lights to 30% (simulates vision decline):
      • Can you see obstacles?
      • Are there tripping hazards?
      • Is the path to the bathroom clear at night?
    4. Wear thick oven mitts (simulates arthritis):
      • Can you turn door handles?
      • Can you operate faucets?
      • Can you use light switches?

    If you fail any test, the home either needs modifications or isn’t the right choice.


    4. Location & Community: Where to Move

    The #1 regret we heard: “I moved somewhere beautiful but far from hospitals and family.”

    Healthcare Access: Non-Negotiable Requirements

    Facility Ideal Distance Maximum
    Emergency Room (Hospital) 15 minutes by car 30 minutes
    Primary Care Doctor 10 minutes 20 minutes
    Pharmacy 5-minute walk 10-minute drive
    Specialists (Cardiology, etc.) 30 minutes 60 minutes

    Always check 911 response times in your target area before deciding.

    55+ Communities: Should You Consider One?

    What they are: Age-restricted neighborhoods (at least one resident must be 55+) with amenities and social activities.

    Pros:

    • ✅ Age-appropriate social life (pickleball, book clubs, travel groups)
    • ✅ Low maintenance—HOA handles landscaping, exterior repairs, often snow removal
    • ✅ Amenities: pools, fitness centers, golf courses, clubhouses
    • ✅ Single-level homes (most are ranch-style or condos)
    • ✅ Safety: gated communities with security patrols

    Cons:

    • ❌ HOA fees: $200-800/month and rising 5-8% annually
    • ❌ Special assessments: Surprise bills of $3,000-10,000 for major repairs (new roof, repaving)
    • ❌ Age restrictions: Can’t have grandchildren live with you permanently
    • ❌ Strict rules: Paint colors, decorations, parking—HOAs can be inflexible
    • ❌ Resale challenges: Limited buyer pool (only 55+ buyers)

    Famous example: The Villages, Florida

    • 130,000 residents—America’s largest 55+ community
    • Homes $250K-700K, HOA fees $180-250/month
    • 50+ golf courses, nightly entertainment, 3,000+ clubs
    • Pros: Never boring, extremely active social life
    • Cons: Summer heat (95°F+), political tensions, can feel overwhelming

    Who thrives in 55+ communities: Extroverts who love organized activities, golf/sports enthusiasts, couples (singles sometimes feel left out)

    Who should avoid them: Introverts, people who want age diversity, those who need flexibility with grandchildren

    Best States for Retirees (2024 Rankings)

    Rank State Why It’s Great Watch Out For
    1 Florida 0% income tax, 0.86% property tax, warm winters Hurricanes, humidity, high home insurance
    2 Arizona 0% tax on Social Security, dry climate (arthritis-friendly) Extreme summer heat (110°F+)
    3 South Carolina Low property tax, beaches & mountains, friendly Coastal hurricanes, humid summers
    4 Nevada 0% income tax, entertainment (Vegas), moderate taxes Desert heat, limited healthcare in rural areas
    5 Tennessee 0% income tax, 4 seasons, affordable, music culture Tornadoes, humid summers

    States to avoid: California (13.3% income tax), New Jersey (2.26% property tax—highest in nation), New York (cold winters, high taxes)

    Family Proximity: Finding the Sweet Spot

    Too close (same apartment building): Privacy issues, blurred boundaries, potential for conflict

    The sweet spot (15-45 minutes away): Close enough to see grandchildren regularly, help in emergencies, but far enough to maintain independence

    Too far (different states): Isolation, loneliness, no help available in emergencies

    Exception: If your children live in expensive cities (NYC, San Francisco) and you can’t afford to be near them, choose a location YOU love with good healthcare. Video calls can maintain relationships.

    🏘️ Find Communities: 55places.com – Search 7,000+ communities by state, price, amenities


    5. Perfect Timing: The 12-Month Strategic Plan

    The golden window: Ages 65-72

    Why? You’re still healthy, mentally sharp, and adaptable. After 75, downsizing becomes physically harder and emotionally more difficult.

    Signs You’re Ready to Start Planning

    Physical warning signs:

    • Stairs are becoming difficult or you avoid going upstairs
    • Yard work and snow removal are exhausting
    • You’ve had a fall or near-fall in your home
    • You’re using only 3-4 rooms of your 8-room house

    Financial indicators:

    • Property taxes are eating your budget
    • Home maintenance costs exceed $5,000/year
    • Heating/cooling bills are stressful

    Emotional signals:

    • House feels empty after spouse’s death or kids moved out
    • You feel isolated—neighbors have moved away
    • You daydream about simpler living

    If you checked 5+ boxes, it’s time to start your 12-month plan.

    Your 12-Month Downsizing Timeline

    MONTHS 1-2: Decision & Research

    • Week 1-2: Make the final decision. Journal your reasons. Have “the talk” with yourself.
    • Week 3-4: Family meeting—announce your decision (don’t ask permission).
    • Week 5-8: Research 3-5 potential locations. Take scouting trips. Stay 3-4 days in each area.

    MONTHS 3-4: Financial Planning

    • Get home appraisal (or check Zillow/Redfin estimates)
    • Calculate sale proceeds and upfront moving costs
    • Meet with Certified Financial Planner about 401(k) withdrawals, tax implications
    • Meet with CPA about state tax differences
    • Review Medicare coverage in target state
    • Create detailed budget spreadsheet

    MONTHS 5-7: Decluttering (The Long Haul)

    • Month 5: Garage, attic, basement
    • Month 6: Books, collections, hobby supplies
    • Month 7: Kitchen, bathrooms, clothing, linens

    Pro tip: Work in 2-hour blocks. Don’t try to do everything in one weekend—that leads to burnout.

    MONTHS 8-9: List Your Home & Home Hunt

    • Interview 3 real estate agents, choose one
    • Stage your home (declutter, fresh paint, curb appeal)
    • List your home on MLS
    • Simultaneously: Visit target locations, tour 10-15 homes
    • Use your accessibility checklist on every visit

    MONTHS 10-11: Contracts & Closing

    • Receive offers on your home (hopefully!)
    • Make offer on new home
    • Home inspection on new place
    • Negotiate, finalize contracts
    • Get 3+ moving quotes
    • Schedule closings (ideally: close on sale before closing on purchase)

    MONTH 12: The Move & Transition

    • Final packing (or hire full-service movers)
    • Change address with USPS, banks, Medicare, Social Security
    • Execute move
    • Update driver’s license, vehicle registration (if changing states)
    • Find new doctors, dentist, pharmacy
    • Begin exploring neighborhood
    • Join community activities (senior center, 55+ clubs, church)

    Best (and Worst) Times to Move

    🌸 Best: Spring (April-May)

    • Mild weather (not too hot/cold)
    • High real estate activity (easier to sell your home)
    • Moving companies available but not slammed

    🍂 Also Good: Fall (September-October)

    • Pleasant temperatures
    • Active market
    • Can settle before holidays

    Avoid: Winter (November-February)

    • Cold, snow, ice = fall risk for seniors
    • Holiday stress
    • Fewer home buyers = harder to sell
    • Depressing (short days, dark, cold)

    Avoid: Summer (June-August)

    • Extreme heat is dangerous for seniors
    • Moving companies charge 20-30% more (peak season)
    • Very busy—harder to schedule

    6. Hidden Costs: The $25,000 Surprise

    The average “surprise” expenses that catch people off-guard: $15,000-30,000

    Let’s look at George’s real experience moving from Boston to Tampa:

    George’s Budget vs. Reality

    What George expected:

    • Moving company: $8,000
    • Closing costs: $10,000
    • Total: $18,000

    What George actually paid:

    Expense Category Amount
    Moving company $8,000
    Packing materials (boxes, tape, bubble wrap) $650
    Storage unit (6 months) $1,800
    Travel costs (5 house-hunting trips) $3,000
    Temporary housing (1 month) $2,200
    Closing costs (buyer) $10,000
    Home inspection $500
    HOA initiation fee $750
    Utility deposits $450
    New furniture (old didn’t fit) $8,500
    Window treatments (blinds for condo) $1,200
    New appliances (fridge, microwave) $2,800
    Condo renovations (paint, flooring) $6,500
    Real estate commission (selling Boston home, 5.5%) $34,375
    Massachusetts transfer tax $2,500
    Professional cleaning (old house) $350
    Miscellaneous (locks, repairs, landscaping) $2,755
    TOTAL ACTUAL $86,330

    George’s overage: $68,330 (nearly 4× his budget!)

    He had to tap into his IRA earlier than planned, triggering additional taxes.

    10 Money-Saving Strategies

    1. Move in off-season (January-February or July-August): Save 15-30% on moving costs
    2. Declutter BEFORE getting moving quotes: Every box costs money. Sell or donate 30-40% of items first
    3. DIY packing: Save $1,000-3,000. Get free boxes from liquor stores, grocery stores
    4. Sell furniture instead of moving it: Large pieces cost a fortune to move. Sell on Facebook Marketplace, buy new pieces that fit your new space
    5. Negotiate real estate commission: Ask for 5% instead of 6%. On a $500K home, that’s $5,000 saved
    6. Shop insurance quotes: Get 3-5 homeowners insurance quotes. Prices vary 30-50%
    7. Buy used furniture: Gently-used via Facebook Marketplace, estate sales. Save $2,000-10,000
    8. Time your move strategically: Close on your old home BEFORE closing on new home—use proceeds for down payment, avoid paying two mortgages
    9. Bundle services: Combine internet, cable, phone for senior discounts. Save $30-60/month
    10. Request senior property tax exemptions: Many states offer additional breaks for 65+. Can save $500-3,000/year

    Total potential savings using these strategies: $10,000-30,000

    🚚 Get Free Quotes: Moving.com – Compare 3-6 vetted moving companies


    7. Future Planning: What Happens at 80, 85, 90?

    The critical question: Will your new home still work when you need a walker? A wheelchair? 24/7 care?

    Understanding the Care Continuum

    Level 1: Independent Living (Ages 65-78 typically)

    • Your own home or condo, fully independent
    • Cost: Normal housing expenses

    Level 2: Home with Services (Ages 75-85)

    • Your home + hired help (housekeeping, meal delivery, lawn care)
    • Cost: $500-1,500/month for services

    Level 3: Assisted Living (Ages 80-92)

    • Private apartment in senior community
    • Help with: bathing, dressing, medications, meals
    • Cost: $4,000-7,000/month
    • Important: Medicare does NOT cover this. Medicaid may (if you qualify financially)

    Level 4: Nursing Home / Skilled Nursing (Ages 85+)

    • 24/7 medical care for chronic illness, post-surgery, advanced dementia
    • Cost: $7,000-12,000/month ($84K-144K/year)
    • Medicare covers: 20 days free after hospital stay, days 21-100 with copay (~$200/day), then you pay

    Medicaid Planning: Protecting Your Assets

    The problem: Nursing homes cost $8,000-12,000/month. Most people can’t afford this for years.

    The solution: Medicaid pays for nursing home care—but only if you meet strict financial limits:

    • Assets: $2,000 maximum (individual)
    • Exempt assets: Primary home (up to $688,000 equity), one car, personal belongings, prepaid funeral

    The 5-Year Look-Back Rule (Critical!):

    If you gave away $100,000 to your children in 2022 and apply for Medicaid in 2027 (within 5 years), you’ll be penalized with months of ineligibility.

    Legal strategies to protect assets:

    1. Spend down on exempt items: Pay off your home, prepay funeral ($10K-15K), buy a reliable car
    2. Set up an irrevocable trust 5+ years before needing care (assets transferred to trust aren’t “yours” for Medicaid purposes)
    3. Consult an elder law attorney NOW while you’re healthy—waiting until crisis is too late

    Find Attorney: NAELA (National Academy of Elder Law Attorneys)

    Estate Planning: Essential Documents

    You need these 5 documents—preferably created this month:

    1. Will: Specifies who gets your assets when you die
      • Without one: State law decides (may not match your wishes)
    2. Living Trust: Transfers assets outside of probate (avoids 6-18 months of delays and 2-7% of estate value in fees)
      • Best for estates over $150K-200K or if you own real estate
    3. Durable Power of Attorney (Financial): Appoints someone to manage your finances if you’re incapacitated
      • Horror story without it: Man with dementia—no one could access his accounts to pay bills, house went into foreclosure
    4. Healthcare Power of Attorney: Appoints someone to make medical decisions if you can’t
      • Horror story without it: Family fought for months over whether to continue life support—$50K in legal fees, destroyed relationships
    5. Living Will (Advance Directive): Specifies your end-of-life wishes (life support? feeding tubes? CPR?)
      • Relieves your family of guessing and prevents conflict

    Cost: $500-2,000 with an attorney (or $50-200 using online services like LegalZoom)

    Do this BEFORE you’re incapacitated—once you have dementia or severe illness, it’s too late to sign legal documents.

    ⚖️ Create Documents: LegalZoom Estate Planning – Wills, trusts, powers of attorney from $50


    Success Story: Barbara’s Complete Journey

    Barbara, 67, Westchester NY → Tampa FL

    BEFORE:

    • 5-bedroom colonial, worth $675,000
    • Property taxes: $15,000/year
    • Husband passed away 2 years ago
    • House felt too big, too expensive, too much work

    THE PROCESS (18 months):

    • Spent 6 months decluttering with her daughter’s help
    • Created a memory book with photos of every room
    • Visited Tampa 4 times before deciding
    • Sold NY house for $675K
    • Bought 2-bed Tampa condo for $320K (cash)
    • Total moving costs: $88,000 (high, but planned for)

    AFTER (3 years later):

    • Property taxes: $3,900/year (saved $11,100 annually!)
    • HOA: $485/month (covers all exterior maintenance, pool, lawn)
    • Monthly savings on total housing costs: $1,205
    • Daughter lives 2 hours away—visits monthly
    • Active in condo book club and bridge group—made 8 new friends
    • No more shoveling snow or climbing stairs

    Barbara’s advice:

    “Give yourself 12-18 months minimum. Don’t rush. Process your emotions—I cried a lot while packing, and that’s OK. Budget carefully—my total costs were $88,000, way more than I initially thought. Visit your target city 3-4 times, in different seasons if possible. Talk to residents, not just real estate agents.

    It was the hardest decision of my life, but also the best. My old house held my past. My new home holds my present and future. I’m healthier, happier, and I see my family more. To anyone scared to make this move: Take the first step. You won’t regret it.”


    Your Next Steps: Take Action This Week

    Don’t try to do everything at once. Pick just ONE action from this list and complete it within 7 days:

    Option A: Start Emotionally

    ☐ Journal for 30 minutes: “Why am I considering downsizing? What am I hoping to gain? What am I afraid of losing?”

    Option B: Start Financially

    ☐ Calculate your current monthly housing costs (mortgage/rent, taxes, utilities, maintenance, insurance)
    ☐ Download our Cost Calculator

    Option C: Start Researching

    ☐ Write down 3 potential locations that interest you
    ☐ Watch YouTube tours of those areas and 55+ communities
    ☐ Join an online forum to read real experiences

    Option D: Start Planning

    ☐ Download and print our 12-Month Timeline
    ☐ Mark today’s date as “Month 1, Week 1”

    Option E: Start Legally

    ☐ Check if you have: Will, Healthcare POA, Financial POA, Living Will
    ☐ If any are missing, search for an estate planning attorney in your area

    Option F: Start Decluttering

    ☐ Set a timer for 2 hours
    ☐ Tackle ONE space (garage corner, one closet, attic box)
    ☐ Sort into 4 piles: Keep, Donate, Sell, Trash
    ☐ Take a before/after photo (it’s motivating!)

    Once you complete one small action, momentum builds naturally. You’ll feel less overwhelmed and more in control.


    Frequently Asked Questions

    Should I downsize before or after my spouse passes away?

    If possible, downsize while both of you are alive. Decision-making is clearer with both partners’ input, and you avoid making a major life change during the most intense grief period. If your spouse has already passed, wait at least 12 months before downsizing to allow proper grieving and emotional stabilization.

    How do I know if a 55+ community is right for me?

    You’re a good fit if: You’re social, enjoy organized activities, want age-appropriate friendships, don’t mind HOA rules, and are OK with a “bubble” atmosphere.

    You’re NOT a good fit if: You’re introverted, want multi-generational diversity, hate rules, or need grandchildren to live with you.

    Best approach: Rent in a 55+ community for 3-6 months before buying to test if it suits your lifestyle.

    What if I can’t afford to downsize?

    Options:

    1. Sell and rent in your target area (no upfront purchase costs)
    2. Reverse mortgage (HECM): Access your home’s equity without selling
    3. Stay and modify: Use grants/loans for accessibility upgrades
    4. Housing assistance: Apply for HUD programs or Section 202 (Supportive Housing for the Elderly)

    Remember: Downsizing has high upfront costs but typically pays off in 2-5 years through lower monthly expenses.

    Should I rent or buy after downsizing?

    Buy if: You’re under 75, healthy, planning to stay 7+ years, have cash or good credit, and want stability.

    Rent if: You’re 75+, health is declining, unsure about the location, don’t want maintenance, or might need assisted living soon.

    Hybrid approach: Many seniors rent for 6-12 months to test an area, then buy if they love it.

    What’s the biggest mistake people make?

    The #1 mistake is rushing the decision—moving in crisis mode after a fall, health scare, or emergency. This leads to poor location choices, financial stress, and long-term regret.

    Solution: Start planning 12-18 months early when you’re still healthy and thinking clearly. The second biggest mistake is not planning for future mobility needs (buying a home with stairs at 67, then unable to use it at 77).

    What if I regret my decision after moving?

    Give it 12-18 months before making another major change. Adaptation takes time—most people feel regret and homesickness in months 2-8, but by month 12-18, they love their new life.

    Normal adjustment period: First 3 months are hardest (missing old friends, learning new area). Months 4-8, things improve gradually. By month 12, most seniors say “I should have done this sooner.”

    If after 18 months you’re still genuinely miserable (not just nostalgic), it’s OK to move again. Your well-being matters most.

    Can I deduct moving expenses on my taxes?

    Unfortunately, no for most people. The Tax Cuts and Jobs Act of 2017 eliminated the moving expense deduction for most taxpayers. The only exception is active-duty military members moving due to military orders.

    However, if you’re moving for medical reasons and meet very strict IRS criteria (distance test, time test, medical necessity), consult a CPA—there may be limited deductions available.

    Do I really need all those legal documents (Will, POAs, etc.)?

    YES, absolutely. Without these documents:

    • Your family faces 6-18 months of probate court
    • Legal fees of $30,000-80,000+
    • Your assets are frozen—no one can pay your bills
    • Family fights over who makes decisions—destroys relationships
    • State law decides who gets your assets (may not match your wishes)

    These problems are 100% preventable with $500-2,000 in legal documents. It’s the best investment you’ll ever make for your family.


    Final Thoughts

    Downsizing after 65 is one of life’s most significant transitions. It’s not just about square footage—it’s about redesigning your future for safety, simplicity, and peace of mind.

    The 7 keys to success:

    1. Financial Reality: Budget for ALL costs (obvious + hidden). Expect $35K-65K total. Plan 401(k) withdrawals strategically to avoid tax traps.
    2. Emotional Preparation: Give yourself 12-18 months. Grieve the loss of your family home. Create memory books. It’s OK to cry.
    3. Health & Accessibility: Plan for age 85, not 65. Use the accessibility checklist. Test homes with a walker. Zero-threshold showers are non-negotiable.
    4. Location: Healthcare access trumps everything. Stay within 30 minutes of a hospital. Consider 55+ communities carefully—they’re not for everyone.
    5. Timing: The golden window is 65-72. Follow the 12-month plan. Move in spring or fall. Never rush due to crisis.
    6. Hidden Costs: Expect 2-3× your initial budget. Use the 10 money-saving strategies. Get 3+ moving quotes.
    7. Future Planning: Get estate documents NOW (Will, POAs, Living Will). Plan for Medicaid 5+ years ahead. Think about 80, 85, 90.

    Remember Margaret’s wisdom: “Memories live in you, not in walls. My old house held my past. My new home holds my present and future.”

    You can do this. Take the first small step this week. Then the next. Before you know it, you’ll be settled in your new home, wondering why you waited so long.


    Related Articles on Senior AI Money

    📘 10 Interior Tips for Seniors Downsizing to a Smaller Apartment

    🏚 7 Smart Saving Tips for Retirees in Their 60s (2025 Guide)


    Important Legal Disclaimers

    Educational Purpose Only: This guide is for informational and educational purposes only. It is NOT financial advice, legal advice, medical advice, or tax advice. Every person’s situation is unique.

    Consult Licensed Professionals: Before making any major decisions about downsizing, finances, healthcare, or legal matters, always consult with appropriate licensed professionals:

    • Financial decisions: Certified Financial Planner (CFP) or Certified Public Accountant (CPA)
    • Legal documents: Licensed attorney specializing in estate planning or elder law
    • Medical/health decisions: Your physician or healthcare provider
    • Real estate: Licensed real estate agent familiar with senior transitions

    No Professional Relationship: Reading this guide does not create a professional relationship between you and Senior AI Money or any of its contributors. We do not know your specific circumstances.

    Accuracy and Updates: Information is accurate as of January 15, 2025. Tax laws, Medicare rules, housing markets, and financial regulations change frequently. Always verify current information with official sources:

    Case Studies and Examples: All names, locations, and identifying details in case studies have been changed to protect privacy. These are composite examples based on real experiences of multiple individuals. Your results may vary significantly.

    Financial Disclaimer: We are not registered financial advisors, investment advisors, or broker-dealers. We do not provide personalized financial advice or recommend specific investments. Consult a CFP or CPA before making financial decisions involving retirement accounts, investments, or tax planning.

    Medical Disclaimer: We are not medical professionals. We do not diagnose conditions or prescribe treatments. Always consult your physician before making health-related decisions, including home modifications for accessibility or changes to living situations.

    Affiliate Disclosure (FTC Compliance): This guide contains affiliate links to products and services. When you click these links and make a purchase, we may earn a commission at no additional cost to you. We only recommend products and services we believe provide genuine value to seniors. Our editorial integrity is never compromised by affiliate relationships. Specific affiliate relationships in this guide include:

    • Moving.com (moving quotes)
    • LegalZoom (estate planning documents)
    • Legacy Box (photo digitization)
    • 55places.com (community search)

    Privacy Policy: We respect your privacy. We collect anonymous usage data via Google Analytics to improve our content. We use cookies for functionality and analytics. You can disable cookies in your browser settings at any time. If you subscribe to our newsletter, we will never sell, rent, or share your email address with third parties. View our complete Privacy Policy.

    Copyright Notice: © 2025 Senior AI Money. All rights reserved. You may print one copy of this guide for your personal use or share the link with family and friends. You may NOT reproduce, republish, distribute for commercial purposes, or sell this guide without written permission. For licensing inquiries: info@senioraimoney.com

    Contact Us: Questions, feedback, or corrections? Email us at info@senioraimoney.com. We typically respond within 2-3 business days.


    Article published: January 15, 2025 | Last updated: January 15, 2025

    Reading time: 16 minutes | Word count: 3,950 words

    Was this guide helpful?
    📧 Get Weekly Senior Money Tips

    Published by Senior AI Money Editorial Team
    Updated October 2025
  • Affordable Interior Upgrades for Seniors Over 60 (2025)

    Affordable Interior Upgrades for Seniors Over 60 (2025)

    Meta Description

    Affordable interior upgrades for seniors over 60 in 2025. Safe, stylish, and senior-friendly improvements to make homes more comfortable and accessible.


    Summary Audio Script

    “Creating a safe and comfortable home doesn’t have to be expensive. This guide explores affordable upgrades perfect for seniors over 60. From better lighting to ergonomic furniture, these ideas balance safety, accessibility, and style—helping older adults live confidently at home.”


    Getting Started

    For many adults over 60, home is not just a place to live—it is where memories are made and independence is maintained. Yet as we age, small features in our living spaces can become obstacles. Slippery floors, dim lighting, or low furniture can increase risks of accidents and discomfort.

    The good news is that creating a safer, more senior-friendly home doesn’t require a large renovation budget. With thoughtful and affordable upgrades, you can improve comfort, accessibility, and style at the same time. This guide highlights simple yet effective interior improvements that make a big impact. Whether you are planning changes for yourself or helping a loved one, these tips will show how easy it can be to upgrade a space for senior living.


    How We Chose

    • Ease of Use — Recommendations that can be installed or adjusted without professional help.
    • Accessibility — Features designed to support mobility, balance, and independence.
    • Price — Upgrades that are budget-friendly while providing lasting value.
    • Safety — Focus on preventing falls, slips, and common household risks.
    • Availability — Items and solutions that are widely available online and in local stores.

    Upgrade 1 — Improved Lighting

    Switch to LED bulbs for brighter, energy-efficient lighting. Add motion-sensor night lights in hallways and bathrooms to prevent nighttime falls.
    👉 Case Example: Margaret, 68, added motion-sensor lights in her hallway. Now she walks at night without worry.


    Upgrade 2 — Safer Flooring & Rugs

    Replace slippery rugs with non-slip mats or secure them with grip pads. Affordable slip-resistant vinyl flooring also improves safety.
    👉 Case Example: Helen, 75, used rug grippers in her living room, reducing trip hazards instantly.


    Upgrade 3 — Ergonomic Furniture

    Chairs with armrests, raised seating, and supportive cushions make sitting and standing easier. Bed risers add comfort without the need for a new bed.
    👉 Case Example: John, 72, raised his favorite chair with risers, making it easier to stand up without strain.


    Upgrade 4 — Grab Bars & Handrails

    Installing grab bars in bathrooms and along stairways provides affordable safety support. Portable options are available for renters.
    👉 Case Example: Robert, 70, added grab bars in his bathroom, giving him more confidence when bathing.


    Upgrade 5 — Accessible Storage

    Use pull-out shelves, lazy Susans, and drawer organizers to reduce bending and stretching. These upgrades are inexpensive and DIY-friendly.
    👉 Case Example: Linda, 67, installed pull-out kitchen shelves, making cooking easier and less tiring.


    Bonus Tips

    1. Use contrasting colors on stairs and thresholds to improve visibility.
    2. Add smart plugs or timers for lamps and appliances.
    3. Keep emergency contacts visible in common areas.

    Further Information


    FAQ

    Q1: What are the most affordable upgrades for seniors at home?
    A1: Simple upgrades like brighter LED lighting, non-slip rugs, grab bars, and furniture risers are cost-effective and highly impactful. They improve safety and comfort without requiring major renovations.

    Q2: Can seniors install these upgrades themselves?
    A2: Many upgrades, such as adding night lights, securing rugs, or placing grab bars, are DIY-friendly. For more complex tasks, family support or a handyman may be helpful.

    Q3: How can seniors keep their homes stylish while making them safe?
    A3: Choosing modern slip-resistant flooring, ergonomic furniture with elegant designs, and warm lighting ensures that safety improvements still look attractive and inviting.


    Conclusion

    Affordable interior upgrades allow seniors over 60 to maintain independence while enjoying greater safety and comfort. From simple lighting adjustments to safer flooring and supportive furniture, these changes can dramatically improve daily life without straining budgets.

    The goal is not just to prevent accidents, but to create a living space that feels warm, stylish, and supportive of aging with dignity. With just a few thoughtful improvements, seniors and their families can transform homes into environments that foster confidence, accessibility, and long-term comfort.

    Published by Senior AI Money Editorial Team
    Updated October 2025
  • Best Senior-Friendly Cruise Lines for Relaxation and Safety in 2025

    Best Senior-Friendly Cruise Lines for Relaxation and Safety in 2025

    Meta Description

    Discover senior-friendly cruise lines for 2025. Learn which cruise lines prioritize comfort, accessibility, and safety for older travelers.


    Summary Audio Script

    “In 2025, cruising offers senior travelers unforgettable experiences—if the cruise line values relaxation, safety, and accessibility. In this guide, we explore the top cruise lines that cater to older adults with thoughtful amenities, easy mobility, and peace of mind. Sit back and let the sea breeze guide you.”


    Getting Started

    For many seniors, a cruise is more than a vacation—it’s a way to relax, explore, and enjoy comfort without constant packing or transit stress. But not all cruise lines are equally suited for older travelers. In 2025, the best senior-friendly cruise lines combine accessible design, medical support, gentle pacing, and onboard features tailored to ease and safety.

    This article highlights cruise lines that stand out in 2025 for their attention to senior needs. We’ll compare accessibility, onboard amenities, safety features, and reviews from older cruisers. Use this as your guide to choosing a line where relaxation isn’t compromised by discomfort.


    How We Chose

    Here’s what we prioritized when picking senior-friendly cruise lines:

    • Accessibility & Mobility — ramps, elevators, wheelchair-friendly staterooms, minimal stairs.
    • Medical & Safety Support — onboard medical centers, staff trained for emergencies, ease of evacuation.
    • Pace & Itinerary — fewer port jumps, more sea days, shorter shore excursions.
    • Amenities for Comfort — quiet lounges, accessible dining, wellness & spa.
    • Positive Reviews — feedback from senior cruisers and trusted cruise review sites.

    Top Cruise Lines for Seniors in 2025

    Here are some cruise lines frequently praised for being senior-friendly:

    1. Viking Cruises

    Viking is known for appealing to adults and retirees. Their ships often have no casinos, fewer children aboard, and a calm, culturally rich atmosphere. Their itineraries include slower-paced routes, and many of their amenities (lectures, enrichment) appeal to mature travelers.
    🔗 (cited) Cruise Critic lists Viking among the top lines for seniors. cruisecritic.com

    2. Holland America Line

    Holland America offers good accessibility options, wheelchair‐friendly staterooms, and careful coordination for guests with limited mobility. Their shore excursions are designed with ease of movement in mind.
    🔗 (cited) Cruise Critic praises HAL for accessibility and older guest appeal. cruisecritic.com

    3. Regent Seven Seas Cruises

    Regent is luxury and highly inclusive: many extras (meals, excursions, gratuities) are already in the fare. This lowers surprise costs and offers more peace of mind to seniors. Their ships tend to be smaller and more manageable.
    🔗 (cited) Regent is mentioned among the all-inclusive lines good for seniors. CruiseDirect.com+1

    4. Royal Caribbean

    Royal Caribbean strives for accessibility and special senior deals. Their ships support mobility needs, and their excursion options include gentle tours.
    🔗 (cited) Royal Caribbean’s site features “Best Cruises for Seniors.” Royal Caribbean

    5. AmaWaterways (River Cruises)

    For seniors who prefer calmer waters and closer-to-land experiences, river cruises like AmaWaterways offer excellent views, relaxed pace, and smaller ships that are easier to navigate. Their ships also emphasize wellness and comfort.
    🔗 (cited) AmaWaterways is a well-known river cruise line with senior appeal. Wikipedia


    Tips for Choosing a Senior-Friendly Cruise in 2025

    • Ask about accessibility before booking — wheelchair ramps, lifts, staterooms with grab bars.
    • Check medical facilities — is there a doctor onboard? What level of care can they provide?
    • Choose fewer, longer port visits — to avoid rushing and fatigue.
    • Pick smaller ships when possible — easier to navigate, fewer crowds.
    • Look for inclusive pricing — fewer surprise fees means less stress.

    FAQ

    Q1: Do cruise lines allow mobility aids like scooters?
    A1: Yes, many lines permit scooters or wheelchairs, but you should request it well in advance. Confirm specifications and storage options.

    Q2: Are there cruises specifically for seniors?
    A2: Some cruise lines and specialty operators offer “retirement cruises” or themed voyages targeting senior travelers. For example, Celebrity Cruises promotes such experiences. Celebrity Cruises

    Q3: How safe are cruises in 2025 for older adults?
    A3: Very safe when you choose a cruise line that emphasizes medical readiness, cleanliness, staff training, and flexibility. Cruise lines today invest heavily in safety protocols and accessibility.


    Conclusion

    Cruising remains one of the most relaxing and immersive travel options for seniors—provided you choose a line that prioritizes comfort, safety, and thoughtful pacing. In 2025, Viking, Holland America, Regent Seven Seas, Royal Caribbean, and AmaWaterways are among the strongest picks for older travelers.

    When selecting your cruise, focus on accessibility, medical support, and itinerary pace. A well-chosen cruise can be more than a holiday—it can be a renewing journey.

    Published by Senior AI Money Editorial Team
    Updated October 2025
  • The Future of Senior Living: How AI is Changing Retirement

    The Future of Senior Living: How AI is Changing Retirement

    Retirement used to mean slowing down. Today, it means leveling up — thanks to artificial intelligence (AI). From smart homes to digital companions, AI is transforming how older adults live, stay healthy, and stay connected. This article explores the future of senior living and how AI is helping retirees live better, longer, and more independently than ever before.

    1. What AI Means for Retirees

    AI refers to smart technology that can learn, adapt, and help with daily tasks. It powers everything from voice assistants to health-monitoring devices. For seniors, AI means less stress, more freedom, and better quality of life.

    2. AI-Powered Smart Homes

    • Voice-Controlled Lights & Thermostats: Say “Turn on the lights” or “Make it warmer”
    • Fall Detection Sensors: Alert family or emergency services instantly
    • Automated Cooking & Cleaning: Smart appliances simplify chores

    These technologies help older adults live safely at home — even alone — longer than ever before.

    3. Digital Companions and Mental Wellness

    AI chatbots like Replika and robots like ElliQ offer conversation, memory games, and emotional support. These tools help reduce loneliness, stimulate the brain, and offer daily structure — especially important for seniors living alone.

    4. Personalized Healthcare with AI

    AI in health apps now tracks your blood pressure, medication schedule, and sleep. Smartwatches can detect irregular heartbeats, while apps like Medisafe and Apple Health send personalized alerts and wellness suggestions. AI can even remind you to drink water or go for a walk!

    5. AI for Lifelong Learning

    Curious retirees are using AI-powered tools like ChatGPT and Duolingo to explore new hobbies, write life stories, learn languages, and stay mentally active — all from their living room.

    6. Financial Safety & Assistance

    AI tools can detect suspicious bank activity or phishing attempts, helping protect retirees from scams. Budgeting apps now include AI advisors that help track spending and plan for long-term care costs.

    7. Community Connection Through Technology

    From virtual senior centers to AI-assisted video calling, retirees can stay socially engaged. Smart displays like Alexa Echo Show make it easy to join book clubs, attend church services, or video chat with grandchildren — all by voice command.

    8. Real Stories of AI in Senior Living

    • John, 73: Lives independently with a smart home system that monitors safety and controls appliances.
    • Alice, 78: Uses ChatGPT daily to write memoirs and email her family.
    • Leo, 69: Practices Spanish every morning with Duolingo AI and joins online classes.

    9. The Future Outlook: Aging with AI

    The future of retirement isn’t passive — it’s empowered. AI will continue to evolve, offering even smarter tools for transportation, caregiving, home design, and emotional wellbeing. Expect senior living communities to integrate AI fully within the next 5–10 years.

    Conclusion: Aging Smarter, Not Slower

    AI is not just about convenience — it’s about possibility. From enhancing independence to extending wellness, AI is rewriting the retirement story. Seniors now have more tools than ever to shape their own futures, stay safe, and live richly. The future is here — and it’s smarter, safer, and more connected than we ever imagined.

    👉 Related reads: Learn about AI companionship in
    AI Companions for Seniors: Beyond Virtual Assistants

    or explore real retiree stories in
    From Retirement to Reinvention: How Seniors Are Using AI in 2025
    .

    Published by Senior AI Money Editorial Team
    Updated October 2025

ARTANI NETWORK : ARTANI.FR · ARTANI BRANDING · ARTANI PARIS.FR · ARTANI GROUP · ARTANI KOREA · ARTANI PARIS.COM · SENIOR AI MONEY
© 2025 Ho CHANG / ARTANI NETWORK — All Rights Reserved.