The emotional writings of Ho CHANG’s Facing Fears Series on ARTANI BRANDING inspire reflection within SENIOR AI MONEY’s creative network.

Category: Interior

  • How to Make Your Home Safe and Accessible for Senior Living: Complete Guide

    Reassuring cartoon illustration of senior-friendly home with grab bars, non-slip surfaces, adequate lighting, clear pathways, and safety features throughout
    Create a safe, accessible home environment supporting independent senior living
    Visual Art by Artani Paris | Pioneer in Luxury Brand Art since 2002

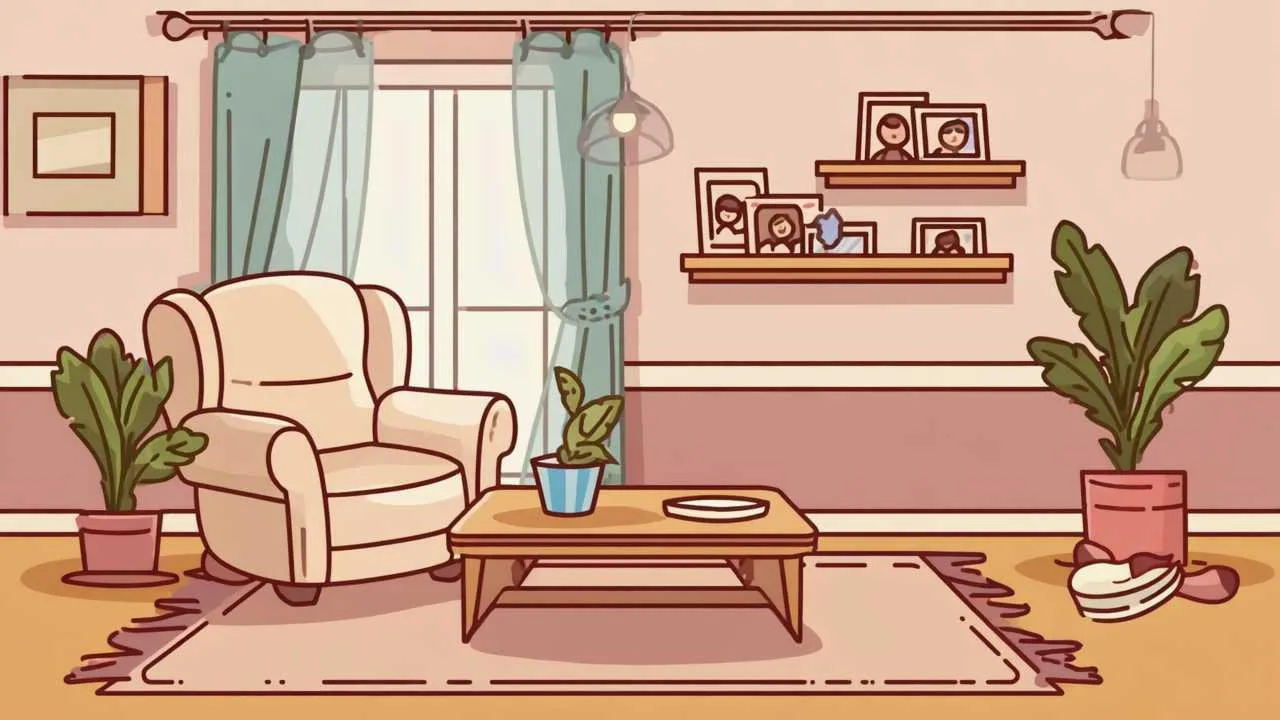
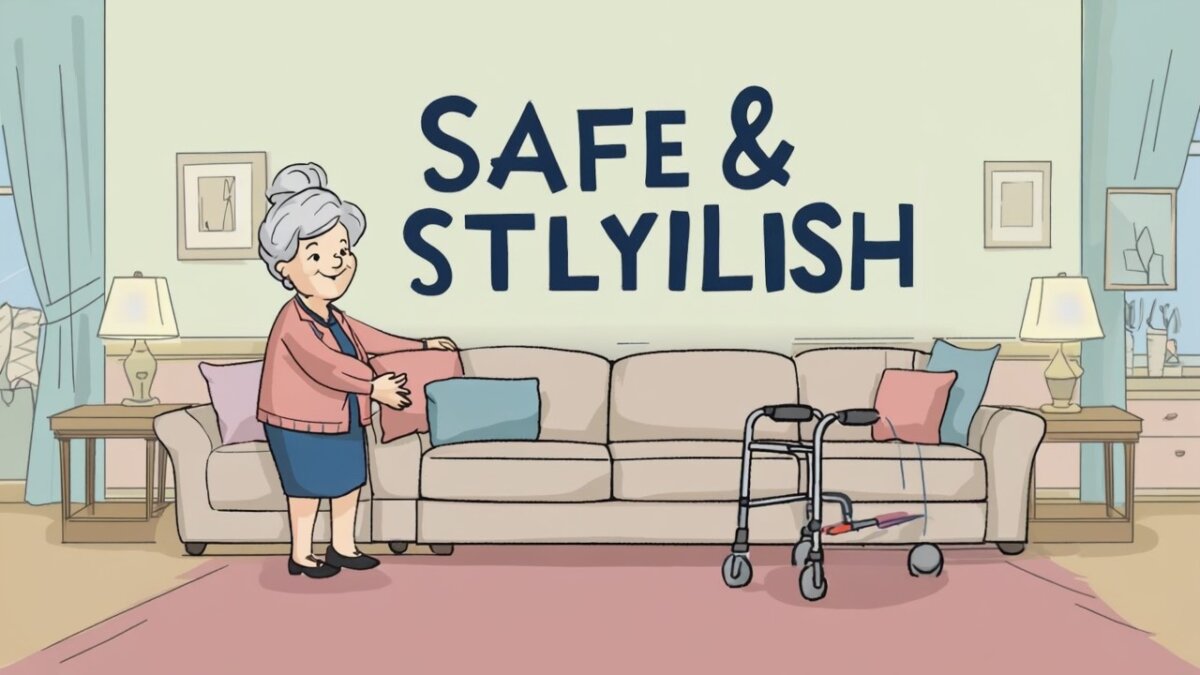
    Creating a safe, accessible home environment becomes increasingly critical as we age, with home modifications potentially preventing the falls, injuries, and accidents that lead to loss of independence and forced relocation to assisted living facilities. According to the CDC, one in four Americans aged 65+ falls each year, with falls being the leading cause of fatal and non-fatal injuries among older adults—yet most falls occur at home and are preventable through environmental modifications. Research from the Journal of the American Geriatrics Society shows seniors living in properly modified homes maintain independence 3.2 years longer on average than those in unmodified environments, with 67% fewer serious falls requiring hospitalization. The good news is that making your home safer doesn’t require expensive whole-house renovations—strategic, affordable modifications in key areas create dramatic safety improvements while maintaining the comfort and aesthetics that make your house feel like home. This comprehensive guide provides room-by-room safety strategies, affordable modification options, and practical implementation advice helping you create a secure environment supporting healthy, independent aging in place for years to come.

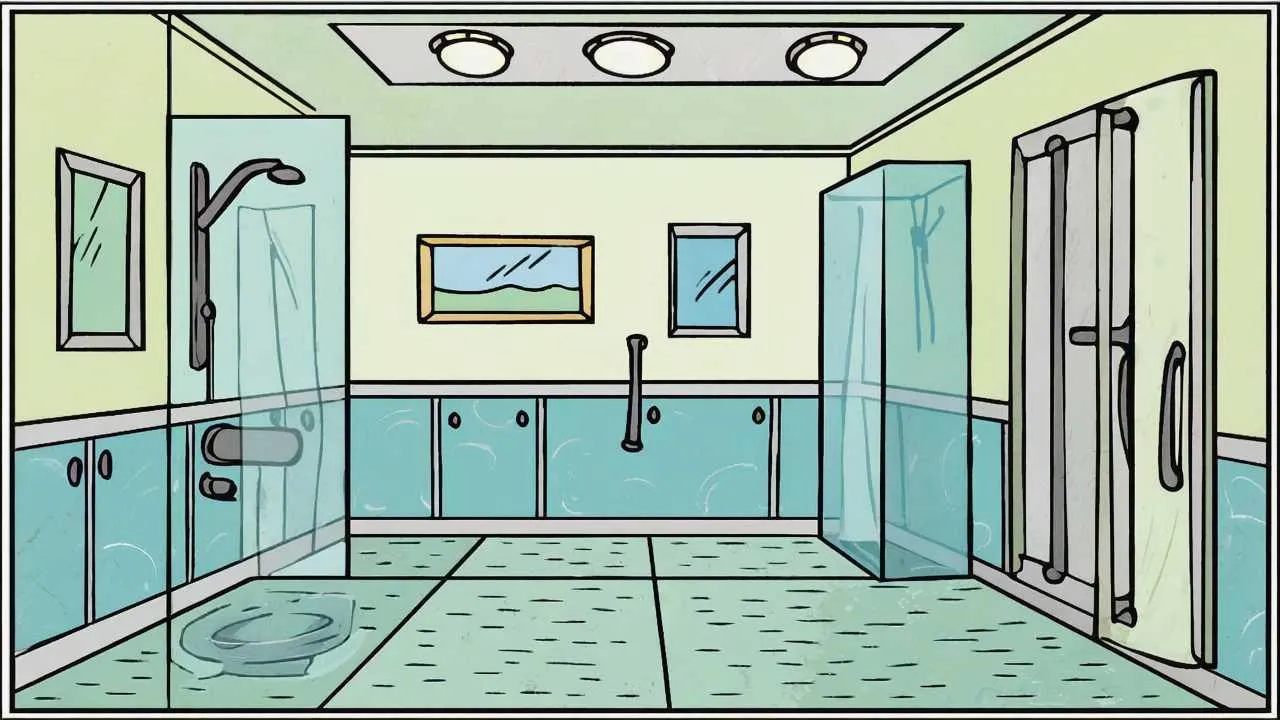
    Making Bathrooms Safe: The Highest-Priority Room

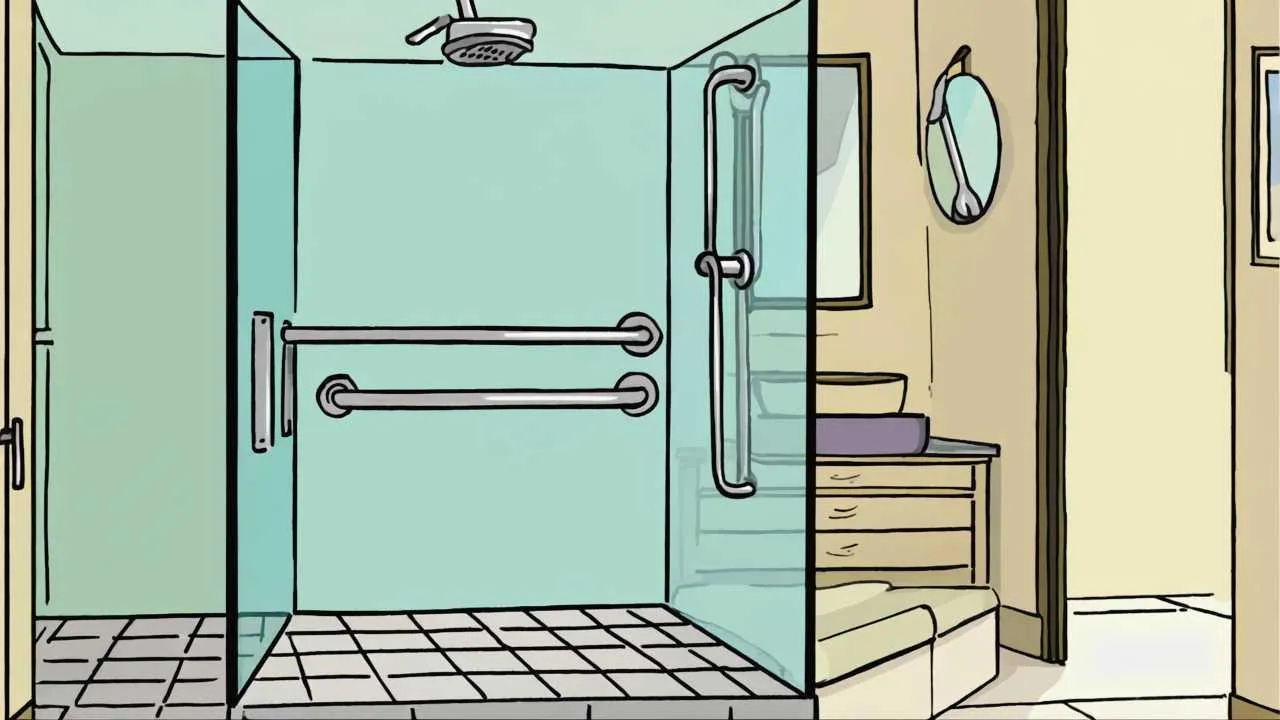
    Bathrooms pose the greatest fall risk in homes—slippery surfaces, wet conditions, and awkward movements required for bathing, toileting, and grooming create dangerous situations. The CDC reports that bathroom falls account for approximately 80% of home-related injuries among seniors, making this room the most critical area for safety modifications.

    Grab Bars: Non-Negotiable Safety Investment
    Installing grab bars is the single most important bathroom safety modification. These sturdy supports prevent falls during the most dangerous activities—entering and exiting showers or tubs, sitting on and standing from toilets, and maintaining balance while bending or reaching. Professional-grade grab bars must support 250-300 pounds minimum and mount directly into wall studs or with specialized anchors, never into drywall alone which cannot support your weight.

    Essential grab bar locations include: inside the shower or tub (horizontal bar at waist height 33-36 inches from floor), outside the shower or tub entrance (vertical bar assisting entry and exit), beside the toilet on the wall side (horizontal bar 33-36 inches high), and near the bathroom sink if balance is an issue. Install L-shaped bars combining vertical and horizontal elements providing support in multiple directions during complex movements.

    Grab bars now come in attractive finishes (brushed nickel, oil-rubbed bronze, chrome) and styles matching your bathroom fixtures rather than institutional-looking white bars. Decorative grab bars ($30-80 each) blend seamlessly with bathroom design while providing crucial safety. Professional installation costs $75-150 per bar including labor and materials, or DIY installation saves money if you’re confident locating studs and drilling properly. Never compromise on installation quality—improperly installed grab bars provide false security and can cause serious falls if they pull out during use.

    Non-Slip Surfaces and Mats
    Wet bathroom floors and tub surfaces become dangerously slippery, particularly for seniors with balance issues or slow reflexes. Address slipping hazards through multiple strategies. Install textured non-slip strips or decals in bathtubs and shower floors ($10-25 per set)—these adhesive strips provide traction without changing your tub’s appearance significantly. Place non-slip bath mats with suction cups inside tubs and showers during use ($15-30), ensuring they stay firmly attached and don’t slide during stepping.

    Outside tubs and showers, use bath rugs with rubber backing or non-slip pads underneath preventing rugs from sliding on tile floors. Replace traditional loop-pile bath rugs with low-pile, quick-dry mats that won’t bunch or curl at edges creating tripping hazards. Consider replacing slippery tile flooring with textured, slip-resistant flooring materials ($3-8 per square foot professionally installed) if you’re planning bathroom updates—this permanent solution eliminates ongoing concerns about mat placement and maintenance.

    Shower and Bath Modifications
    Walk-in showers with no curbs or lips to step over are ideal for senior safety, eliminating the dangerous step-up and step-down movements required with traditional tubs and shower pans. If you have a bathtub and bathing is difficult, consider converting it to a walk-in shower ($2,000-6,000 professionally installed)—this significant investment dramatically improves safety and accessibility while often increasing home value.

    For less expensive modifications, install a transfer bench or shower chair ($40-150) allowing you to sit while bathing, eliminating standing balance requirements and reducing fall risk. Hand-held shower heads ($25-80) attach to existing shower arms, allowing seated bathing and making hair washing easier without overhead reaching. Raised toilet seats ($30-80) add 3-5 inches to toilet height, making sitting and standing significantly easier for those with knee problems, arthritis, or limited mobility.

    Lighting Improvements
    Bathrooms need bright, even lighting eliminating shadows that hide depth changes and obstacles. Replace single overhead fixtures with multiple light sources—vanity lights on both sides of mirrors, recessed ceiling lights, and nightlights providing gentle illumination for nighttime bathroom visits. Install motion-sensor nightlights ($15-30) in bathrooms and hallways leading to bathrooms, automatically lighting paths for safe nighttime navigation without fumbling for switches in the dark.

    Ensure light switches are easily accessible near bathroom entrances—you should be able to turn on lights before entering rather than navigating dark bathrooms to reach switches inside. Consider rocker-style switches ($3-8 each) requiring pressing rather than pinching, easier for arthritic hands than traditional toggle switches.

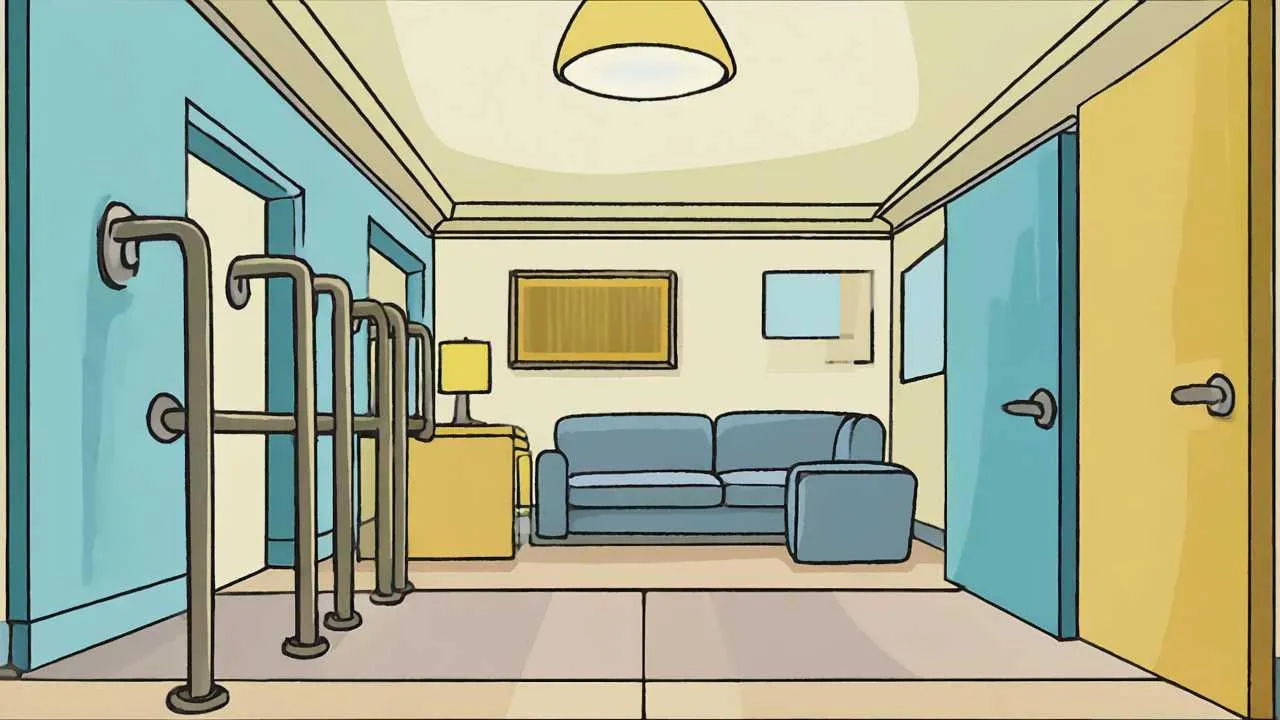
    Securing Stairways and Steps

    Stairs present serious fall risks—the National Safety Council reports that stairway falls cause over 12,000 deaths annually among adults 65+, with thousands more suffering serious injuries. Making stairs safer requires attention to lighting, railings, visibility, and sometimes alternatives to stair use.

    Proper Railings and Handrails
    Every stairway must have sturdy handrails on both sides regardless of building code requirements (which typically mandate only one handrail for stairs less than 44 inches wide). Two-sided handrails allow you to maintain support throughout climbs regardless of which hand you favor and provide critical support if one side is temporarily unusable due to carrying items or injury.

    Handrails should extend beyond the top and bottom steps by 12 inches, providing support before you begin descending and after you complete climbing. Rails must be mounted 34-38 inches above stair treads and should be graspable—round or oval profiles 1.25-2 inches in diameter work better than flat profiles or decorative rails impossible to grip properly. Test handrails by pulling hard—they should feel absolutely solid without any wobble or movement. Loose handrails are dangerous, providing false security that fails when you need support most.

    If your home lacks handrails or has only one, installing a second rail costs $150-400 professionally depending on stairway length and configuration. This investment dramatically improves stairway safety and often increases home value, as proper handrails appeal to buyers of all ages.

    Visibility and Marking
    Many stair falls occur because people misjudge step locations, particularly at the top and bottom where transitions from flat surfaces catch attention less than mid-stairway steps. Improve step visibility through high-contrast marking—apply bright colored tape or paint to step edges (nosing) creating clear visual boundaries between steps. Yellow or white contrasting tape ($10-20 for 30 feet) works well on dark stairs, while dark tape suits light-colored stairs.

    Ensure adequate lighting at stair tops, bottoms, and along entire stairways. Install three-way switches allowing lights to be controlled from both top and bottom, so you never climb or descend in darkness. Motion-sensor lights eliminate the need to find switches while carrying items or if switches are inconveniently located. LED strip lights under stair nosing or along baseboards ($30-60 for 15 feet) provide gentle illumination perfect for nighttime stair use without harsh overhead glare.

    Stair Treads and Carpet
    Stairs should have non-slip surfaces preventing foot slippage that causes falls. If you have hardwood or tile stairs, install rubber or carpet stair treads ($50-150 for 13 steps) providing traction while leaving stair appearance attractive. Secure loose carpet or torn edges immediately—even small lifting corners can catch feet causing tumbles. Replace worn, slippery carpet on stairs rather than waiting until carpet is thoroughly worn out—the cost of replacement ($300-800 for typical residential staircases) is insignificant compared to injury costs from falls.

    Remove or secure runners on stairs—loose runners slide dangerously under feet. If you love the aesthetic of runners, secure them properly with runner rods ($30-80 per flight) or carpet tacks every few inches rather than relying on friction alone.

    Alternatives to Stairs
    For multi-story homes where stairs become increasingly difficult or dangerous, consider alternatives preserving access to all levels. Stairlifts ($3,000-5,000 installed for straight stairs, $7,000-15,000 for curved stairs) provide seated transport up and down stairs, eliminating physical demands and fall risks of stair climbing. While expensive, stairlifts often cost less than moving to single-story housing and preserve ability to age in place in homes you love.

    For homes with small step transitions between rooms or into garages, install permanent ramps ($200-800 depending on length) eliminating steps entirely. Modular ramp systems work for higher transitions, though professional design ensures proper slope ratios (maximum 1:12 slope recommended for independent wheelchair use, 1:16 for walker use) and code compliance.

    Informative cartoon showing various home safety modifications including grab bars, non-slip mats, adequate lighting, clear pathways, and assistive devices
    Strategic safety modifications throughout your home prevent falls and injuries
    Visual Art by Artani Paris

    Creating Safe, Accessible Bedrooms

    Bedrooms should provide safe, comfortable rest without hazards during nighttime bathroom trips when you’re groggy and vision is compromised by darkness. Falls in bedrooms frequently occur during these nighttime movements, making this room crucial for safety modifications.

    Proper Bed Height and Access
    Bed height significantly affects getting in and out safely. Ideal bed height positions your feet flat on the floor when sitting on the bed edge, with knees bent approximately 90 degrees—typically 20-23 inches from floor to top of mattress for most adults. Beds too low require difficult standing from low positions, straining knees and back. Beds too high force dangerous jumping or climbing down, risking falls and twisted ankles.

    Adjust bed height using bed risers ($15-40 per set) adding 3-8 inches to low beds, or by removing box springs and using low-profile foundations for too-high beds. Hospital-style adjustable beds ($800-3,000) allow electronic height adjustment plus head and foot elevation, providing optimal comfort and safety for those with breathing problems, acid reflux, or circulation issues.

    Ensure clear space on both sides of beds for safe entry and exit. Position beds away from walls on at least one side (preferably both) allowing unrestricted access. Keep bed sides clear of furniture impeding movement—nightstands should sit back slightly from bed edges rather than blocking side access.

    Bedroom Lighting
    Bedrooms require multiple lighting options accommodating different needs and times. Install bedside lamps on both sides of beds for reading and for illuminating the room when getting up at night. Use motion-sensor nightlights ($15-25) providing automatic path lighting for bathroom trips without requiring fumbling for switches. Position nightlights along pathways from beds to bathrooms, eliminating navigation in complete darkness.

    Consider smart bulbs or switches allowing voice activation of bedroom lights—calling “lights on” eliminates dangerous groping for switches or lamps when disoriented by nighttime waking. Voice control particularly benefits those with limited mobility or arthritis making switch operation painful. Smart switches cost $15-50 each, while smart bulbs cost $10-25 each, with most systems working with Amazon Alexa or Google Assistant voice controls.

    Floor Hazards and Trip Prevention
    Keep bedroom floors completely clear of tripping hazards—shoes, clothing, extension cords, and loose rugs cause unnecessary falls. Establish specific storage locations for everything: shoes in closets or under-bed organizers, clothing in hampers or hung immediately, cords secured along baseboards rather than crossing floor pathways. This organization eliminates moment-by-moment decisions about where to place items, preventing the gradual floor clutter accumulation that creates hazards.

    Remove or secure loose area rugs. Small scatter rugs slide easily on hardwood or tile floors, catching feet and causing falls. If you want rugs for warmth or aesthetics, use non-slip rug pads ($15-40 depending on size) underneath or choose rugs with non-slip rubber backing. Low-pile rugs (1/4-1/2 inch) pose fewer tripping hazards than high-pile or shag rugs where feet can catch on fibers.

    Emergency Preparedness
    Keep flashlights on both bedside tables for power outage situations. Motion-activated emergency lights ($20-40) provide automatic backup lighting during outages, preventing dangerous navigation in complete darkness. Keep phones within easy reach from beds—cordless phones on charging cradles ($30-70) or cell phones with large-button emergency contact settings ensure you can call for help if needed without leaving beds during nighttime emergencies.

    Room/Area Top Hazards Essential Modifications Estimated Cost
    Bathroom Slippery surfaces, awkward movements Grab bars, non-slip mats, raised toilet seat, shower chair $200-500
    Stairs Falls during climbing/descending Double handrails, contrast tape, improved lighting $150-600
    Bedroom Nighttime navigation, bed access Motion sensor lights, proper bed height, clear floors $100-300
    Kitchen Reaching, bending, hot surfaces Reorganized storage, anti-fatigue mats, adequate lighting $150-400
    Living Areas Tripping hazards, furniture obstacles Cord management, furniture arrangement, pathway clearing $50-200
    Entryways Steps, uneven surfaces, poor lighting Handrails, ramps, motion lights, weather protection $200-800
    Room-by-room safety priorities and modification costs for senior homes (2025 estimates)

    Kitchen Safety and Accessibility Modifications

    Kitchens present unique safety challenges—hot surfaces, sharp objects, reaching and bending requirements, and standing duration demands make this room hazardous without proper modifications. The goal is maintaining independence in meal preparation while minimizing injury and fatigue risks.

    Storage Reorganization for Easy Access
    Store frequently used items at waist to shoulder height (roughly 30-54 inches from floor), eliminating dangerous reaching overhead or bending to floor-level cabinets. Move everyday dishes, glasses, cooking utensils, pots, pans, and food staples to easily accessible shelves. Use lower cabinets for rarely used items or items you can retrieve while seated. Upper cabinets above shoulder height should hold only rarely used holiday items or excess supplies.

    Install pull-out shelves ($30-80 each) in lower cabinets, bringing contents to you rather than requiring kneeling or deep reaching into cabinet backs. Lazy Susans ($15-40) in corner cabinets make all items accessible with simple rotation rather than reaching awkwardly into dark corners. Drawer organizers ($10-30) keep utensils and small items sorted and visible, preventing frustrated digging through cluttered drawers.

    Reducing Physical Demands
    Anti-fatigue mats ($30-70) in front of sinks and preparation areas reduce leg and back fatigue during meal preparation, allowing longer standing without pain. Pull-out cutting boards and work surfaces at comfortable heights reduce awkward bending and reaching. Keep a stool or chair in kitchens for seated food preparation when possible—chopping vegetables, mixing ingredients, and other tasks often can be done while seated, reserving standing for activities truly requiring it.

    Use lightweight cookware rather than heavy cast iron or thick stainless steel. Nonstick pans require less scrubbing, reducing hand and wrist strain. Replace traditional tea kettles with electric kettles ($25-60) featuring automatic shut-off preventing dangerous dry-boiling if you forget the kettle. Electric can openers ($15-35) eliminate hand strain and arthritis pain from manual openers.

    Preventing Burns and Injuries
    Mark stove controls clearly with large, high-contrast labels indicating off positions, making it easy to verify burners are off. Consider induction cooktops ($300-1,200) for kitchen updates—these stay cool to touch except where pots sit, dramatically reducing burn risks and automatically shutting off when pots are removed. Keep a fire extinguisher ($20-50) easily accessible in kitchens, mounted near exit doors rather than near stoves (you don’t want to reach over fires to access extinguishers).

    Use timer reminders for anything cooking or boiling—smartphone timers, kitchen timers, or smart speakers all work. Set timers immediately when starting cooking, preventing forgotten items burning or boiling dry while you’re distracted. Install smoke detectors ($15-40) in kitchens and adjacent rooms, testing them monthly to ensure they function properly.

    Lighting and Visibility
    Kitchens need excellent task lighting for safe food preparation. Install under-cabinet LED strip lights ($30-60 per cabinet section) illuminating countertops where you work, eliminating shadows from overhead fixtures. Increase overall ambient lighting with brighter bulbs or additional fixtures—kitchens should be the brightest rooms in your home. Use warm-white LEDs (2700-3000K) providing adequate brightness without harsh, cold institutional feelings.

    General Home Modifications for Overall Safety

    Beyond room-specific modifications, general changes throughout your home improve safety comprehensively, creating secure environments regardless of which rooms you occupy at any moment.

    Flooring and Surface Improvements
    Replace slippery flooring with textured, slip-resistant alternatives when planning updates. Luxury vinyl plank flooring ($2-7 per square foot installed) provides attractive, durable, slip-resistant surfaces at moderate cost. If replacing flooring isn’t feasible, secure loose carpet edges, repair or replace worn carpet, and ensure area rugs have non-slip backing or pads underneath.

    Maintain consistent flooring heights throughout homes—transitions between different flooring types often create small lips where materials meet. These height differences, even 1/4 inch, create tripping hazards particularly for those using walkers or shuffling feet rather than lifting high with each step. Install beveled transition strips ($8-20 each) smoothing height differences, or consider removing transitions entirely during flooring updates by extending single flooring types through multiple rooms.

    Lighting Throughout the Home
    Aging eyes require 2-3 times more light than younger eyes for comfortable vision and safe navigation. Increase lighting throughout homes, particularly in hallways, staircases, and transition areas where falls commonly occur. Replace low-wattage bulbs with brighter LEDs—many modern LEDs produce equivalent light to 100-watt incandescent bulbs while using only 15-20 watts, providing brightness without excessive energy costs.

    Install motion-sensor lights ($15-35 each) in hallways, bathrooms, and entryways providing automatic lighting when you enter spaces, eliminating fumbling for switches. Three-way switches in hallways allow lighting control from both ends, preventing navigation through dark hallways to reach switches on opposite ends. Timer switches or smart switches allowing scheduled automatic lighting ensure key routes stay illuminated during times you typically move through them.

    Eliminating Tripping Hazards
    Conduct thorough room-by-room hazard assessments identifying and eliminating tripping risks. Remove unnecessary furniture blocking pathways or creating narrow passages. Secure electrical cords along baseboards using cord channels ($8-15) or cord clips rather than allowing cords to cross floor pathways. Remove throw rugs without non-slip backing. Eliminate floor clutter—shoes, bags, pet toys, and miscellaneous items left on floors create unnecessary hazards.

    Establish and maintain clear pathways minimum 36 inches wide through all living spaces—sufficient for safe walking and wide enough for walkers or wheelchairs if needed in future. This width provides comfortable passing even when carrying items and prevents the sideways shuffle required to navigate tight spaces that can cause balance loss.

    Technology for Safety
    Medical alert systems ($25-50 monthly) provide emergency response access at button-push, connecting you with monitoring centers 24/7. Modern systems include fall detection automatically alerting responders if falls are detected even when you can’t press buttons. While monthly fees add up, these systems provide peace of mind for both you and your family, potentially saving lives during medical emergencies when you cannot reach phones.

    Smart home technology enhances safety through voice control, automation, and remote monitoring. Smart speakers ($30-100) allow voice control of lights, thermostats, timers, and calls without physical movement. Video doorbells ($80-250) let you see and speak to visitors without approaching doors, preventing falls rushing to answer bells. Smart locks ($100-300) allow remote locking verification and emergency access for family or responders without physical key management.

    Modification Type DIY Cost Professional Cost Impact Level
    Grab Bars (per bar) $30-50 $75-150 Very High
    Non-Slip Mats/Strips $10-30 N/A High
    Motion Sensor Lights (each) $15-35 $50-100 High
    Stair Handrails (one side) $80-200 $150-400 Very High
    Raised Toilet Seat $30-80 N/A Medium-High
    Lever Door Handles (each) $15-40 $50-100 Medium
    Stairlift Installation N/A $3,000-5,000 Very High
    Walk-in Shower Conversion N/A $2,000-6,000 Very High
    Common safety modification costs and impact ratings (2025 estimates)

    Outdoor and Entryway Safety

    Outdoor areas and entryways present unique hazards—weather exposure, uneven surfaces, steps, and poor lighting combine creating dangerous conditions. Many falls occur during entry and exit, making these transition areas critical for safety attention.

    Steps and Ramps
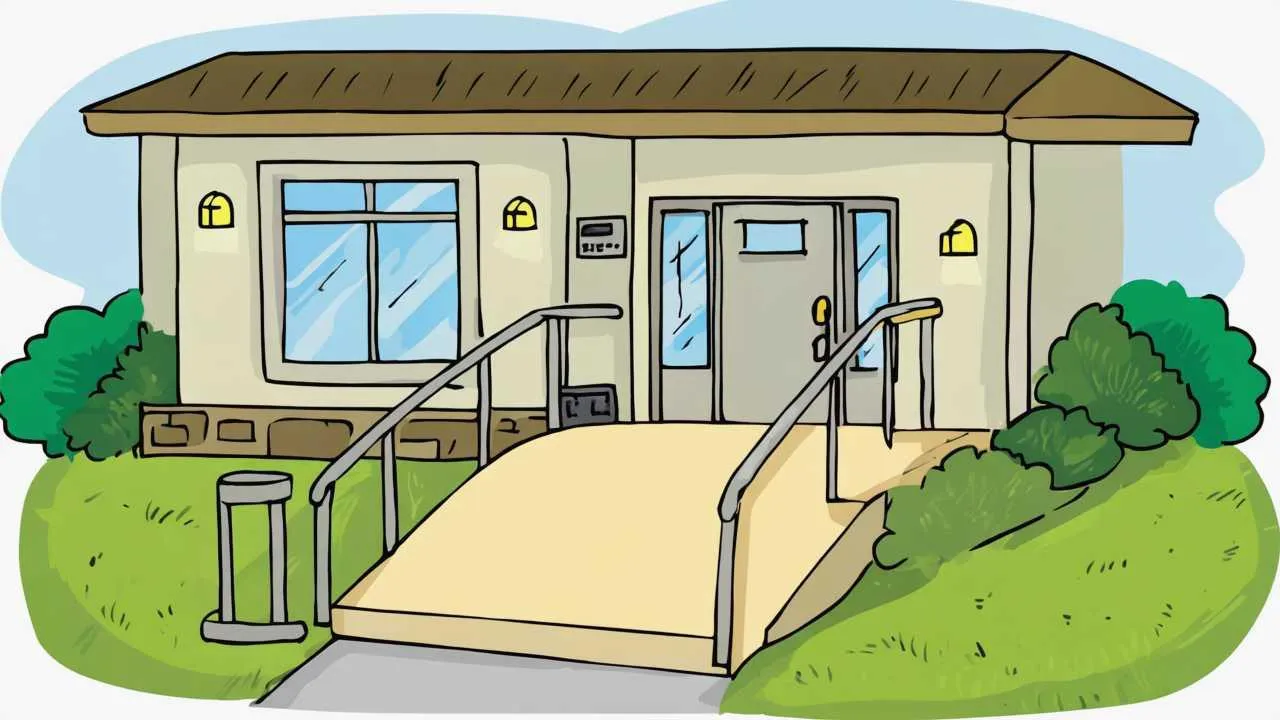
    All outdoor steps require sturdy handrails on both sides regardless of step number—even single steps cause falls and benefit from handrail support. Handrails should be weather-resistant materials (powder-coated metal, treated wood, composite materials) withstanding rain, snow, and temperature extremes without deteriorating. Mark step edges with high-contrast paint or tape improving visibility, particularly important outdoors where lighting varies throughout the day and step edges may be less obvious than indoors.

    For homes with multiple entry steps, consider permanent ramp installation ($500-3,000 depending on height and length) eliminating steps entirely. Modular ramp systems allow DIY installation or professional installation, providing wheelchair access and easier entry for anyone using walkers, canes, or simply finding steps increasingly difficult. Ramps require proper slope ratios (1:12 maximum for independent wheelchair use) and may need railings on both sides depending on height and local codes.

    Lighting and Visibility
    Outdoor entry areas need excellent lighting for safe nighttime access. Install motion-sensor lights ($30-80) at front and back doors, automatically illuminating approaches when you arrive home after dark. Dusk-to-dawn lights ($20-50) provide all-night illumination without manual switching, ensuring entry areas stay lit throughout dark hours. Solar-powered pathway lights ($30-100 for sets of 6-12) mark walkways from driveways or sidewalks to doors, requiring no electrical work and providing sustainable lighting.

    Ensure house numbers are large (minimum 4 inches tall), high-contrast, and well-lit so emergency responders can locate your home quickly during emergencies. Backlit or solar house numbers ($25-60) provide 24/7 visibility without ongoing electricity costs.

    Weather Protection and Surface Maintenance
    Keep walkways, steps, and entry areas clear of ice, snow, leaves, and debris. Apply ice-melt products ($10-25 per 50-pound bag) liberally during winter, preventing slippery conditions on walkways and steps. Store ice melt in easily accessible locations near doors you use regularly, allowing quick application before leaving home. Consider heated entry mats ($80-200) automatically melting snow and ice from small entry areas like single steps or small porches.

    Repair cracked or uneven concrete, asphalt, or paving stones creating tripping hazards. Small height differences between paving sections catch toes and cause falls. Fill cracks with concrete patch ($8-15 per container), level sunken sections with polyurethane foam injection ($500-1,500 professionally for typical residential repair), or replace severely damaged sections ($5-15 per square foot installed).

    Seating at Entries
    Place benches or chairs near entryways allowing seated shoe removal and rest while handling bags, packages, or mail. Entry seating proves particularly valuable after shopping trips or when arriving home tired. Weather-resistant benches ($80-250) work for covered porch areas, while simple plastic resin chairs ($15-40) provide affordable, durable seating for more exposed areas. Seating eliminates rushed, one-legged hopping while putting on or removing shoes—a surprisingly common cause of entry area falls.

    Practical cartoon displaying accessible home features including ramps, lever handles, lowered switches, wide doorways, and assistive technology
    Thoughtful accessibility modifications support independent living for years to come
    Visual Art by Artani Paris

    Financial Assistance for Home Modifications

    Home safety modifications can be expensive, particularly major projects like stairlifts or bathroom conversions. Fortunately, various programs and strategies can help fund necessary modifications, making safety improvements accessible even on limited budgets.

    Government Programs and Tax Benefits
    Medicaid Waiver programs in many states cover home modifications allowing seniors to remain at home rather than entering nursing facilities. Coverage and eligibility vary by state, but programs typically cover modifications like ramps, grab bars, stairlifts, and bathroom adaptations when medically necessary. Contact your state Medicaid office or local Area Agency on Aging for specific program information and application assistance.

    Veterans Affairs (VA) offers home modification grants for eligible veterans through programs like Specially Adapted Housing (SAH) grants up to $109,986 and Special Housing Adaptation (SHA) grants up to $21,996 for service-connected disability modifications. Even veterans without service-connected disabilities may qualify for Home Improvements and Structural Alterations (HISA) grants up to $6,800. Contact your local VA office or visit va.gov for eligibility information and applications.

    IRS medical expense deductions may include home modifications if prescribed by doctors for specific medical conditions. Modifications improving accessibility for mobility-impaired individuals (ramps, widened doorways, modified bathrooms) qualify as deductible medical expenses. Consult tax professionals about claiming these deductions, as rules are complex and require proper documentation.

    Nonprofit and Community Resources
    Rebuilding Together (rebuildingtogether.org) provides free home repairs and modifications for low-income homeowners, including seniors. Local affiliates coordinate volunteer labor and donated materials making critical safety repairs at no cost. Services typically include grab bar installation, ramp construction, step repairs, and other safety modifications. Contact your local affiliate for eligibility requirements and application processes.

    Habitat for Humanity and similar organizations often operate aging-in-place or home repair programs for seniors. While famous for building new homes, many affiliates now focus on modification and repair services helping seniors remain in existing homes. Services and eligibility vary by location, so contact local affiliates for program information.

    Home Equity and Loan Options
    Home equity loans or lines of credit provide funds for major modifications using your home’s value as collateral. Interest rates are typically lower than personal loans or credit cards, and interest may be tax-deductible (consult tax professionals). However, these loans require monthly payments and put your home at risk if you can’t repay, so consider carefully whether this option suits your financial situation.

    Reverse mortgages for homeowners 62+ convert home equity into cash without monthly payments, with loans repaid only when you move or pass away. Proceeds can fund home modifications, though reverse mortgages involve fees and reduce equity available for heirs. Consult with HUD-approved counselors before pursuing reverse mortgages to ensure you understand terms and implications.

    Funding Source Maximum Amount Eligibility Application Process
    Medicaid Waivers Varies by state Low income, medical necessity State Medicaid office
    VA SAH Grant $109,986 Eligible veterans, service-connected disability Local VA office, va.gov
    VA SHA Grant $21,996 Eligible veterans, service-connected disability Local VA office, va.gov
    VA HISA Grant $6,800 Eligible veterans Local VA office, va.gov
    Rebuilding Together Free (donated) Low income homeowners Local affiliate, rebuildingtogether.org
    IRS Medical Deduction No limit Medically necessary modifications Tax return (consult professional)
    Financial assistance programs for home safety modifications (2025 information)

    Real Success Stories

    Case Study 1: Tampa, Florida

    Barbara M. (73 years old)

    Barbara fell twice in six months—once stepping out of her bathtub and once on her dimly lit staircase. The second fall resulted in a fractured wrist requiring surgery, and her orthopedic surgeon warned that another serious fall could end her independence. Her daughter pushed for moving to assisted living, but Barbara desperately wanted to remain in the home where she’d lived for 40 years.

    Working with an occupational therapist ($150 for home assessment), Barbara identified critical modifications needed for safe aging in place. She prioritized bathroom safety first, installing grab bars inside and outside her tub ($200 professionally installed), adding a shower chair ($60), placing non-slip mats ($25), and installing a raised toilet seat ($45). For stairway safety, she added a second handrail on the previously open side ($180 professionally installed), applied bright yellow contrast tape to all step edges ($12), and installed motion-sensor LED lights at top and bottom ($40).

    Additional modifications included motion-sensor nightlights in hallways and bathrooms ($60 for four lights), removing throw rugs throughout the house, and reorganizing kitchen storage to eliminate overhead reaching. Total investment of $772 transformed Barbara’s home from hazardous to safe.

    Results:

    • Zero falls in the 18 months following modifications versus 2 serious falls in previous 6 months
    • Maintained independent living versus facing assisted living costs of $4,000-6,000 monthly
    • Increased confidence performing daily activities without fear of falling
    • Daughter’s anxiety about Barbara’s safety decreased significantly, reducing family conflict about living arrangements
    • Total investment of $772 (including OT assessment) provided peace of mind and prevented potential medical costs from future falls

    “After my second fall and surgery, I was terrified in my own home—scared to shower, scared to use the stairs, scared to move around at night. The modifications changed everything. I feel safe again. My daughter wanted me to move to assisted living, but now she sees I can stay here safely. Those grab bars and better lighting probably saved my independence.” – Barbara M.

    Case Study 2: Portland, Oregon

    David and Susan K. (both 70 years old)

    This retired couple loved their two-story home but increasingly struggled with stairs as arthritis and balance issues worsened. They considered selling and buying a ranch-style home but dreaded leaving their neighborhood, friends, and the home where they’d raised their children. Daily stair climbing caused knee pain, and both feared falling on stairs—a realistic concern given Susan’s two near-falls in recent months.

    Rather than moving, they explored modifications allowing them to age in place in their beloved home. After researching options and consulting with contractors, they invested in a straight stairlift ($3,800 installed) eliminating physical demands and fall risks of stair climbing. They converted a first-floor office into a bedroom ($800 for closet addition and privacy upgrades) and modified the adjacent powder room with a shower insert ($1,200 professionally installed) creating a complete first-floor living suite.

    These modifications allowed David and Susan to live entirely on the first floor if desired while maintaining access to second-floor bedrooms for guests. Total investment of $5,800 seemed significant initially but compared favorably to selling costs (typically 6-8% of home value plus moving expenses) and the emotional cost of leaving their community.

    Results:

    • Eliminated daily stair climbing pain and fall anxiety while maintaining access to all home areas
    • Avoided selling costs of approximately $24,000-32,000 on their $400,000 home plus $5,000-10,000 moving expenses
    • Remained in their community near friends, familiar doctors, and support networks
    • Created guest bedroom suite on second floor allowing adult children and grandchildren to visit comfortably
    • Increased home value by approximately $6,000-8,000 through modifications, recovering most investment

    “We almost sold our house because of those stairs—we couldn’t imagine continuing to climb them multiple times daily as we got older. The stairlift seemed expensive until we calculated moving costs and realized we’d spend three times as much selling and buying a different house. Now we get to stay in the home and neighborhood we love, and honestly, we use the lift multiple times daily and wonder why we waited so long to install it.” – Susan K.

    Case Study 3: Albuquerque, New Mexico

    Robert T. (68 years old)

    As a veteran with service-connected mobility issues, Robert struggled increasingly with his home’s accessibility as his condition worsened. He used a walker full-time and anticipated needing a wheelchair within a few years. His home had three entry steps with no handrails, a step-in shower impossible to use safely with a walker, narrow doorways barely accommodating his walker, and a toilet too low for safe transfers. He assumed he’d eventually need to move to accessible housing despite wanting to stay in his home near the VA medical center where he received care.

    Robert’s VA social worker informed him about VA’s Special Housing Adaptation (SHA) grant providing up to $21,996 for accessibility modifications. Working with a VA-approved contractor, Robert installed a permanent entry ramp ($2,400), widened key doorways to 36 inches ($3,200 for four doorways), converted his step-in shower to a roll-in shower with built-in seat ($4,800), raised his toilet and added grab bars throughout the bathroom ($800), and added lever-style door handles throughout the house replacing difficult-to-grip knobs ($600 for 12 handles).

    Total modifications cost $11,800, fully covered by his SHA grant. These changes transformed Robert’s home from barely manageable to fully accessible, extending his ability to age in place independently by an estimated 5-8 years according to his occupational therapist.

    Results:

    • Achieved wheelchair accessibility throughout home, preparing for anticipated mobility decline
    • Eliminated dangerous step navigation and awkward doorway maneuvering risking falls and injury
    • Zero out-of-pocket costs through VA SHA grant—$11,800 in modifications fully funded
    • Extended projected independent living by 5-8 years, saving estimated $240,000-480,000 in facility care costs ($4,000-6,000 monthly for 5-8 years)
    • Remained near VA medical center providing specialized care for his service-connected conditions

    “I had no idea the VA would pay for all these modifications. I thought I’d have to move to some accessible apartment complex away from my doctors and the VA hospital. Instead, my house is now fully accessible—I can get in and out independently, use my bathroom safely, and move throughout my home with my walker or wheelchair when I eventually need one. These modifications changed everything. Every veteran should know about these benefits.” – Robert T.

    Frequently Asked Questions

    Do home safety modifications decrease home value?

    Most safety modifications either maintain or increase home value, contrary to common concerns. Grab bars, improved lighting, non-slip surfaces, and handrails appeal to buyers of all ages as “universal design” features. Major modifications like stairlifts can be removed before selling if buyers don’t need them, while walk-in showers, ramps, and widened doorways typically increase home value by improving accessibility. Real estate agents report that homes with safety and accessibility features often sell faster and for higher prices than comparable homes without them, as aging Baby Boomers increasingly seek move-in-ready homes requiring no modification work.

    Should I make all modifications at once or gradually over time?

    Prioritize modifications addressing your most serious fall risks and mobility limitations first, then add others over time as needed and budget allows. Start with bathroom grab bars, adequate lighting throughout, and stairway handrails—these prevent the most common and dangerous falls. Add other modifications gradually unless you’re recovering from falls or injuries requiring immediate comprehensive changes. Gradual modification allows spreading costs over time and ensures you invest in modifications you actually need rather than anticipating problems that may never occur. However, if you’re planning other home updates (bathroom remodels, flooring replacement), incorporate accessibility features during those projects rather than making separate modifications later.

    Can I install safety modifications myself or should I hire professionals?

    Simple modifications like non-slip mats, nightlights, lever door handles, and cord organization are easy DIY projects requiring no special skills. Installing grab bars requires finding wall studs and drilling properly—DIY is possible if you’re confident with tools, but improper installation creates dangerous false security. Handrails, lighting modifications requiring new electrical work, and any structural changes (ramps, doorway widening, bathroom conversions) should be done by licensed professionals ensuring safety, code compliance, and proper installation. When in doubt, hire professionals—the cost difference is small compared to injury costs from failed DIY installations. Many handyman services charge $50-100 per hour for simple installations like grab bars and handrails, providing professional installation at reasonable costs.

    How do I know which modifications I actually need?

    Consider professional home safety assessments by occupational therapists ($150-300) who evaluate your home identifying specific fall risks and mobility challenges based on your current and anticipated needs. OTs provide prioritized recommendations and can write prescriptions for modifications potentially covered by insurance or qualifying for tax deductions. Alternatively, free or low-cost assessments are available through Area Agencies on Aging (find yours at eldercare.acl.gov) offering home safety evaluations, or through organizations like Rebuilding Together if you qualify for their services. You can also conduct self-assessments using free checklists from CDC, National Institute on Aging, or AARP, though professional assessments identify issues you might miss.

    Will Medicare or insurance pay for home modifications?

    Traditional Medicare does not cover home modifications like grab bars, ramps, or stairlifts, though it covers durable medical equipment like shower chairs, raised toilet seats, and walkers when prescribed by doctors. Medicare Advantage plans sometimes cover home safety modifications as supplemental benefits—check specific plan details. Medicaid waiver programs in most states cover home modifications for eligible low-income seniors, though coverage varies by state. Long-term care insurance policies may cover modifications if you’re receiving benefits. Private homeowners insurance doesn’t cover accessibility modifications but may cover repairs if damage from falls or accidents necessitates modifications. Check specific policies and consult with insurance agents about potential coverage.

    How can I make modifications without making my home look institutional?

    Modern safety products come in attractive finishes and styles blending with home decor rather than looking medical or institutional. Grab bars are available in oil-rubbed bronze, brushed nickel, chrome, and other finishes matching bathroom fixtures. Decorative grab bars incorporate towel bar styling looking like intentional design elements. Stair handrails come in wood, metal, and composite materials matching existing trim and design aesthetics. LED lighting with warm color temperatures (2700-3000K) provides bright, safe lighting without harsh institutional feelings. Focus on universal design principles benefiting everyone rather than appearing specifically disability-oriented. Many safety features—lever handles, adequate lighting, non-slip surfaces—are simply good design appropriate for all ages and abilities.

    What if I’m renting and can’t make permanent modifications?

    Many effective safety modifications require no permanent changes and can be implemented in rentals. Use suction-cup grab bars ($20-50) in showers and near toilets—while not suitable for full weight-bearing, they provide balance support for most situations. Add motion-sensor plug-in nightlights, non-slip mats, shower chairs, raised toilet seats, and improved lighting through floor and table lamps. Secure cords with removable cable channels. Use furniture risers to adjust bed and seating heights. Discuss critical modifications like grab bars or handrails with landlords—many will install or allow installation if you offer to cover costs, as modifications increase property value. Document all modifications before moving in and plan restoration if required when moving out, though many safety features actually make properties more marketable to a wider range of tenants.

    At what age should I start thinking about home safety modifications?

    Start implementing basic modifications in your 60s before falls or injuries force reactive modifications, allowing gradual, affordable improvements rather than expensive emergency changes. Many modifications benefit all ages—adequate lighting, clutter-free pathways, non-slip surfaces—making implementation sensible at any age. However, focus intensifies after age 65 when fall risks increase significantly. If you’ve experienced falls, near-falls, or notice balance or mobility changes, implement modifications immediately regardless of age. Proactive modification prevents injuries rather than responding to them, and early modifications allow time to adjust to changes like using grab bars or handrails that feel odd initially but become automatic with use. Think of safety modifications as preventive healthcare—addressed early, they prevent problems rather than fixing damage after it occurs.

    How do I convince a parent or spouse that modifications are needed?

    Resistance to modifications often stems from denial about aging or fear that changes make homes look institutional. Approach conversations focusing on maintaining independence rather than limitations—modifications allow longer independent living rather than acknowledging disability. Share statistics about fall risks and consequences, noting that falls are the leading cause of forced moves to assisted living. Suggest starting with small, non-invasive changes (better lighting, decluttering) allowing them to experience benefits before major modifications. Consider professional home assessments by occupational therapists providing objective, expert recommendations hard to dismiss as overconcern. After falls or close calls, act quickly during windows when resistance is lower and necessity is obvious. If appropriate, involve their doctors who can prescribe modifications as medical necessities, increasing psychological acceptance. Emphasize that modifications are investments in future freedom, not admissions of current incapacity.

    What modifications provide the best return on investment for safety?

    Bathroom grab bars provide the highest safety return on investment—relatively inexpensive ($30-150 per bar installed) but preventing the most dangerous and common falls. Improved lighting throughout homes ranks second—affordable ($100-300 for whole-home improvements) but dramatically reducing falls during nighttime navigation. Stair handrails (preferably both sides) are third—moderate cost ($150-400 per flight) preventing falls on the most dangerous home feature. These three modifications address the vast majority of senior home fall risks at combined costs of $280-850, providing maximum safety improvement for minimum investment. Additional modifications should be prioritized based on individual fall risks and mobility limitations identified through home assessments. Don’t postpone these critical modifications trying to save money—fall-related injuries cost far more than preventive modifications both financially and in quality of life impacts.

    Action Steps to Make Your Home Safer

    1. Conduct room-by-room home safety assessment using free checklists from CDC or AARP, photographing hazards and noting specific concerns about falls, reaching, or access difficulties
    2. Prioritize bathroom modifications first—install grab bars inside/outside tub or shower, add non-slip mats, consider raised toilet seat and shower chair based on current mobility and balance
    3. Improve home lighting throughout by replacing low-wattage bulbs with bright warm-white LEDs and installing motion-sensor nightlights in bathrooms, hallways, and any areas you navigate at night
    4. Ensure all stairways have sturdy handrails on both sides, apply high-contrast tape to step edges, and add lighting at tops and bottoms of stairs controlled by three-way switches
    5. Eliminate tripping hazards by removing unnecessary rugs without non-slip backing, securing electrical cords along baseboards, decluttering floors, and maintaining clear 36-inch-wide pathways throughout your home
    6. Reorganize kitchen and bathroom storage placing frequently used items at waist to shoulder height (30-54 inches), eliminating dangerous overhead reaching and floor-level bending for everyday items
    7. Research financial assistance programs including Medicaid waivers, VA grants if you’re a veteran, local nonprofit home repair programs, and potential tax deductions for medically necessary modifications
    8. Consider professional home safety assessment by occupational therapist ($150-300) providing expert recommendations prioritized to your specific fall risks and mobility challenges
    9. Create modification budget and timeline starting with highest-priority safety issues (bathroom, stairs, lighting) and adding other improvements gradually as funds allow over 6-12 months
    10. Install medical alert system ($25-50 monthly) with fall detection providing emergency response access if falls occur despite modification efforts—prevention is primary, but backup plans ensure safety

    Disclaimer
    This article is provided for informational purposes only and does not constitute professional medical, safety, or construction advice. While modification strategies discussed generally improve home safety for seniors, individual needs vary based on specific health conditions, mobility limitations, cognitive status, and home configurations. Consult qualified professionals including occupational therapists, certified aging-in-place specialists, licensed contractors, and healthcare providers before implementing modifications, particularly those involving structural changes or electrical work. Building codes and safety standards vary by location—ensure all modifications comply with local requirements. Financial assistance program eligibility and benefits change frequently—verify current program details through official sources before making decisions based on this information.
    Information current as of October 2, 2025. Safety standards, product availability, costs, and assistance programs may change. Always verify critical information with qualified professionals and official program sources before implementation.

    Get Weekly Senior Safety and Home Modification Tips

    Join thousands of seniors discovering practical strategies for safe, accessible homes. Receive room-by-room safety checklists, affordable modification ideas, financial assistance updates, and success stories delivered to your inbox every Tuesday morning.

    Related Articles


    Published by Senior AI Money Editorial Team
    Updated October 2025
  • Easy Interior Ideas to Create a Cozy Retirement Home: Complete Design Guide

    Warm cartoon illustration of inviting senior home interior with comfortable seating, soft lighting, accessible layout, and personal touches in soothing colors

               Transform your home into a comfortable, personal sanctuary for retirement years
              Visual Art by Artani Paris | Pioneer in Luxury Brand Art since 2002

    Creating a cozy, comfortable home environment becomes increasingly important during retirement years when you spend more time at home than any previous life stage. A thoughtfully designed retirement home combines warmth, comfort, safety, and personal style—reflecting your tastes while accommodating age-related changes in vision, mobility, and daily living needs. Research from the Journal of Environmental Psychology shows seniors living in personalized, comfortable home environments report 47% higher life satisfaction and 38% better mental health outcomes compared to those in generic, institutional-feeling spaces. The good news is that creating a cozy retirement home doesn’t require expensive renovations or professional interior designers—simple, affordable changes in color, lighting, furniture arrangement, textiles, and personal touches can transform any space into a welcoming sanctuary. This comprehensive guide provides practical, budget-friendly interior design strategies specifically tailored for seniors, helping you create spaces that feel warm, inviting, and perfectly suited to your retirement lifestyle while maintaining the functionality and safety essential for aging in place comfortably.

    Choosing Warm, Inviting Colors That Comfort

    Color profoundly impacts how spaces feel—warm colors create inviting, cozy atmospheres while cool colors can feel stark and unwelcoming. For retirement homes, prioritize warm, soft color palettes that make rooms feel comfortable and nurturing rather than cold and institutional.

    Understanding Warm Color Palettes
    Warm colors include reds, oranges, yellows, and their derivatives—terracotta, peach, cream, butter yellow, warm beige, and soft coral. These colors psychologically create feelings of warmth, comfort, and security. They also reflect light beautifully, making spaces feel brighter without harsh glare that can challenge aging eyes. Warm neutrals like beige, taupe, and warm gray provide versatile backgrounds allowing you to add color through accessories and textiles.

    Avoid stark white walls which can feel institutional and cold, creating glare problems for aging eyes. If you prefer light walls, choose warm whites with beige or yellow undertones (names like “Cream,” “Vanilla,” “Linen White”) rather than pure white or cool whites with blue undertones. These warm whites maintain brightness while feeling softer and more welcoming. Test paint samples on your walls, observing how they look throughout the day as natural light changes before committing to full rooms.

    Room-by-Room Color Recommendations
    Living rooms benefit from warm, medium-toned colors creating cozy gathering spaces. Consider soft terracotta, warm taupe, gentle sage green, or buttery yellow. These colors make large living spaces feel intimate and welcoming while providing beautiful backdrops for furniture and artwork. Accent walls in deeper versions of your main color add visual interest without overwhelming spaces.

    Bedrooms should promote relaxation and sleep through calming warm colors. Soft peach, warm gray, gentle lavender (which reads warm when paired with cream trim), or pale terracotta create restful environments. Avoid energizing colors like bright red or orange in bedrooms—these stimulate rather than relax. Your bedroom should feel like a peaceful retreat encouraging quality sleep.

    Kitchens thrive with warm, cheerful colors stimulating appetite and conversation. Cream, butter yellow, soft coral, or warm beige create inviting spaces where you enjoy cooking and eating. Consider painting just upper cabinets or a single accent wall if full-room color feels overwhelming. Even small color additions like a colorful backsplash or painted cabinet interiors create warmth.

    Bathrooms need careful color consideration—clinical white bathrooms feel institutional. Add warmth through soft beige, warm gray, or gentle aqua (which can read warm when balanced with cream fixtures and warm lighting). Colorful towels, rugs, and accessories easily warm up otherwise neutral bathrooms without permanent commitment.

    Budget-Friendly Color Changes
    You don’t need to repaint entire homes immediately. Start with the room where you spend most time—usually the living room or bedroom. Paint costs $30-50 per gallon covering approximately 400 square feet. A 12×14 bedroom requires only 1-2 gallons ($30-100) for dramatic transformation. Many paint stores offer senior discounts (typically 10-15%) on purchases.

    If painting feels overwhelming, add color through removable options: colorful throw pillows ($15-40 each), blankets ($30-80), curtains ($40-100 per panel), and area rugs ($80-300). These textiles introduce warmth and color while remaining changeable if your tastes evolve. Thrift stores and discount retailers like HomeGoods, TJ Maxx, and Ross offer quality home textiles at 40-60% below department store prices.

    Creating Layered, Comfortable Lighting

    Lighting dramatically affects how cozy spaces feel, and aging eyes require more light than younger eyes for comfortable vision. However, the goal isn’t harsh overhead brightness but rather layered lighting providing adequate illumination without glare or shadows.

    Understanding the Three Types of Lighting
    Ambient lighting provides overall room illumination—ceiling fixtures, recessed lights, or wall sconces. This general lighting should be bright enough for safe navigation but soft enough to avoid harshness. Use warm-white LED bulbs (2700-3000K color temperature) rather than cool white or daylight bulbs which cast harsh, blue-toned light that feels cold and institutional.

    Task lighting illuminates specific activities—reading lamps beside chairs, under-cabinet lights in kitchens, vanity lights in bathrooms. Seniors need 2-3 times more task lighting than younger adults for comfortable reading and detailed work. Position task lights to eliminate shadows on work surfaces while avoiding direct glare in eyes. Adjustable task lamps with flexible necks allow perfect positioning for various activities.

    Accent lighting adds warmth and ambiance—table lamps, floor lamps with soft shades, picture lights, and decorative string lights. This softer lighting creates cozy atmosphere during evenings when harsh overhead lights feel unwelcoming. Multiple accent lights around a room eliminate the single-source lighting that creates harsh shadows and feels institutional.

    Practical Lighting Solutions for Each Room
    Living rooms need layered lighting supporting various activities. Install dimmer switches on overhead fixtures ($15-40 each, easy DIY installation) allowing brightness adjustment throughout the day. Add 2-3 table or floor lamps with 3-way bulbs (50/100/150 watts equivalent) providing flexible light levels. Position lamps near seating areas for reading, crafts, or other close work. Warm-toned lamp shades (cream, beige, light brown) diffuse light beautifully while adding warmth.

    Bedrooms benefit from multiple lighting options accommodating different activities and times of day. Install bedside lamps on both sides of the bed (if couples have different sleep schedules, individual reading lights prevent disturbing partners). Consider swing-arm wall-mounted lamps ($40-80) saving nightstand space while providing adjustable reading light. Add a soft nightlight or motion-sensor light in hallways preventing dangerous nighttime navigation in darkness.

    Kitchens require excellent task lighting for safe food preparation. Install under-cabinet LED strip lights ($25-60 per cabinet) illuminating countertops without casting shadows. These lights make chopping, reading recipes, and checking food doneness much easier. Add pendant lights over islands or dining areas creating inviting spaces for meals and conversation. Replace harsh fluorescent fixtures with warm LED alternatives if you have older lighting.

    Bathrooms need bright, even lighting for grooming tasks while avoiding harsh shadows. Vertical fixtures on both sides of mirrors provide better facial illumination than single overhead lights which create unflattering shadows. Install nightlights or motion-sensor lights preventing stumbles during nighttime bathroom visits—falls frequently occur during these dark nighttime trips.

    Affordable Lighting Upgrades
    LED bulbs cost more initially ($3-8 each) but last 15-25 years and use 75% less energy than incandescent bulbs, saving money long-term. Replace all bulbs throughout your home with warm-white LEDs (2700-3000K) creating consistent, cozy lighting. Many utility companies offer rebates or free LED bulbs to customers—check your provider’s website for energy-saving programs.

    Purchase affordable lamps from discount retailers, thrift stores, or online marketplaces. Goodwill, Habitat for Humanity ReStores, and estate sales offer quality lamps for $10-30 versus $60-150 retail. Even dated-looking lamps become stylish with new shades ($15-40) and a coat of spray paint ($5-8 per can). This DIY approach creates custom lighting fitting your style at fraction of new lamp costs.

    Inviting cartoon scene of senior-friendly furniture arrangement with supportive seating, accessible tables, soft textiles, and easy-to-navigate layout
                           Select furniture prioritizing comfort, support, and ease of use
                           Visual Art by Artani Paris

    Selecting Comfortable, Supportive Furniture

    Furniture should support aging bodies while looking attractive and inviting. Cozy retirement homes feature comfortable seating, appropriate heights, and arrangements facilitating easy movement and social interaction.

    Choosing the Right Seating
    Sofas and chairs should provide firm support rather than soft cushioning you sink into—while plush furniture feels luxurious initially, it becomes difficult to exit as you age. Look for seating with seat heights 18-20 inches from floor (standard chair height) making sitting and standing easier. Test furniture in stores by sitting and standing multiple times—if you struggle getting up, the piece is too low or soft regardless of how comfortable it feels while seated.

    Armrests are essential for seniors, providing leverage when standing and arm support while seated. Armrests should extend to the front of seats and be sturdy enough to bear your weight when pushing up. Padded armrests increase comfort for extended sitting. Avoid armless chairs and ultra-low-arm modern designs which look sleek but provide poor support for aging bodies.

    Recliners offer excellent comfort and support when chosen carefully. Look for recliners with power lift features ($400-800) gently tilting forward to assist standing—these mechanisms are invaluable for those with arthritis, back pain, or limited mobility. Ensure recliners fit your body properly—seats shouldn’t be so deep that your back doesn’t reach the backrest, and footrests should support your legs without cutting off circulation behind knees.

    Arranging Furniture for Comfort and Conversation
    Arrange seating in U-shapes or L-shapes facilitating conversation without shouting across rooms. Position chairs and sofas 6-8 feet apart—close enough for easy conversation but far enough to maintain personal space. Avoid pushing all furniture against walls—floating furniture away from walls creates intimate conversation areas and improves room flow.

    Ensure clear walkways 36 inches wide minimum between furniture pieces. These paths prevent bumping into furniture and allow safe passage with walkers or wheelchairs if needed. Remove unnecessary furniture if rooms feel crowded—fewer pieces arranged thoughtfully create cozier, safer spaces than rooms packed with furniture you navigate like obstacle courses.

    Create multiple seating options throughout homes. Add a comfortable chair in bedrooms for reading or putting on shoes. Place a small bench or chair in entryways for sitting while putting on shoes. Include seating in kitchens (bar stools or small table) for resting during meal preparation. These additional seating spots make daily activities less tiring and more comfortable.

    Budget-Friendly Furniture Solutions
    You don’t need expensive new furniture to create comfortable, cozy spaces. Secondhand stores, estate sales, Craigslist, and Facebook Marketplace offer quality furniture at 50-80% below retail prices. Focus on structural soundness rather than appearance—scratched wood refinishes easily, and upholstered furniture recovers affordably (typically $200-500 for sofas).

    Enhance existing furniture rather than replacing it. Add firm cushions to too-soft sofas ($30-60 each). Install furniture risers ($15-25 per set) under low furniture increasing seat height 2-4 inches. Slipcovered furniture transforms worn pieces with washable, affordable covers ($80-200). These modifications extend furniture life while improving comfort and support for aging bodies.

    Furniture Type Ideal Height Key Features Budget Options
    Sofa/Chair Seats 18-20 inches Firm cushions, sturdy armrests, upright backs Add cushions, use risers, secondhand with reupholstery
    Coffee Tables 18-20 inches Rounded edges, stable base, adequate surface Thrift stores, repaint existing, ottoman with tray
    End Tables 24-26 inches Easy reach from seating, stable, adequate size Repurpose small tables, stack books/boxes, DIY
    Dining Tables 28-30 inches Stable base, adequate knee clearance, smooth edges Secondhand, refinish existing, extendable options
    Dining Chairs 18-19 inches Armrests, firm seats, supportive backs Estate sales, add cushions, slip covers
    Beds 23-26 inches Firm mattress, supportive frame, easy access Adjustable bed risers, quality used frames, firm toppers
    Recommended furniture heights and features for senior comfort and safety

    Adding Softness Through Textiles and Fabrics

    Textiles—pillows, throws, curtains, rugs, and upholstery—transform hard, stark spaces into soft, cozy sanctuaries. Layering various textures creates visual warmth and physical comfort making homes feel inviting and personal.

    Throw Pillows and Cushions
    Throw pillows instantly add color, pattern, and comfort to seating. Use 2-4 pillows per sofa and 1-2 per chair creating inviting, comfortable spots without overcrowding. Choose pillows in various sizes (18-22 inches square) and mix solid colors with patterns for visual interest. Pillow combinations should include your room’s main color plus 1-2 accent colors creating cohesive looks.

    Consider pillow inserts and removable covers rather than sewn-shut pillows. This system allows washing covers ($15-30 each) while reusing inserts ($8-20), and you can change covers seasonally without buying complete new pillows. Down-alternative inserts ($10-15) provide comfortable, hypoallergenic support for most people. Covers with zippers or envelope closures are easier to remove and replace than those with buttons or ties.

    Avoid purely decorative pillows that provide no functional support. Choose soft but supportive pillows you actually lean against and use, not rock-hard decorative pillows immediately removed when sitting. Your home is for living, not staging—comfort trumps appearance always.

    Throw Blankets for Warmth and Texture
    Draped throw blankets add instant coziness to living rooms and bedrooms while serving practical warmth functions. Fold throws over sofa arms or backs, drape them across chair corners, or layer them at bed ends creating inviting, nest-like spaces. Choose throws in complementary colors and varied textures—chunky knits, soft fleece, smooth cotton—for visual and tactile interest.

    Size matters—oversized throws (60×80 inches) provide better coverage than small decorative throws, functioning as actual blankets rather than mere decoration. Quality fleece or sherpa throws cost $20-40 and provide warmth and softness for years. Washable options are essential—throws collect dust and should be laundered monthly for cleanliness and allergen control.

    Curtains and Window Treatments
    Curtains significantly impact room coziness—bare windows feel cold and exposed while properly dressed windows create warmth and completeness. Choose curtains in soft, flowing fabrics like cotton, linen blends, or velvet adding texture and sound absorption. Lined curtains provide better insulation, light control, and fullness than unlined options, though they cost slightly more ($40-80 per panel versus $25-50 for unlined).

    Hang curtains properly for maximum impact. Mount rods 4-6 inches above window frames and extend rods 6-12 inches beyond frames on each side. This high-and-wide mounting makes windows appear larger, allows curtains to stack back completely (maximizing light), and creates elegant proportions. Let curtains touch or slightly puddle on floors for luxurious appearance—curtains hanging 2-3 inches above floors look skimpy and unfinished.

    Area Rugs for Warmth and Definition
    Area rugs anchor furniture groupings, define spaces, add warmth underfoot, and introduce color and pattern. In living rooms, choose rugs large enough that front legs of all furniture pieces sit on the rug—this unified arrangement makes spaces feel cohesive. Rugs should extend 12-18 inches beyond furniture edges on all sides; small rugs that barely fit under coffee tables look disconnected and skimpy.

    Prioritize safety when selecting rugs. Choose low-pile rugs (1/4-1/2 inch) rather than shag or high-pile options which create tripping hazards and make walking with walkers or wheelchairs difficult. Use rug pads ($20-60 depending on size) under all rugs preventing dangerous slipping—non-slip pads are absolutely essential for senior safety. Avoid rugs with curled edges, which create tripping hazards.

    Incorporating Personal Touches and Memories

    The coziest homes reflect inhabitants’ personalities, interests, and life stories. Personal touches transform generic spaces into meaningful sanctuaries filled with memories, achievements, and things you love.

    Displaying Photos and Artwork
    Family photos create instant warmth and personalization. Create gallery walls mixing frame sizes and styles for eclectic, collected-over-time appearance. Alternatively, use matching frames for cohesive, organized looks—both approaches work, so choose the style matching your aesthetic preferences. Include photos from various life stages—wedding photos, children at different ages, travel memories, milestone celebrations—telling your life story through images.

    Hang photos at proper heights for comfortable viewing. Center most artwork 57-60 inches from floor (standard gallery height), placing visual centers at average eye level. In seating areas where people view art while sitting, lower placement (48-54 inches center height) works better. Avoid hanging photos so high you strain necks viewing them or so low they feel like afterthoughts.

    Mix photos with other meaningful art—paintings you’ve created, prints from favorite places you’ve traveled, inherited pieces from family, or affordable art from local artists. Art doesn’t need to be expensive to be meaningful. Frame children’s artwork, vintage postcards, pressed flowers from your garden, or beautiful fabric swatches creating personal, unique displays costing little but meaning much.

    Collections and Treasured Objects
    Display collections you’ve gathered throughout life—vintage books, pottery, seashells, model trains, or any items bringing joy. Dedicate specific shelves or display areas to collections, arranging items attractively rather than storing them in boxes where no one sees them. Your home should showcase things you love, not hide them away.

    Edit ruthlessly—displaying everything you own creates cluttered, overwhelming spaces. Choose favorite items for display, rotating others seasonally if you have extensive collections. This editing creates more impactful displays where each piece shines rather than getting lost in overwhelming arrangements. Store non-displayed items properly, bringing them out when you want fresh displays.

    Plants and Natural Elements
    Living plants add life, color, and improved air quality to homes. Even seniors without green thumbs can maintain easy-care plants like pothos, snake plants, or ZZ plants requiring water only every 1-2 weeks and tolerating low light. Plants soften hard edges, add organic shapes contrasting with furniture’s straight lines, and create peaceful, natural atmospheres.

    If plant care feels overwhelming, high-quality artificial plants ($30-80) now look remarkably realistic, providing greenery without maintenance demands. Dust them monthly with feather dusters and refresh with occasional gentle cleaning. Mix real and artificial plants if desired—nobody will judge, and your home will benefit from the greenery either way.

    Design Element Budget Range Impact Level DIY Friendly
    Paint (per room) $30-100 Very High Yes
    Throw Pillows (set of 4) $60-160 High Yes (covers)
    Throw Blankets (2-3) $60-120 Medium-High No
    Area Rug (5×7) $80-300 High No
    Curtains (per room) $80-200 Very High Yes (hemming)
    Table/Floor Lamps (2-3) $60-200 High Partial
    LED Bulbs (whole home) $40-80 Medium-High Yes
    Artwork/Photos (framed) $100-300 High Yes
    Budget-friendly interior improvements with high impact on coziness (2025 estimates)

    Decluttering and Organizing for Cozy Simplicity

    Paradoxically, cozy homes often contain less rather than more. Clutter creates visual chaos and stress, while thoughtfully curated, organized spaces feel calm, peaceful, and genuinely welcoming. The goal isn’t stark minimalism but rather intentional selection of items you love and use, displayed attractively rather than crammed everywhere.

    The Psychology of Clutter
    Research consistently links cluttered environments to increased stress, anxiety, and depression. A Princeton University Neuroscience Institute study found clutter competes for your attention, reducing performance and increasing stress. Multiple objects in your visual field simultaneously demand attention, overwhelming your brain’s processing capacity. Simplified, organized spaces allow your brain to relax, improving mood and cognitive function.

    For seniors, clutter poses safety risks beyond psychological effects. Piles of papers, magazines, or miscellaneous items create tripping hazards. Overstuffed shelves and surfaces make finding needed items difficult, creating frustration and wasted time. Excessive possessions requiring storage, maintenance, and organization drain energy better spent on enjoyable activities.

    Practical Decluttering Strategies
    Start small to avoid overwhelming yourself. Choose one drawer, shelf, or small area rather than tackling entire rooms. Work in 15-30 minute sessions, stopping before exhaustion sets in. Consistent small efforts accumulate to significant results without the burnout of marathon decluttering sessions.

    Use the “one-year rule” for most possessions—if you haven’t used, worn, or needed something in a year, you probably won’t. Exceptions include seasonal items (holiday decorations, winter coats in summer), sentimental keepsakes, and emergency supplies. But general household items, clothes, kitchen equipment, and books unused for a year are candidates for donation or disposal.

    Create four sorting categories: Keep (use regularly and love), Donate (good condition but unused), Trash (broken, stained, or unusable), and Decide Later (can’t decide now). The “Decide Later” box gets a specific deadline (30 days)—items you haven’t missed or thought about in that time get donated. This system prevents agonizing over every item while making steady progress.

    Organizing What Remains
    Once you’ve decluttered, organize remaining possessions logically. Store items near where you use them—coffee and mugs near the coffee maker, reading glasses beside your reading chair, medicines in bathrooms or bedrooms. This logical organization eliminates unnecessary trips around your home and makes daily living more efficient and less tiring.

    Use clear storage containers ($8-25 depending on size) letting you see contents without opening each box. Label everything clearly with large, easy-to-read labels (use label makers or print labels in 14-16 point font minimum). Clear visibility and labeling prevent forgotten items languishing in containers forever and make finding things quick and frustration-free.

    Heartwarming cartoon of personalized senior living space with family photos, meaningful decorations, plants, comfortable textiles, and organized displays
                              Fill your space with meaningful items that tell your life story
                              Visual Art by Artani Paris

    Engaging Multiple Senses for Complete Comfort

    Truly cozy homes engage all five senses, not just vision. Consider how your home sounds, smells, feels, and creates overall atmosphere through multi-sensory experiences that genuinely comfort and delight.

    Sound: Creating Peaceful Acoustics
    Homes shouldn’t be silent, but harsh or jarring sounds prevent coziness. Hard surfaces—tile, hardwood, bare walls—create echoes and amplify noise. Soft furnishings—rugs, curtains, upholstered furniture, fabric wall hangings—absorb sound, creating quieter, more peaceful environments. If your home feels echoey and loud, add soft textiles absorbing sound naturally.

    Introduce pleasant ambient sounds—soft music, nature sounds, or even white noise—creating peaceful audio backgrounds. Wind chimes near windows, small tabletop fountains ($20-50), or digital speakers playing gentle music or nature sounds ($30-100) add pleasant audio dimension. The goal isn’t covering up noise but rather creating intentional, pleasant soundscapes replacing harsh silence or unwanted external noise.

    Scent: Using Fragrance Thoughtfully
    Scent powerfully impacts mood and memory. Gentle, natural fragrances—lavender, vanilla, cinnamon, citrus—create welcoming atmospheres associated with relaxation, warmth, and cleanliness. Avoid overwhelming artificial air fresheners causing headaches or respiratory irritation, particularly problematic for seniors with sensitivities or breathing issues.

    Natural scent options include essential oil diffusers ($15-40) using pure essential oils diluted in water, simmering potpourri on the stove (oranges, cinnamon sticks, cloves in water), scented candles using natural soy or beeswax rather than paraffin, fresh flowers or herbs, and baking cookies or bread filling homes with comforting food aromas. Even opening windows for fresh air can be the best “scent” of all.

    Touch: Varying Textures
    Cozy spaces include varied textures inviting touch—soft velvet pillows, nubby linen curtains, smooth wood tables, plush rugs. This textural variety creates sensory interest making spaces feel rich and layered rather than flat and one-dimensional. When selecting textiles and materials, consider how they feel, not just how they look.

    Temperature-regulating materials increase comfort. Natural fibers like cotton, linen, and wool breathe better than synthetics, staying cooler in summer and warmer in winter. Throw blankets in various weights—light cotton for summer, medium fleece for spring and fall, heavy wool or sherpa for winter—allow comfortable snuggling year-round.

    Creating Comfortable Temperature
    Physical comfort requires appropriate temperature. Most seniors feel comfortable at 68-72°F (20-22°C), though individual preferences vary. Maintain consistent temperatures throughout your home rather than extreme differences between rooms—temperature variations strain your body’s adaptation mechanisms. Programmable thermostats ($40-150) automatically adjust temperatures throughout the day, maintaining comfort while reducing energy costs by 10-20%.

    Sensory Element Cozy Enhancements Budget Solutions Safety Notes
    Sight Warm colors, layered lighting, personal photos Paint, thrift lamps, print photos at home Adequate lighting prevents falls
    Sound Soft music, fountains, wind chimes Smartphone speakers, simple chimes Avoid masking safety sounds (alarms, doorbells)
    Scent Essential oils, candles, fresh flowers Simmer pot, dried herbs, open windows Never leave candles unattended
    Touch Varied textures, soft textiles, smooth surfaces Thrift blankets, DIY pillows, refinish furniture Avoid rough/sharp edges causing injury
    Temperature Consistent warmth, layered bedding Programmable thermostat, draft stoppers Maintain 68-72°F for safety and comfort
    Multi-sensory elements creating cozy, comfortable home environments

    Real Success Stories

    Case Study 1: Tucson, Arizona

    Margaret S. (69 years old)

    After moving from her large family home into a smaller retirement condo, Margaret felt depressed and disconnected living in generic, builder-grade spaces with stark white walls, harsh overhead lighting, and minimal furniture. The condo felt like a waiting room rather than a home, and she spent most time either out of the house or in bed avoiding the unwelcoming environment.

    Working with a modest $1,200 budget over three months, Margaret transformed her space using the strategies in this guide. She painted the living room and bedroom warm terracotta and soft peach respectively ($120 total), added four thrift-store lamps with new shades creating layered lighting ($140), purchased colorful throw pillows, blankets, and curtains introducing warmth and softness ($280), bought two area rugs anchoring living spaces ($260), and created a gallery wall of family photos in matching frames ($180).

    The physical transformation was dramatic, but the emotional impact proved even more significant. Margaret began inviting friends over again, started daily routines she’d abandoned, and reported feeling “at home” for the first time since moving. Her adult children noticed remarkable improvements in her mood and engagement during visits.

    Results:

    • Depression scores improved from 14 (moderate depression) to 5 (minimal symptoms) over 3 months
    • Social interactions increased from 2-3 monthly visits to 8-10 as she began hosting coffee dates and game nights in her newly cozy home
    • Sleep quality improved significantly—falling asleep in average 15 minutes versus previous 50+ minutes in the stark bedroom
    • Total investment of $1,180 over 3 months transformed her entire living environment
    • She reported feeling 8/10 satisfaction with her home versus previous 3/10 before changes

    “I didn’t realize how much the cold, impersonal space was affecting my mental health until I made it warm and mine. Now when I come home, I actually feel happy to be here instead of depressed. The warm colors, soft lighting, and my family photos everywhere make it feel like ME—like home should feel.” – Margaret S.

    Case Study 2: Burlington, Vermont

    Robert and Linda T. (both 72 years old)

    This retired couple lived in their home for 35 years but admitted it felt dated, cluttered, and increasingly difficult to maintain. Overwhelming collections of possessions accumulated over decades created crowded, stressful spaces. Dark wood paneling and heavy curtains from the 1980s blocked natural light, making rooms feel cave-like and depressing, particularly during Vermont’s long, dark winters.

    Rather than expensive renovations, they implemented a systematic three-month transformation focusing on decluttering, lighting, and color. They spent six weeks decluttering room by room, donating 40% of their possessions to local charities and keeping only items they used or truly loved. They painted over dark paneling with warm cream ($180), replaced heavy drapes with light-filtering linen curtains ($320), added eight new lamps throughout the house ($240 from estate sales and thrift stores), and replaced all bulbs with warm LED lighting ($60).

    The combination of decluttering and physical improvements created transformative results. Rooms felt twice as large despite no structural changes. Natural light flooded previously dark spaces. The couple reported feeling energized rather than depressed at home and found household maintenance much easier with fewer possessions to clean and organize.

    Results:

    • Donated or disposed of approximately 2,500 pounds of excess possessions over 6 weeks
    • Natural light in main living spaces increased by estimated 65% through curtain replacement and decluttering windows
    • Weekly cleaning time decreased from 8-9 hours to 3-4 hours with fewer possessions requiring maintenance
    • Both reported significant mood improvements, with Linda’s seasonal affective disorder symptoms decreasing notably
    • Total investment of $800 plus 40 hours decluttering labor transformed their entire home environment

    “We’d lived here 35 years and thought we’d need major renovations to make it feel better. Instead, getting rid of half our stuff and adding warm paint and better lighting changed everything. Our home feels peaceful now instead of overwhelming. We actually enjoy being here instead of dreading the clutter and darkness.” – Linda T.

    Case Study 3: Charleston, South Carolina

    Patricia W. (75 years old)

    Living alone in a rental apartment after her husband’s death, Patricia felt disconnected from her space, viewing it as temporary and not worth personalizing despite living there for three years. The landlord’s neutral beige walls, basic fixtures, and minimal furniture made the apartment feel institutional rather than homelike. She spent most time watching television from bed, had stopped cooking regular meals, and rarely had visitors, citing embarrassment about her “depressing” living space.

    A visiting daughter recognized the connection between Patricia’s living environment and her declining health and mood. Together, they created a personalization plan using only renter-friendly, reversible changes requiring no landlord permission. They added removable wallpaper as an accent wall in the living room ($120), hung family photos and artwork with command strips ($80 for frames and strips), purchased colorful textiles—rugs, curtains, pillows, and throws—transforming neutral spaces ($340), added plants (mix of real and high-quality artificial) providing life and color ($100), and improved lighting with five new lamps ($160 from discount retailers).

    The transformation from generic rental to personalized home dramatically impacted Patricia’s quality of life. She began cooking regular meals in her now-cheerful kitchen, started inviting friends for coffee in her cozy living room, and reported feeling genuine attachment to her space for the first time since moving in. Most importantly, she stopped viewing her apartment as a temporary waystation and began treating it as her actual home.

    Results:

    • Social visits increased from less than 1 per month to 6-8 monthly as she began regularly hosting friends
    • Cooking frequency increased from 2-3 times weekly (mostly frozen meals) to 10-12 times weekly (fresh, nutritious meals)
    • Overall life satisfaction scores improved from 4.2/10 to 7.8/10 over 4 months
    • Sleep improved as she stopped sleeping with television on, instead reading in her cozy, personalized bedroom
    • Total investment of $800 using only renter-friendly modifications requiring no landlord permission or permanent changes

    “I’d been living here like I was in a hotel—not making it mine because it wasn’t ‘permanent.’ But my daughter helped me realize this IS my home, whether I own it or not, and I deserve to make it comfortable and beautiful. Adding color, my family photos, and soft textures changed everything. Now I love coming home and having people over. It finally feels like MY space.” – Patricia W.

    Frequently Asked Questions

    How much does it typically cost to make a home feel cozier?

    Creating a cozy home is remarkably affordable when approached strategically. You can make significant improvements for $500-1,500 spread over 2-3 months by prioritizing high-impact, budget-friendly changes. Start with paint (single room $30-100), add textiles like pillows, throws, and curtains ($200-400), improve lighting with thrift-store lamps and LED bulbs ($100-200), and incorporate personal touches through photos and artwork ($100-300). The key is focusing on elements creating maximum coziness for minimum investment rather than expensive furniture or renovations. Many successful transformations cost under $1,000 total, as demonstrated in our case studies.

    Can I make a rental feel cozy without violating lease terms?

    Absolutely. Focus on temporary, reversible modifications requiring no landlord permission. Use removable wallpaper or peel-and-stick tiles for accent walls. Hang artwork and photos with command strips or picture hanging strips. Add area rugs, curtains (hung from tension rods if you can’t install curtain rods), throw pillows, and blankets transforming spaces without permanent changes. Improve lighting with portable lamps requiring no installation. Add plants and personal decorations. When moving, remove temporary additions, fill command strip holes with spackle, and return the space to original condition. These renter-friendly strategies create dramatic transformations without jeopardizing security deposits or violating leases.

    What if my spouse or partner doesn’t like the same style I do?

    Compromise and communication are essential when decorating shared spaces. Start by identifying common ground—elements you both appreciate like certain colors, comfort level, or specific furniture pieces. Designate certain spaces for individual expression (one person’s home office, personal reading nooks) while compromising on shared areas like living rooms and bedrooms. Mix both styles rather than choosing one person’s aesthetic entirely. Consider neutral backgrounds (walls, large furniture) allowing personal expression through changeable accessories (pillows, artwork, decorations). Remember that coziness matters more than strict adherence to any design style—if your home feels comfortable and welcoming to both of you, stylistic consistency becomes less important. Many successful homes blend multiple styles creating unique, personalized spaces reflecting both inhabitants.

    How do I make a large, open space feel cozier rather than cavernous?

    Large spaces often feel cold and unwelcoming without intentional coziness strategies. Create distinct zones within open areas using furniture arrangement—group seating to define a conversation area, position a desk and chair creating an office zone, place a small table and chairs establishing a dining nook. Use area rugs anchoring and defining each zone visually. Add multiple lighting sources throughout the space rather than relying on single overhead fixtures—scattered lamps create intimate pools of light making large spaces feel broken into comfortable sections. Paint accent walls or use different colors in different zones providing visual definition. Fill vertical space with tall bookcases, plants on stands, or floor-to-ceiling curtains preventing the “empty warehouse” feeling. Layer textiles generously—multiple throw pillows, draped blankets, curtains—softening hard surfaces and adding visual warmth.

    What’s the single most impactful change for creating coziness on a tight budget?

    If forced to choose only one improvement, prioritize lighting. Harsh overhead lighting creates institutional feelings while warm, layered lighting instantly transforms spaces into cozy havens. For $100-200, you can add 3-4 table or floor lamps from thrift stores ($10-30 each), new shades for dated lamps ($15-40 each), and warm LED bulbs throughout your home ($3-8 each). This single category of improvements affects how every element in your home appears and feels, making colors warmer, textures more visible, and spaces more inviting. Good lighting makes even modest furniture and simple decor feel welcoming, while poor lighting makes even expensive decor feel cold and unwelcoming. After improving lighting, the next highest-impact changes are warm paint colors ($30-100 per room) and soft textiles like throw pillows and blankets ($100-200 total).

    How do I incorporate modern safety features without sacrificing coziness?

    Safety and coziness aren’t mutually exclusive—many safety features enhance rather than detract from comfort. Motion-sensor nightlights provide safe nighttime navigation while creating gentle ambient lighting. Non-slip rug pads prevent dangerous slipping while allowing beautiful rugs. Furniture at appropriate heights with supportive armrests increases both safety and comfort. Adequate lighting prevents falls while creating warm ambiance when using warm-white bulbs in attractive fixtures. Clear walkways and decluttered spaces improve safety while creating peaceful, organized environments. Grab bars now come in attractive finishes and styles looking like towel bars or decorative elements rather than medical equipment. The key is choosing safety features with aesthetic appeal and incorporating them thoughtfully into your overall design rather than treating them as afterthoughts.

    Should I get rid of furniture that’s uncomfortable but has sentimental value?

    This decision balances practical comfort with emotional significance. If furniture serves daily functions (dining chairs, bed, primary seating), prioritize comfort—you’ll use these pieces constantly and discomfort will diminish your quality of life regardless of sentimental attachment. However, you can often modify uncomfortable furniture: add cushions to hard chairs, use furniture risers for low seating, reupholster worn pieces with firmer, more supportive materials. For sentimental pieces used occasionally or displayed rather than used daily (grandmother’s rocking chair, inherited bench), keeping them makes sense even if not optimally comfortable. Consider moving sentimental-but-uncomfortable pieces to guest rooms, bedrooms, or decorative corners where they’re seen and appreciated but not required for daily comfort. Photograph extremely uncomfortable pieces before donating them—photos preserve memories while freeing you from furniture causing daily discomfort.

    How often should I update or refresh my home’s decor?

    There’s no prescribed timeline—update when spaces no longer feel comfortable, functional, or reflective of your current self. Many seniors successfully maintain satisfying homes for years without changes, while others enjoy refreshing seasonally. Small seasonal changes (swapping throw pillow covers, rotating displayed photos or artwork, changing curtains) keep spaces feeling fresh without major investment or effort. Larger updates might occur every 3-5 years as needs change, mobility shifts, or tastes evolve. Listen to how you feel in your space—if it still brings joy and meets your needs, no changes are necessary regardless of design trends. If you feel restless, uncomfortable, or disconnected from your environment, consider updates. Remember: your home should serve you, not vice versa. Update for your comfort and satisfaction, not because magazines suggest it’s time to redecorate.

    What if I can’t physically do the work required for home improvements?

    Many cozy-home improvements require minimal physical effort and can be accomplished even with significant mobility limitations. Hire help for physically demanding tasks—local handyman services charge $50-100 per hour and can hang curtains, move furniture, install lamps, and hang artwork in a few hours. Many senior centers offer volunteer programs or connect seniors with community helpers for minor home tasks. Ask family members or friends for assistance—many people genuinely enjoy helping with concrete, time-limited projects. Consider professional services for painting ($200-500 per room including labor and materials). Focus on improvements requiring little physical effort: selecting textiles, choosing colors, curating displays, directing helpers on furniture placement, and making decorating decisions. The creative and planning aspects of home improvement are often more important than the physical execution, which others can handle affordably. Your vision and direction matter most; physical implementation can be delegated.

    How do I maintain a cozy home without creating excessive cleaning and maintenance demands?

    Cozy doesn’t mean cluttered or high-maintenance. Choose low-maintenance textiles—machine-washable curtains, durable performance fabrics for upholstery, easy-care throw blankets and pillow covers. Avoid delicate fabrics requiring dry cleaning or special care. Select furniture and decor that clean easily—smooth surfaces over ornate carved details, closed storage over open shelving collecting dust. Incorporate artificial plants alongside real ones if plant care feels overwhelming. Use LED bulbs lasting 15-25 years eliminating frequent bulb changes. Establish simple maintenance routines: vacuum rugs weekly, wash throw blankets monthly, dust surfaces weekly with microfiber cloths, rotate displayed items seasonally. The key is creating coziness through carefully selected, high-quality, easy-care items rather than excessive quantities of high-maintenance decorations. Less can genuinely be more when items are thoughtfully chosen for both beauty and practicality.

    Action Steps to Create Your Cozy Retirement Home

    1. Assess your current home room by room, noting what feels cold, uncomfortable, or unwelcoming—take photos to document current conditions and identify specific problems to address
    2. Create a prioritized list of changes starting with highest-impact, most affordable improvements like lighting and paint rather than expensive furniture replacement or major renovations
    3. Set a realistic budget for home improvements ($500-1,500 creates significant transformation) and timeline (2-3 months allows spreading costs without rushing)
    4. Start with lighting improvements—purchase 3-5 warm-white LED bulbs ($15-40 total) replacing the harshest lights in rooms where you spend most time, immediately improving how spaces feel
    5. Add softness through one or two throw blankets ($40-80) and 4-6 throw pillows ($60-160) in your primary living space, choosing warm colors and varied textures
    6. Paint one accent wall or single room in a warm color ($30-50) to see how dramatically color affects room feeling before committing to multiple rooms
    7. Visit thrift stores, estate sales, or online marketplaces for affordable lamps, decorative items, and textiles—budget $100-200 for these initial shopping trips
    8. Declutter one room completely using the keep/donate/trash/decide-later system, removing items that contribute to visual chaos without adding function or joy
    9. Create one personal display area featuring family photos, treasured collections, or meaningful artwork—this focused personalization makes spaces feel like yours rather than generic
    10. Invite a trusted friend or family member to provide feedback on changes and help with physical tasks you cannot easily do yourself—fresh perspectives and practical assistance accelerate transformation

    Disclaimer
    This article is provided for informational purposes only and does not constitute professional interior design, home safety, or accessibility advice. While design strategies discussed are generally appropriate for seniors, individual needs vary based on specific health conditions, mobility limitations, and personal circumstances. Consult qualified professionals including occupational therapists, certified aging-in-place specialists, or licensed contractors before making structural changes or modifications affecting home safety. Product recommendations and price estimates are approximate and may vary by location and time. Always verify product safety, check reviews, and ensure modifications comply with local building codes and rental agreements if applicable.
    Information current as of October 2, 2025. Product availability, prices, and design trends may change. Interior design recommendations represent general guidance and may not suit all individual preferences or circumstances.

    Get Weekly Senior Living and Home Tips

    Join thousands of seniors discovering practical strategies for comfortable, safe, and beautiful retirement homes. Receive budget-friendly decorating ideas, organization tips, seasonal updates, and inspiring transformation stories delivered to your inbox every Tuesday morning.

    Related Articles


    Published by Senior AI Money Editorial Team
    Updated October 2025
  • 10 Best Senior-Friendly Home Interior Ideas for 2025

    10 Best Senior-Friendly Home Interior Ideas for 2025

    Meta Description

    Discover the 10 best senior-friendly home interior ideas for 2025. Create safe, stylish, and comfortable living spaces that support aging with ease.


    Summary Audio Script

    “In 2025, home interiors for seniors balance comfort, safety, and style. From slip-resistant floors to smart lighting, these 10 ideas create spaces that help older adults live independently and enjoy daily life.”


    Getting Started

    Aging in place is becoming the preferred choice for many seniors. Rather than moving to assisted living, older adults are redesigning their homes to be safe, functional, and stylish. In 2025, interior design trends for seniors combine accessibility with beauty, proving that safety doesn’t have to mean sacrificing style.

    This guide explores the 10 best senior-friendly home interior ideas, from practical modifications to design innovations. Whether you are updating a single room or rethinking the whole house, these ideas will inspire safe and enjoyable living.


    How We Chose

    We focused on designs that provide:

    • Safety — Reducing fall risks and injury.
    • Accessibility — Easy-to-reach storage, wide walkways, and mobility support.
    • Comfort — Ergonomic furniture and soothing layouts.
    • Technology — Smart features that simplify daily life.
    • Aesthetic Appeal — Designs that look modern and inviting.

    Idea 1 — Slip-Resistant Flooring

    Replace rugs and glossy tiles with slip-resistant materials such as cork, vinyl, or textured tile. These reduce fall risks without compromising design.

    👉 Case Example: Helen, 72, installed slip-resistant vinyl floors. She enjoys the modern look and feels safer walking around her home.


    Idea 2 — Smart Lighting Systems

    Motion-sensor lights in hallways, bathrooms, and bedrooms prevent nighttime accidents. Adjustable smart bulbs allow seniors to change brightness easily.

    👉 Case Example: Robert, 78, added smart lighting with voice controls. He can adjust brightness without getting out of bed.


    Idea 3 — Ergonomic Furniture

    Chairs with firm cushions, supportive backs, and armrests make standing up easier. Adjustable recliners also add comfort for reading or napping.

    👉 Case Example: Linda, 80, replaced her low sofa with a supportive recliner. It reduced her knee strain and made TV time more enjoyable.


    Idea 4 — Wider Walkways and Open Layouts

    Removing clutter and widening doorways creates safer movement for seniors using walkers or wheelchairs.

    👉 Case Example: James, 76, remodeled his living room for open space. He no longer bumps into furniture while using his walker.


    Idea 5 — Accessible Storage Solutions

    Pull-out shelves, lazy Susans, and adjustable cabinets make kitchens easier to use. Seniors avoid bending or reaching too high.

    👉 Case Example: Margaret, 81, added pull-out pantry drawers. Cooking became simpler and less tiring.


    Idea 6 — Walk-In Showers with Grab Bars

    Bathrooms are high-risk areas. Walk-in showers with seating, grab bars, and handheld showerheads increase safety and comfort.

    👉 Case Example: George, 79, replaced his bathtub with a walk-in shower. Bathing became safer and more convenient.


    Idea 7 — Multi-Functional Spaces

    Convert spare rooms into hobby areas, guest rooms, or relaxation spaces. Multi-functional designs keep homes practical and fun.

    👉 Case Example: Mary, 74, turned her extra room into a craft space and guest bedroom. It gave her flexibility and joy.


    Idea 8 — Smart Home Technology

    Voice assistants, smart thermostats, and security cameras help seniors manage their homes easily. These reduce stress and add peace of mind.

    👉 Case Example: John, 82, uses a voice assistant to control his thermostat and lights. It makes daily tasks simple and safe.


    Idea 9 — Comfortable Outdoor Areas

    Gardening, relaxing, or socializing outdoors promotes mental health. Raised garden beds, slip-resistant patios, and shade structures make outdoor areas senior-friendly.

    👉 Case Example: Margaret, 77, installed raised flower beds. She enjoys gardening without bending or straining her back.


    Idea 10 — Calming Color Schemes and Décor

    Soft colors like blues, greens, and neutrals reduce stress and create a soothing atmosphere. Warm lighting and natural décor further enhance relaxation.

    👉 Case Example: Alice, 70, painted her bedroom in calming tones. She noticed better sleep and a more peaceful mood.


    Bonus Tips

    1. Prioritize safety upgrades in bathrooms and kitchens first.
    2. Choose low-maintenance materials for flooring and furniture.
    3. Add personal touches—family photos, art, and crafts—to make spaces feel warm.
    4. Review designs with an occupational therapist for customized advice.

    Further Information


    FAQ

    Q1: What is the most important home modification for senior safety?
    A1: Bathrooms often pose the highest risks. Installing walk-in showers with grab bars and slip-resistant flooring should be a top priority for seniors.

    Q2: Are smart home devices safe for seniors to use?
    A2: Yes. Devices like voice assistants and smart thermostats are designed for convenience. Many have senior-friendly features such as large buttons and voice commands.

    Q3: How can seniors make their homes stylish and safe at the same time?
    A3: By choosing ergonomic furniture, calming color schemes, and modern slip-resistant materials, seniors can enjoy a home that is both attractive and safe.


    Conclusion

    In 2025, senior-friendly home interiors focus on blending safety with style. From slip-resistant flooring to smart lighting, these design choices make daily life easier without compromising comfort.

    The right home modifications support independence and confidence. Whether through simple upgrades or full renovations, seniors can create homes that truly meet their needs.

    By adopting these 10 ideas, older adults can enjoy homes that are safe, stylish, and supportive of aging with dignity.

    Published by Senior AI Money Editorial Team
    Updated October 2025
  • Cozy Home Ideas: How Seniors Create Warm Living Rooms in 2025

    Cozy Home Ideas: How Seniors Create Warm Living Rooms in 2025

    Warm inviting senior-friendly living room with comfortable seating and soft lighting
    Transform your living space into a comfortable sanctuary with practical design choices that combine warmth, safety, and style
    Visual Art by Artani Paris | Pioneer in Luxury Brand Art since 2002

    Creating a cozy living room becomes increasingly important as we age—this is where we spend most of our waking hours reading, watching television, entertaining family, and relaxing. In 2025, senior-friendly design has evolved beyond institutional accessibility features to embrace warmth, comfort, and personal style while incorporating practical elements that support aging in place. A well-designed living room balances emotional comfort through soft textures and warm lighting with physical comfort via supportive seating and safe navigation. This guide demonstrates how seniors across America are transforming their living spaces into inviting sanctuaries that accommodate mobility needs, reduce fall risks, and create the welcoming atmosphere essential for mental wellbeing—all while maintaining the aesthetic appeal that makes a house feel like home.

    Why Cozy Living Spaces Matter for Seniors’ Wellbeing

    The physical environment profoundly affects mental and physical health, particularly for seniors spending 70-90% of their time at home according to a 2024 study by the National Institute on Aging. Living rooms that feel cold, cluttered, or institutional trigger stress responses, while warm, personalized spaces promote relaxation, better sleep quality, and positive mood. The psychological concept of “environmental mastery”—feeling in control of your surroundings—correlates strongly with life satisfaction in retirement.

    Temperature perception changes with age, making warmth both literal and aesthetic priority. Adults over 65 feel cold at higher temperatures than younger people due to decreased circulation and metabolism. A 2024 AARP survey found that 68% of seniors keep homes warmer than they did in middle age, with many reporting discomfort in spaces that feel visually “cold” even when adequately heated. Design choices emphasizing warm colors, soft textures, and layered lighting create perceived warmth beyond thermostat settings.

    Social connection depends significantly on living room comfort. Seniors with inviting living spaces entertain family and friends 3.5 times more frequently than those with uncomfortable or cluttered rooms, according to Stanford Center on Longevity research. Grandchildren visit more often when homes feel welcoming rather than filled with fragile objects and uncomfortable seating. The living room becomes the family gathering hub where relationships maintain strength and isolation reduces.

    Safety considerations integrate seamlessly into cozy design when approached thoughtfully. Fall prevention doesn’t require sterile hospital aesthetics—strategic furniture placement, adequate lighting, and secure rugs actually enhance coziness by creating defined spaces and eliminating hazards that cause unconscious tension. Knowing your environment is safe allows genuine relaxation impossible when subconsciously worried about tripping or losing balance.

    The financial impact of home comfort cannot be ignored. Seniors who create satisfying home environments delay or avoid costly moves to assisted living facilities. The average assisted living costs $54,000 annually in 2025, while home modifications supporting aging in place typically cost $3,000-15,000 one-time. Beyond finances, remaining in familiar surroundings where you’ve built memories and feel competent maintains cognitive function and emotional stability during aging’s challenges.

    Personal identity and autonomy find expression through home design. Your living room reflects who you are—your travels, interests, accomplishments, and values. Maintaining control over your environment affirms independence and capability. A 2024 University of Michigan study demonstrated that seniors who personalized living spaces showed 42% higher self-efficacy scores and reported feeling “more like myself” compared to those in standardized or others-controlled environments.

    Benefits of cozy living room design for senior mental and physical health
    How thoughtful living room design supports independence, comfort, and wellbeing in retirement
    Visual Art by Artani Paris

    Design Element Physical Benefit Emotional Benefit Social Benefit
    Warm Color Palette Perceived temperature increase Reduces anxiety, promotes calm Creates inviting atmosphere
    Layered Lighting Reduces eye strain, prevents falls Adjustable for mood, tasks Flattering for gatherings
    Supportive Seating Reduces back/joint pain Encourages relaxation Comfortable for extended visits
    Clear Pathways Prevents falls, aids mobility Reduces unconscious stress Wheelchair/walker accessible
    Soft Textures Tactile comfort, warmth Sensory pleasure, coziness Approachable, touchable
    Personal Displays Conversation prompts, memory aids Identity affirmation, pride Storytelling opportunities
    Multi-dimensional benefits of cozy living room elements for seniors (2024 research)

    Choosing the Right Seating: Comfort, Support, and Style

    Seating represents the most critical furniture decision in senior living rooms since you spend 6-10 hours daily sitting. The ideal chair or sofa combines orthopedic support with easy entry/exit, durability, and aesthetic appeal. In 2025, manufacturers offer more senior-friendly options that don’t sacrifice style—no more choosing between comfort and appearance.

    Seat height determines ease of standing. The optimal height for seniors is 19-21 inches from floor to seat—approximately 2-3 inches higher than standard sofas (17-18 inches). This elevation reduces the strength and balance required to stand, particularly important for those with knee or hip arthritis. Test by sitting: if your knees rise higher than your hips, the seat is too low. Your thighs should be roughly parallel to the floor or slightly downward-sloping.

    Firm cushioning provides better support than soft, sink-in seating despite feeling less initially comfortable. Medium-firm density foam (1.8-2.0 pounds per cubic foot) offers the best balance—supportive enough to maintain posture but with sufficient cushioning for comfort during extended sitting. Avoid overly plush sofas that make standing difficult and provide inadequate back support. Run your hand under the seat cushion; if you feel the frame easily, the cushioning is too thin.

    Armrests at the correct height (7-9 inches above seat) function as essential push-off points when standing. The armrests should extend to the front edge of the seat, not stopping halfway, allowing you to push up from the strongest position. Width between armrests should accommodate your body comfortably—22-24 inches works for most seniors. Test armrest comfort by sitting, placing your hands on the armrests with elbows bent at 90 degrees; they should feel naturally positioned without hunching or stretching.

    Recliner chairs offer particular value for seniors with circulation issues, back pain, or those who nap frequently. Modern “lift chairs” combine reclining function with motorized assistance that gently tilts you forward to standing position. Prices range from $500-2,000 depending on features. Look for: two-position or infinite position recline, USB charging ports, easy-to-reach controls (not requiring bending to side), and upholstery that breathes (not vinyl that causes sweating).

    Upholstery fabric balances durability, comfort, and maintenance. Performance fabrics like Crypton or Sunbrella resist stains, clean easily with water, and feel soft rather than plastic-like. These fabrics cost 20-30% more than standard upholstery but last 3-4 times longer and eliminate anxiety about spills. Avoid delicate silks, velvet that shows wear patterns, or leather that requires conditioning—choose fabrics that don’t demand constant maintenance.

    Color and pattern selection affects both practicality and coziness. Solid colors in warm neutrals (taupe, warm gray, camel, soft navy) provide versatility and hide minor soiling better than stark white or black. Small-to-medium patterns disguise stains and wear more effectively than solids while adding visual interest. Consider your existing color scheme—new seating should complement rather than clash with wall colors, flooring, and existing furniture.

    Furniture arrangement creates conversation areas while maintaining clear pathways. Position main seating facing the television at comfortable viewing distance (8-10 feet for 50-55 inch screens, 10-12 feet for 65-70 inch). Create a secondary seating group with chairs angled toward each other for conversation, positioned near windows for natural light reading. Ensure 36-inch minimum clearance for walkways—48 inches if you use a walker or wheelchair.

    Budget considerations vary widely. Quality sofas suitable for seniors range $800-2,500, with recliners $500-2,000, and accent chairs $300-800. Invest more in pieces you use most—if you spend evenings in your recliner, that deserves the highest budget allocation. Used furniture from quality brands (Ethan Allen, Stickley, Flexsteel) often outlasts new budget pieces. Check estate sales and consignment shops for well-maintained, high-quality options at 50-70% off retail.

    Delivery and setup services matter increasingly with age. Many retailers offer “white glove” delivery including furniture placement, packaging removal, and assembly for $100-200. This service eliminates lifting heavy furniture and struggling with assembly. Ask about trial periods—some stores allow 30-90 day returns if furniture doesn’t work in your space. This reduces risk when making significant investments in comfort and safety.

    Comparison of senior-friendly seating options including height, support, and style features
    Key features to look for in senior-friendly seating that combines comfort with safety
    Visual Art by Artani Paris

    Lighting Strategies That Create Warmth and Prevent Falls

    Lighting serves dual purposes in senior living rooms—creating ambiance while providing safety-critical visibility. Adults over 60 require 2-3 times more light than younger people to see clearly due to natural lens yellowing and pupil size reduction. Poor lighting causes 30% of home falls among seniors, according to 2024 CDC data. Strategic lighting design eliminates shadows, reduces glare, and creates the warm glow essential to cozy spaces.

    Layer three types of lighting for optimal results: ambient (general illumination), task (focused for reading/activities), and accent (decorative/mood). Ambient lighting should provide even illumination without harsh shadows—aim for 50-75 foot-candles in living rooms (double the 25-30 foot-candles needed by younger adults). Ceiling fixtures with diffusers, recessed lighting, or floor lamps with torchieres pointing upward create this base layer.

    Task lighting focuses bright light where needed for reading, hobbies, or detailed work without over-illuminating the entire room. Adjustable reading lamps beside chairs should provide 100-150 foot-candles directly on reading material. LED bulbs rated 800-1100 lumens (60-75 watt incandescent equivalent) work well for task lighting. Position lamps to eliminate shadows—if right-handed, place lamps to your left to prevent your hand shadowing the page.

    Eliminate glare that causes eye strain and reduces visibility. Glare occurs when bright light sources hit shiny surfaces or reflect directly into eyes. Solutions include: positioning lamps away from television screens, using lamp shades that direct light up or down rather than sideways, choosing matte rather than glossy paint finishes, and adding sheer curtains to diffuse harsh sunlight. If you squint while reading or watching television, glare is the likely culprit.

    Smart bulbs and dimmer switches provide lighting flexibility matching activities and mood. Philips Hue, LIFX, or Wyze smart bulbs ($10-25 each) allow adjusting brightness and color temperature via smartphone or voice commands. Warmer color temperatures (2700-3000K) create coziness for evening relaxation, while cooler light (3500-4000K) aids concentration for reading or projects. Program “scenes” for different times—bright for morning activities, dimmer and warmer for evening.

    Motion-activated night lights prevent dangerous nighttime navigation. Place sensor lights along pathways from bedroom to bathroom and bathroom to living room. Modern LED motion lights ($15-30 each) last years without battery changes and provide soft illumination that doesn’t disrupt sleep if you wake during the night. Avoid lights requiring manual switching—you won’t use them if turning on requires fumbling in the dark.

    Maximize natural light during daytime for mood and circadian rhythm benefits. Natural light exposure, especially in morning, improves sleep quality, mood, and alertness. Position seating near windows to take advantage of daylight for reading and activities. Use sheer curtains providing privacy while allowing light penetration. Consider light-colored window treatments that reflect rather than absorb light—white, cream, or pale yellow sheers brighten rooms significantly.

    Floor and table lamps add both illumination and decorative warmth. Choose lamps with stable, weighted bases preventing easy tipping—particularly important if you use a walker that might bump furniture. Lampshades in warm fabrics (linen, silk, cotton) create softer light than plastic or metal. Place lamps within easy reach of seating so you can adjust lighting without standing. Three-way bulbs (50/100/150 watts) offer flexible brightness levels for different needs.

    Accent lighting highlights artwork, plants, or architectural features while contributing to overall ambiance. Picture lights, uplights on plants, or strip lighting under shelves add visual interest and fill corners that might otherwise feel dark. Warm white LED strips ($20-40 for 16 feet) installed under built-in bookshelves or behind media consoles create gentle background glow particularly pleasant for evening television viewing.

    Light switches at convenient heights and locations matter more than people realize. Standard switches at 48 inches require reaching that becomes difficult with limited mobility. Lower switches to 42 inches or add remote controls for overhead fixtures. Rocker-style switches require less finger dexterity than traditional toggles. Consider voice-controlled options—”Alexa, turn on the living room lights” eliminates switch navigation entirely.

    Lighting Type Purpose Recommended Brightness Best Placement
    Ambient (Ceiling) General illumination 2000-3000 lumens Center of room, even distribution
    Task (Reading) Focused activities 800-1100 lumens Beside chairs, adjustable arms
    Accent (Decorative) Ambiance, highlighting 200-400 lumens Under shelves, behind plants
    Night Lights Safety navigation 10-50 lumens Floor level, pathways
    Table Lamps Flexible task/ambient 600-900 lumens End tables, consoles
    Floor Lamps Upward ambient light 1500-2000 lumens Corners, behind seating
    Layered lighting specifications for senior-friendly living rooms (2025 standards)

    Warm Color Palettes That Comfort and Energize

    Color psychology demonstrates measurable effects on mood, energy, and wellbeing. Warm colors—reds, oranges, yellows, warm neutrals—stimulate feelings of comfort, security, and sociability, while cool colors like blues and grays can feel calming but potentially depressing when overused. For seniors spending substantial time at home, choosing the right color palette profoundly affects daily emotional experience. The 2024 Pantone Color Institute study found that seniors in warm-colored rooms reported 34% higher happiness scores than those in cool-colored spaces.

    Start with a warm neutral base that works across seasons and decorating changes. Warm beige, soft taupe, warm gray (greige), or cream provides versatile backgrounds that don’t overwhelm. These neutrals make rooms feel larger and brighter while providing canvas for colorful accents. Test paint samples in your space at different times of day—colors look dramatically different under morning natural light versus evening lamp light. Most paint stores provide sample pots ($3-5) worth the small investment.

    Accent walls in deeper warm tones add personality without overwhelming. Consider warm terracotta, soft coral, muted gold, sage green, or dusty blue on one wall while keeping others neutral. The accent wall should be the one you face when entering the room—typically the wall behind your sofa or the fireplace wall. This creates visual interest and draws the eye without making the space feel closed-in. Avoid dark, saturated colors on all walls which can feel oppressive in smaller spaces.

    Textiles introduce color flexibility through pillows, throws, and curtains changed seasonally or when you want refresh. Warm oranges and reds work beautifully for fall and winter, while soft corals and yellows feel appropriate for spring and summer. Layer 3-5 throw pillows per sofa in coordinating patterns—one large pattern, one medium, one small scale, plus solid colors tying them together. This creates visual richness without chaos. Blanket throws in soft materials (fleece, chenille, cotton) add literal and visual warmth.

    Artwork provides major color impact and personal meaning. Choose pieces you love rather than what’s trendy—you’ll live with them for years. Original art isn’t necessary; high-quality prints, family photographs in nice frames, or local artist work from galleries contribute warmth and personality. Warm-toned landscapes, family portraits, or abstract art in golds, oranges, and warm greens enhance coziness. Group smaller pieces in gallery walls rather than scattering individually around the room.

    Rugs ground seating areas while introducing pattern and warmth underfoot. Warm-toned rugs in rust, gold, terracotta, or warm brown create definition and comfort. Patterns hide stains and wear better than solids. Choose low-pile or flatweave rugs (under 0.5 inches) that don’t catch walker wheels or create tripping hazards. Secure all rugs with non-slip pads underneath—this prevents bunching and sliding that causes falls. A 5×7 or 8×10 rug under seating groups creates cohesive conversation areas.

    Wood tones affect warmth perception significantly. Warm woods like cherry, oak, or walnut create coziness, while cool-toned woods like maple or gray-washed finishes feel more contemporary but less warm. If you have existing cool-toned furniture, add warmth through other elements rather than replacing functional pieces. Warm-toned picture frames, wood decorative bowls, or wood-toned lamp bases introduce warmth without major investment.

    Plants add life, color, and proven psychological benefits. Research from Texas A&M University (2024) found that seniors with indoor plants reported 28% higher life satisfaction and 23% lower stress hormones than those without plants. Choose easy-care varieties like pothos, snake plants, or peace lilies requiring minimal attention. Terracotta or warm-glazed ceramic pots enhance the warm color palette. Position plants where you’ll see them regularly—near seating, on side tables, or on shelves at eye level.

    Avoid color overload that becomes visually exhausting. The 60-30-10 rule provides balance: 60% dominant color (walls, large furniture), 30% secondary color (area rug, curtains, accent chairs), 10% accent color (pillows, artwork, accessories). This proportion creates visual interest without overwhelming. If your room feels chaotic despite warm colors, you likely have too many competing elements—remove accessories until the space feels calm again.

    Seasonal refresh keeps spaces feeling current without major expense. Swap throw pillow covers ($15-30 each) for fall and spring. Change artwork or rotate pieces from storage. Add or remove blanket throws. These small changes prevent visual stagnation and give you something to look forward to seasonally. Many seniors develop a “seasonal box” of accessories rotated quarterly—this makes changing affordable and keeps stored items organized.

    Decluttering for Safety While Maintaining Personal Style

    Clutter creates both physical danger and psychological burden. The National Safety Council reports that clutter contributes to 25% of falls among seniors, while psychological research demonstrates that cluttered environments increase cortisol levels and reduce cognitive function. Paradoxically, completely bare spaces feel institutional and depressing. The solution lies in purposeful curation—displaying meaningful items while eliminating unnecessary stuff that serves neither function nor joy.

    Apply the “touch rule” to displayed items: if you haven’t touched, used, or enjoyed looking at something in six months, remove it from the living room. This doesn’t mean discarding—store seasonal items, rotate artwork, or give to family members. Books you finished years ago, decorative items you never notice, gifts you keep from obligation—these serve no purpose taking up space. Be ruthless about function and meaning; be gentle with yourself about letting go gradually.

    Create clear pathways of at least 36 inches throughout the living room. Measure actual clearances with a tape measure rather than estimating—paths that look sufficient often measure 24-30 inches, inadequate for safe navigation particularly if using assistive devices. Remove small tables blocking direct routes, angle furniture to create natural pathways, and eliminate decorative items placed on floors (floor vases, magazine racks, ottomans used as “decoration”).

    Contain categories rather than scattering items everywhere. All remote controls in one attractive box or tray. Magazines in a single basket, not piled on multiple surfaces. Books on shelves, not stacked on floor. Throws folded in a basket beside the sofa. This “home for everything” approach reduces visual clutter while making items easy to find. Choose containers matching your warm color palette—woven baskets, wood boxes, ceramic bowls—that function as decor while organizing.

    Limit surface displays using the “rule of three.” Group decorative items in clusters of three items varying in height—this creates visual interest without overwhelming. One tall candlestick, one medium decorative box, one small bowl creates more pleasing arrangement than seven small items scattered across a table. Apply this to bookshelves too—arrange books interspersed with three-item groupings of decorative objects rather than cramming shelves completely full.

    Eliminate “just in case” items that create clutter without adding value. The extra chairs kept “in case we have guests” taking up corners. The decorative pillows making actual sitting impossible. The collection of items you might want someday. If you haven’t used something in a year, you won’t use it next year either. Free yourself from these obligation objects. Donate, give to family, or store elsewhere if truly sentimental.

    Address cords and cables that create tripping hazards while looking messy. Cable management boxes ($15-25) hide power strips and excess cord length. Cord covers ($10-15 for 5 feet) secure cables running along baseboards. Behind furniture, use zip ties or velcro straps bundling cables together rather than letting them tangle. Consider furniture with built-in power outlets and USB ports eliminating the need for extension cords stretching across the room.

    Maintain decluttering through daily 10-minute tidying routine. Before bed, return everything to its designated home—remote to its tray, throws folded over sofa arm, magazines to their basket. This prevents gradual accumulation that leads to overwhelming clutter. The small daily effort (literally 10 minutes) eliminates need for periodic exhausting decluttering sessions. Think of it as environmental hygiene equivalent to brushing teeth—small habit preventing major problems.

    Display family photos purposefully rather than covering every surface. Choose 10-15 favorite photos in coordinating frames and group them meaningfully—one wall gallery, one shelf arrangement, or one table display. Rotate photos seasonally or when you want to refresh. Digital photo frames ($50-150) allow displaying hundreds of photos in one spot, updating automatically with new family pictures. This combines nostalgia with space efficiency.

    Resist the urge to keep everything grandchildren make or give you. Choose the most meaningful pieces to display, photograph the rest, and quietly recycle or donate. Your grandchildren won’t remember or miss every craft project, and displaying too many dilutes the impact of truly special items. Keep one special box of grandchildren’s artwork, rotating what’s displayed. This honors their creativity without overwhelming your space.

    Reassuring cartoon illustration of senior-friendly home with grab bars, non-slip surfaces, adequate lighting, clear pathways, and safety features throughout

    Organized senior living room showing clear pathways, purposeful displays, and safety features
    Strategic decluttering creates safety and serenity while preserving personal character
    Visual Art by Artani Paris

    Texture Layers That Add Warmth Without Overwhelming

    Texture creates physical and visual warmth more powerfully than color alone. Smooth, hard surfaces like leather, glass, and metal feel cold regardless of color, while soft, nubby textures like wool, chenille, and velvet feel warm to touch and eye. Layering multiple textures—rough with smooth, soft with structured—creates depth and sensory richness that makes spaces feel inviting. This tactile dimension proves especially important for seniors whose touch sensitivity often increases as other senses decline.

    Start with the sofa or main seating as your primary texture anchor. Performance fabrics now include options mimicking linen, wool, and even velvet while offering stain-resistance and durability. Textured upholstery in subtle patterns (herringbone, basket weave, small geometric) provides more visual interest than flat solids without busy patterns that tire the eyes. Run your hand across fabric samples—it should feel pleasant to touch since you’ll spend hours in contact with this material.

    Layer throw blankets of varying textures creating touchable warmth. Chunky knit cotton throws, plush fleece, waffle-weave, and chenille each provide different tactile experiences. Drape 2-3 throws casually over sofa arms or backs where they’re accessible for use. Avoid perfectly folded stacks that look staged—casual draping feels lived-in and welcoming. Choose machine-washable throws since accessibility means you’ll actually use them, and used throws need occasional cleaning.

    Add pillows with varied texture covers rather than matching sets. Mix velvet with linen, smooth cotton with nubby boucle, silk with wool. Different textures catch light differently, creating subtle variation throughout the day. The visual and tactile contrast adds richness without color chaos—four pillows in cream and warm gray but varying textures create more interest than four identical pillows in four colors. Remove scratchy, uncomfortable pillow covers—decorative pillows should be usable, not just visual.

    Incorporate natural textures through wood, woven materials, and plants. Wood side tables, woven baskets, rattan decorative trays, and plant-filled ceramic or terracotta pots all contribute organic warmth. These materials age beautifully rather than looking worn, and they introduce variation from upholstered and painted surfaces. A wood bowl filled with decorative balls (wool felt, rattan, or natural wood) provides textural interest visitors unconsciously want to touch.

    Area rugs add crucial texture underfoot. Wool rugs provide warmth and durability, natural fiber rugs (jute, sisal) bring organic texture, and synthetic rugs offer budget-friendly softness. Layer smaller rugs over larger ones for added texture dimension—a sheepskin or faux fur rug (2×3 feet) on top of a larger area rug creates luxurious layering. Ensure rug edges stay flat with non-slip pads preventing curling that creates tripping hazards.

    Curtains or window treatments in textured fabrics soften hard windows while managing light. Linen curtains provide casual texture, velvet adds luxury and blocks drafts, and woven cotton offers structure. Floor-length curtains feel more finished than those ending at the windowsill, but ensure hems don’t drag on floor creating trip hazards. Consider thermal-backed curtains combining texture with temperature control—they keep rooms warmer in winter, cooler in summer.

    Lampshades in fabric rather than paper or metal add softness when lit and unlit. Linen, burlap, or textured cotton shades create warm light diffusion while contributing to overall room texture. Choose neutral shade colors (cream, natural linen, soft white) allowing flexibility if you change other room colors. Textured shades hide dust better than smooth materials, reducing maintenance frequency.

    Introduce metallic accents sparingly for texture variety without coldness. Warm metals (brass, copper, gold, oil-rubbed bronze) complement warm color palettes and add subtle shine catching light. Picture frames, lamp bases, decorative bowls, or candlesticks in warm metals provide contrast to soft textiles. Avoid chrome, steel, or silver which read cold—stick to warm-toned metals maintaining overall coziness.

    Balance texture overload by varying scale and intensity. One chunky knit throw, one smooth velvet pillow, one nubby linen pillow, one sleek wood table—each texture gets space to be appreciated. Too many competing textures create visual noise. If a space feels chaotic despite neutral colors, remove half the textured items. You can always add back, but starting with less reveals what the space actually needs versus what you think it should have.

    Real Homes: Seniors Who Transformed Their Living Rooms

    Case Study 1: From Institutional to Inviting – Scottsdale, Arizona

    Patricia and Robert Chen (74 and 76 years old) recovering from Patricia’s stroke

    After Patricia’s stroke in 2024, their adult children insisted on “safety modifications” that transformed their once-cozy living room into something resembling a rehabilitation facility. White walls, hospital-grade vinyl recliner, bright fluorescent lighting, and removed area rugs left Patricia depressed. “I felt like a patient in my own home,” she explained. The sterile environment affected her recovery motivation and made family visits feel clinical rather than comforting.

    Robert consulted an occupational therapist specializing in aging-in-place design who emphasized that safety and warmth aren’t mutually exclusive. Over three months in early 2025, they made strategic changes: painted one accent wall warm terracotta, replaced the vinyl recliner with a lift chair in soft chenille fabric ($1,200), installed layered lighting with warm LED bulbs and dimmers ($300), and added secured low-pile rugs in rust and gold ($400). They brought back family photos, added throw pillows and blankets, and positioned plants near Patricia’s chair.

    Results:

    • Patricia’s depression scores decreased from moderate to mild range within two months (measured by occupational therapist)
    • Family visits increased from once weekly to 3-4 times weekly—grandchildren stayed longer in the “normal-feeling” space
    • Total renovation cost: $2,400 including paint, seating, lighting, rugs, and accessories
    • Robert reported: “We proved you don’t have to choose between safety and feeling at home”

    “The white walls and hospital chair made me feel like an invalid. Once we brought warmth back—color, soft fabrics, our photos—I felt like myself again. My recovery improved because I wanted to be in that space, not escape it. Creating a home that’s both safe and beautiful was the best thing we did for my recovery.” – Patricia Chen

    Case Study 2: Downsizing Done Right – Portland, Maine

    Dorothy Sullivan (71 years old) moving from 4-bedroom house to 2-bedroom condo

    Dorothy moved to a condo in spring 2025 after 40 years in the family home. The 1,200-square-foot condo felt cramped compared to her 2,800-square-foot house. She initially tried cramming favorite furniture from the large living room into the smaller space, resulting in cluttered chaos. “I couldn’t walk without bumping into something, and I felt claustrophobic,” she recalled. The stress triggered anxiety about whether downsizing was a mistake.

    A friend recommended a senior-focused interior designer who helped Dorothy through the painful process of selecting what truly mattered. They kept: one small-scale sofa ($900 replacement for her massive sectional), two favorite armchairs, one side table, one coffee table, and carefully curated decorative items. They donated or gave family the rest. The designer helped arrange furniture creating 48-inch pathways, painted walls warm beige, added smart lighting ($200), and positioned Dorothy’s favorite artwork and family photos prominently.

    Results:

    • Condo felt spacious rather than cramped with proper furniture scaling
    • Dorothy reported feeling “lighter” emotionally after releasing items she’d kept from obligation
    • Navigation improved dramatically—no more bruised shins from furniture bumping
    • Unexpected benefit: easier cleaning and maintenance meant more time for hobbies and friends

    “I thought I’d lost my identity when I gave away so much furniture and decorations. The opposite happened—freed from stuff I’d accumulated but didn’t love, my space finally reflected who I am now, not who I was 30 years ago. The condo feels more like home than my old house did in recent years.” – Dorothy Sullivan

    Case Study 3: Budget Warmth Transformation – Mobile, Alabama

    James Washington (68 years old) on fixed Social Security income

    James lived in a rented duplex with a living room that felt cold and unwelcoming—beige walls, worn-out sofa from the 1990s, harsh overhead fluorescent light, and minimal decoration. With only $900 Social Security monthly income and $12,000 savings he was afraid to spend, James felt stuck. “I wanted my home to feel cozy, but I thought that required money I didn’t have,” he explained. The depressing environment contributed to isolation—he rarely invited his church friends over.

    In January 2025, James attended a senior center workshop on budget decorating. He learned that warmth comes from strategic small changes, not expensive renovations. James’s transformation: painted one wall warm rust color using Habitat for Humanity ReStore paint ($15), replaced fluorescent bulbs with warm LED bulbs ($30), found a clean, comfortable used sofa at estate sale ($200), made throw pillow covers from discount fabric ($25), bought clearance throw blankets ($40), framed family photos from dollar store frames ($30), and added three easy-care plants in thrift store pots ($25).

    Results:

    • Total spent: $365—less than one month’s Social Security check
    • James began hosting monthly game nights—eight church friends now meet at his home regularly
    • Neighbors commented on the “new” living room asking if he’d done major renovations
    • James’s loneliness decreased significantly with increased social hosting

    “I thought ‘cozy’ meant expensive. Wrong. Warmth comes from color, soft things, good light, and personal touches—none of which cost much if you’re patient and creative. My home went from somewhere I tolerated to somewhere I’m proud to have friends visit. That’s worth way more than the $365 I spent.” – James Washington

    Frequently Asked Questions

    How much should I budget for creating a cozy living room?

    Budgets vary dramatically based on starting point and needs. Minimal refresh (paint, lighting, accessories): $300-800. Moderate update (new seating, paint, lighting, accessories): $2,000-5,000. Complete transformation (furniture, paint, flooring, lighting): $5,000-15,000. Prioritize: invest most in what you use most (if you spend evenings in your chair, that deserves the highest budget). Shop estate sales, consignment stores, and clearance for quality pieces at 50-70% off retail. DIY what you can (painting, arranging, decorating) and hire professionals only for specialized tasks (electrical work, furniture assembly requiring two people).

    Can I create a cozy room if I rent and can’t paint walls?

    Absolutely. Bring warmth through removable elements: warm-colored curtains, area rugs, throws, pillows, artwork, plants, and lamps. Temporary wallpaper or large tapestries cover rental walls without damage. Furniture arrangement and lighting matter more than wall color—a well-lit, thoughtfully arranged room with warm textiles feels cozy regardless of wall color. Focus your budget on portable items you’ll take when you move. Many renters find they create cozier spaces than homeowners because they must work with color and texture rather than relying on permanent modifications.

    What if my spouse and I disagree on decorating style?

    Compromise on shared spaces while giving each person domains where they have final say. Living room often requires negotiation—identify non-negotiables for each person, then find middle ground. If one prefers modern and one traditional, transitional style splits the difference. If one wants bold colors and one wants neutrals, use neutral bases with colorful accents. Hire a designer for one consultation ($100-200)—neutral third party often helps couples see compromise options they couldn’t identify alone. Remember the goal is both people feeling at home, not one person winning.

    How do I make my living room cozy without it feeling cluttered?

    Coziness comes from warmth (color, texture, lighting), not quantity of stuff. You can have a cozy minimalist room with careful choices—warm wall color, one great textured sofa, soft lighting, a few meaningful items. Apply “curate don’t accumulate” philosophy: display only things you love or use regularly. Everything should have a designated home preventing visual chaos. Use the squint test—squint at your room; if it looks blurry and jumbled, remove items until distinct zones emerge. Coziness feels enveloping and soft; clutter feels overwhelming and stressful. Clear the difference by removing half your accessories and seeing if the room feels better.

    What’s the best first step for someone overwhelmed by the thought of redesigning?

    Start with lighting—it’s the fastest transformation with immediate impact. Replace all bulbs with warm white LEDs (2700-3000K), add one or two table lamps near seating, and install a dimmer switch on overhead fixture ($15-30 DIY or $75-100 professional install). This single change dramatically affects room warmth and comfort. Second easiest step: add throws and pillows in warm colors and soft textures ($100-200 total). These two changes alone create noticeable coziness without major investment or commitment. Living with these improvements for a month often clarifies what additional changes would enhance comfort.

    How do I incorporate family heirlooms or inherited furniture I don’t love?

    You’re not obligated to display or use items just because they’re family pieces. Options: 1) Offer items to other family members who might love them, 2) Photograph items then donate/sell—photos preserve the memory, 3) Repurpose in creative ways (old trunk becomes coffee table storage), 4) Display temporarily, rotate seasonally with other items, 5) Keep one or two most meaningful pieces, release the rest guilt-free. Your home should reflect your life now, not become a museum for previous generations. Honor family history by living comfortably in your own space. The guilt you feel about rejecting inherited furniture often exceeds any family member’s actual feelings about it.

    What if I lack the physical ability to rearrange furniture or make changes myself?

    Many options exist beyond doing everything yourself: 1) Ask family members to help during visits—make it a project together, 2) Hire TaskRabbit or handyman services ($ 40-80/hour) for furniture moving and assembly, 3) Many furniture stores offer setup services for $100-200, 4) Check if local senior centers offer volunteer handyman programs, 5) Occupational therapists sometimes include home modification in treatment plans covered by Medicare, 6) Contact Area Agency on Aging for low-cost/free home modification programs. Never attempt moving heavy furniture alone risking injury—the cost of help is far less than medical bills from falls or strained backs.

    How often should I update or refresh my living room to keep it from feeling stale?

    Major furniture purchases last 10-20 years with quality pieces. Refresh every 2-3 years with smaller changes: new throw pillow covers ($50-100), different artwork or rotating existing pieces, new plants, updated accessories, refreshed paint color on one accent wall ($50-100 materials). Seasonal changes every 3-4 months using interchangeable items (fall-colored throws, spring flowers, holiday decorations) keep spaces feeling current. If your room still feels comfortable and functional, resist pressure to update just because it’s been a certain number of years. Refresh when you’re bored or needs change, not on arbitrary schedules.

    What safety modifications don’t compromise coziness?

    Modern safety features often enhance rather than detract from coziness: grab bars now come in oil-rubbed bronze, brushed gold, and decorative styles looking like towel bars; night lights with motion sensors provide gentle ambient glow; lift chairs are available in any upholstery style; non-slip rug pads are invisible under rugs; smart lights with voice control eliminate switch reaching; smoke/CO detectors come in styles matching decor rather than industrial white circles. Safety and aesthetics stopped being opposites years ago—manufacturers recognize seniors want both. Request “residential style” rather than “medical style” when researching safety products.

    Should I use an interior designer, and if so, how do I find one experienced with seniors?

    Designers accelerate the process and prevent costly mistakes if you’re doing major changes. Look for designers with CAPS certification (Certified Aging in Place Specialist) understanding both aesthetics and age-related needs. Many offer single consultation sessions ($150-300) where they assess your space, provide actionable recommendations, and create shopping lists—you implement changes yourself. This hybrid approach costs less than full-service design while providing expert guidance. Ask for references from other senior clients. Interview 2-3 designers; choose based on personality fit (you’ll work closely together) and portfolio showing warm, livable spaces rather than magazine-perfect sterility.

    Action Plan: Creating Your Cozy Living Room in 6 Steps

    1. Assess your current space with critical honesty – Walk into your living room as if seeing it for the first time. What feels cold, cluttered, or uncomfortable? What do you love? Take photos from multiple angles—cameras reveal issues we stop noticing. Make three lists: 1) Safety hazards (trip risks, inadequate lighting, hard-to-navigate paths), 2) Comfort problems (bad seating, poor lighting, too cold/stark), 3) Things you love and want to keep. These lists guide all subsequent decisions.
    2. Set a realistic budget and prioritize spending – Decide total amount you can/want to spend. Break it into categories: seating (40-50%), lighting (20-25%), paint/color (10-15%), textiles/accessories (15-20%), safety modifications (10%). Allocate more to categories addressing your biggest problems from step 1. Remember you don’t have to do everything at once—phase changes over 6-12 months if budget is tight. Start with highest-impact, lowest-cost changes (lighting, decluttering) before major furniture purchases.
    3. Tackle lighting first for immediate transformation – Replace all bulbs with warm white LEDs (2700-3000K). Add or relocate table lamps near seating for reading. Install dimmer switches on overhead fixtures. Add motion-sensor night lights along pathways. This single step dramatically improves room warmth and safety, costs $100-300, and can be completed in one afternoon. Live with the improved lighting for two weeks before making other changes—you’ll see your space differently under good light.
    4. Declutter strategically preserving what matters – Remove items from your living room that don’t serve function or bring joy. Create three piles: keep/display, store/rotate, donate/discard. Measure and mark 36-48 inch pathways with painter’s tape to ensure furniture arrangement allows safe navigation. This costs nothing but time and emotional energy. Consider working with family member or friend providing objective opinion about what enhances versus clutters the space. The goal is breathing room, not bareness.
    5. Add warmth through color, texture, and personal touches – Paint one accent wall in a warm color ($50-100 for paint and supplies). Add 3-5 throw pillows in coordinating warm tones and varied textures ($75-150). Include 2-3 throw blankets in soft materials ($60-120). Bring in plants ($30-60 for 3-4 easy-care varieties). Display 10-15 favorite family photos in coordinating frames ($50-100). Hang meaningful artwork ($0-300 depending on source). These changes create coziness without major renovation.
    6. Evaluate and adjust after living with changes – Live in your “new” living room for 3-4 weeks before making additional purchases. Notice what works and what still bothers you. You may discover that better lighting eliminated the need for new furniture, or that decluttering makes your existing sofa feel fine. Resist impulse to buy everything at once—thoughtful, phased changes often produce better results than rushed complete makeovers. Take after photos comparing to your initial photos—visual proof of transformation motivates continued improvement.


    Disclaimer
    This article provides general interior design and home safety information for seniors and does not constitute professional interior design services, occupational therapy recommendations, or medical advice. While we discuss safety features, readers should consult occupational therapists, physical therapists, or medical professionals for personalized safety assessments and recommendations based on individual mobility limitations and health conditions. Home modifications should be evaluated by licensed contractors when structural changes are involved. Individual needs, preferences, and budgets vary significantly. Always verify furniture specifications, room measurements, and safety features before making purchases.
    Information current as of October 2, 2025. Product availability and interior design trends may change.

    Get Home Design Tips for Seniors Every Month

    Receive practical decorating ideas, safety modification guides, and budget-friendly home improvement tips designed specifically for aging in place—delivered free monthly.

    Related Articles


      Published by Senior AI Money Editorial Team
      Updated October 2025
    • 10 Interior Tips for Seniors Downsizing to a Smaller Apartment

      10 Interior Tips for Seniors Downsizing to a Smaller Apartment

      Senior creating comfortable organized space in smaller apartment with smart furniture placement
      Transform downsizing from overwhelming challenge into opportunity for simplified, intentional living with strategic design choices
      Visual Art by Artani Paris | Pioneer in Luxury Brand Art since 2002

      Downsizing from a spacious family home to a smaller apartment represents one of retirement’s most emotionally challenging transitions, yet 68% of Americans over 65 will make this move according to 2024 AARP research. The physical process of fitting a lifetime’s possessions into 800-1,200 square feet feels overwhelming, while the emotional weight of releasing family memories and accepting reduced space triggers grief and anxiety. However, strategic interior design transforms downsizing from loss into liberation—creating homes that feel spacious, organized, and distinctly yours despite smaller square footage. This guide provides ten practical design strategies specifically addressing senior downsizing challenges: making small spaces feel larger, organizing efficiently, maintaining accessibility, preserving cherished items while releasing clutter, and creating the comfort essential for mental wellbeing during major life transitions. These tested approaches help thousands of seniors annually turn cramped apartments into personalized sanctuaries supporting independent living.

      Understanding the Psychology of Downsizing for Better Decision-Making

      The emotional difficulty of downsizing stems from identity attachment to possessions and spaces. Your 3,000-square-foot house holds 40 years of accumulated belongings representing different life chapters—raising children, career success, hobbies pursued, travels taken. Each item connects to memories and identity: “I’m someone who entertains,” “I’m a collector,” “I’m prepared for anything.” Releasing possessions feels like releasing parts of yourself. A 2024 University of Michigan study found that seniors downsizing experienced grief symptoms comparable to losing a loved one, with depression and anxiety peaking during the first 3-6 months.

      Reframe downsizing as intentional curation rather than deprivation. You’re not losing possessions—you’re choosing what matters most and releasing what no longer serves your current life. This shift from scarcity mindset (“I’m losing so much”) to abundance mindset (“I’m keeping my favorites and gaining freedom”) dramatically affects emotional experience. Research demonstrates that seniors who view downsizing as “editing to essentials” adjust 40% faster than those perceiving it as forced loss.

      Recognize that smaller spaces require different living patterns. Large homes allowed spreading out—dedicated rooms for different activities, storage for “someday” items, space for rarely-used things. Apartments demand efficiency: furniture serving multiple purposes, belongings you actually use, thoughtful organization maximizing every inch. This isn’t compromise—it’s optimization. Many seniors report that after adjustment, they prefer apartment living’s simplicity to large house maintenance burdens.

      Understand the grief process and give yourself permission to mourn. Leaving the family home where you raised children, hosted holidays, and built life triggers legitimate grief. Rushing through decisions or suppressing emotions leads to regret and depression. Allow 3-6 months for major downsizing decisions when possible. Visit your new apartment multiple times imagining daily life there. This realistic preview prevents unrealistic expectations causing post-move disappointment.

      The financial reality often drives downsizing but creates additional stress. Selling a house while purging possessions while finding and furnishing an apartment overwhelms even organized people. Financial pressure (“I need to sell quickly”) conflicts with emotional need for gradual transition. If possible, separate timelines—downsize belongings before listing the house, or rent temporary storage during transition. This prevents desperate decisions you’ll regret when emotional dust settles.

      Family dynamics complicate downsizing significantly. Adult children often push parents toward more drastic downsizing than necessary, motivated by concern or inheritance considerations. Conversely, some seniors resist needed downsizing from stubborn independence or denial about declining capabilities. Honest family discussions about practical needs, safety concerns, and emotional attachments prevent resentment. Including family in decisions doesn’t mean letting them control—you maintain final authority over your possessions and living arrangements.

      Emotional journey of senior downsizing showing stages and coping strategies
      Understanding the psychological aspects of downsizing helps navigate this major life transition
      Visual Art by Artani Paris

      Downsizing Stage Common Emotions Helpful Strategies Timeline
      Decision Phase Anxiety, resistance, denial Visit apartments, calculate costs, list pros/cons 1-3 months
      Sorting Possessions Overwhelm, grief, guilt Small daily sessions, “keep/maybe/go” system 2-4 months
      Letting Go Loss, sadness, second-guessing Photo documentation, thoughtful gifting to family 1-2 months
      Moving Day Stress, exhaustion, nostalgia Professional movers, family support, self-compassion 1-3 days
      Initial Adjustment Disorientation, regret, loneliness Unpack essentials first, establish routines 2-4 weeks
      Long-term Settling Acceptance, relief, contentment Personalize space, join community activities 3-6 months
      Emotional stages of downsizing with evidence-based coping strategies (2024 research)

      Tip 1: Measure Everything Before Anything Else

      The single biggest downsizing mistake is moving furniture that doesn’t fit, creating immediate stress and requiring expensive solutions. Before making any keep/donate decisions, obtain exact apartment measurements and create a scaled floor plan. This objective data prevents emotional decisions (“I love this sofa, I’m keeping it”) that create problems later when the beloved sofa overwhelms the living room making it unusable.

      Visit your new apartment with a tape measure, notepad, and helper. Measure every room’s length and width, ceiling height, doorway widths, hallway widths, and closet dimensions. Note locations of electrical outlets, windows, and built-in features like radiators or air conditioning units. Photograph each room from multiple angles. These photos combined with measurements allow furniture planning from home without repeated apartment visits. Request a digital floor plan from the building management—many have these available.

      Create a scaled floor plan using graph paper (1/4 inch = 1 foot) or free online tools like RoomSketcher or Floorplanner. Mark permanent features: windows, doors (showing swing direction), closets, outlets. Cut scaled templates of your existing furniture from graph paper or use software’s virtual furniture. This lets you test different arrangements before moving anything, revealing immediately what fits and what’s too large.

      Measure pathways and clearances, not just wall-to-wall room dimensions. You need 36-48 inches of clear pathway for safe navigation, more if using walkers or wheelchairs. Doorways should accommodate furniture delivery—standard doorways are 30-32 inches, but measure yours. Hallways require turning clearance for moving furniture from room to room. That sofa fitting in the living room means nothing if it won’t navigate the hallway turn from the entrance.

      Measure your current furniture precisely, including height, width, and depth. Large furniture that fits proportionally in spacious rooms overwhelms small apartments. A king bed appropriate for a 16×18 bedroom consumes a 10×12 apartment bedroom leaving no floor space. A 90-inch sectional sofa perfect for a 20×24 living room dominates a 12×14 apartment living room preventing other furniture or walking space. Be brutally honest about scale—smaller space requires smaller-scale furniture.

      Calculate storage capacity in your new apartment versus current home. Walk-in closets in houses average 50-100 square feet; apartment closets average 4-8 square feet. Basements, attics, and garages provide hundreds of cubic feet of storage that apartments lack. Understanding this storage deficit guides possession decisions. If your apartment has 200 cubic feet of storage and you currently use 800 cubic feet, you must eliminate 75% of stored items or rent storage units (adding $100-200 monthly costs).

      Prioritize rooms by usage when furniture won’t all fit. Most seniors spend 80% of home time in the living room and bedroom. These spaces deserve the most attention and best furniture. Dining rooms and guest bedrooms receive less priority—many successful downsizers eliminate formal dining (eating at kitchen counter or table) and guest rooms (guests stay in hotels or air mattresses in living rooms). Optimize for your daily life, not occasional guests.

      Consider furniture arrangement options, not just fit. A room that technically fits three pieces might only have one workable arrangement, or maybe the only arrangement blocks outlets or windows. Test multiple layouts in your floor plan. If only one arrangement works and it’s awkward, that signals the need for different furniture. Flexibility in arrangement options indicates appropriate furniture sizing.

      Measure vertical space and utilize height. Apartments often have 8-9 foot ceilings providing vertical storage opportunity. Tall bookcases, upper kitchen cabinets, over-door organizers, and wall-mounted shelves maximize space. Measure ceiling heights and window heights to ensure tall furniture fits and doesn’t block windows. Vertical thinking multiplies usable space when floor area is limited.

      Document everything in a “measurement bible”—a three-ring binder or digital folder containing all measurements, photos, floor plans, and furniture dimensions. Reference this constantly during downsizing decisions. When questioning whether to keep furniture, consult your bible. Objective measurements prevent emotional decisions that create problems. Share this documentation with family members helping with decisions or moves—everyone works from the same factual information.

      Tip 2: Use Multi-Functional Furniture to Maximize Space

      Single-purpose furniture wastes precious apartment square footage. Every piece should serve multiple functions or provide hidden storage. This doesn’t mean sacrificing comfort or style—modern multi-functional furniture comes in attractive designs suitable for adult living spaces, not just college dorms. Strategic furniture choices can make an 800-square-foot apartment function like 1,200 square feet through intelligent design.

      Ottoman coffee tables with hidden storage replace traditional coffee tables while providing seating and organization. Quality upholstered storage ottomans ($150-400) hold blankets, magazines, photo albums, or craft supplies while serving as foot rests, extra seating, or even TV trays with a top tray. Choose ottomans with sturdy, flat tops supporting drinks and lightweight items. This single piece replaces a coffee table plus separate storage furniture, saving 8-12 square feet.

      Sofa beds or sleeper sofas accommodate overnight guests without dedicating an entire room to occasional visitors. Modern sleeper mechanisms have improved dramatically—memory foam mattresses and easy-opening frames make guest sleeping comfortable. Mid-range sleeper sofas ($800-1,500) provide daily seating and comfortable guest accommodation. This eliminates the need for a guest bedroom that sits empty 360 days yearly, freeing 100+ square feet for other uses.

      Murphy beds (wall beds) fold up into cabinets when not in use, converting bedrooms into multi-purpose rooms. A bedroom with Murphy bed becomes office, craft room, or exercise space during daytime, then bedroom at night. Quality Murphy bed systems ($1,500-3,500 installed) include surrounding shelving and workspace. For seniors living alone in studio or one-bedroom apartments, Murphy beds in living areas create sleeping space while maintaining daytime openness.

      Console tables that expand to dining tables provide everyday functionality plus entertaining capability. Narrow console tables (12-18 inches deep) fit against walls as sofa tables or entryway pieces, then extend to 30-36 inch depth seating 4-6 people. Prices range $300-800. This eliminates permanent dining tables dominating small living spaces while maintaining the ability to host family dinners. When not extended, the space serves as walkway or additional living area.

      Lift-top coffee tables provide storage underneath plus elevated work surfaces for laptop use or meals from the sofa. The lift mechanism brings the table top up and forward, creating comfortable height for working or eating while seated. These tables ($200-500) typically include storage underneath for remotes, books, and electronics. This combination replaces traditional coffee tables plus TV trays plus side tables, consolidating three furniture pieces into one.

      Nesting tables provide flexible side table options without permanent floor space commitment. Three nesting tables ($100-300) sit together as one unit normally, then separate when you need multiple surfaces for entertaining. The two smaller tables slide under the largest, occupying just 18×24 inches normally but providing three separate surfaces when needed. This flexibility proves particularly valuable in apartments where furniture arrangement changes based on activities.

      Beds with built-in storage drawers eliminate the need for separate dressers. Platform beds with four to six large drawers ($400-1,200) store clothing, linens, or seasonal items underneath. This can eliminate one or two dressers, saving 8-16 square feet of bedroom floor space. Ensure drawer clearance—you need 30 inches of space in front of the bed to pull drawers fully open, so measure your bedroom before committing to this solution.

      Bookcases with doors at bottom provide both display and hidden storage. Open shelves display books, photos, and decorative items, while closed cabinets below hide clutter, paperwork, or items you need but don’t want visible. These dual-purpose pieces ($250-600 for quality units) replace separate bookcases and storage cabinets, consolidating functions. Choose bookcases with adjustable shelves accommodating various item sizes as your needs change.

      Avoid furniture that doesn’t earn its footprint. Decorative chairs nobody sits in, occasional tables holding nothing, display-only furniture serving no practical purpose—these waste space. Every furniture piece should pass the “use test”: you use it at least weekly, or it provides essential storage, or it serves a specific necessary function. Beautiful but useless furniture is a luxury large homes afford; apartments cannot.

      Invest in quality multi-functional pieces rather than cheap single-purpose furniture. A $1,000 Murphy bed system providing bedroom and office space offers better value than a $400 regular bed plus a $400 desk that overcrowd a room. Multi-functional furniture costs more initially but delivers space efficiency impossible to achieve with multiple separate pieces. Calculate cost per function, not just absolute price—a sleeper sofa providing seating and guest bed for $1,200 costs $600 per function, better value than $600 sofa plus $600 guest bed.

      Examples of multi-functional furniture perfect for senior apartment living
      Smart furniture choices maximize space while maintaining comfort and style in smaller apartments
      Visual Art by Artani Paris

      Tip 3: Master the Art of Vertical Storage

      Americans typically use only 50% of available storage space because we think horizontally—floor-based furniture and low shelving. Apartments demand vertical thinking, utilizing wall space from floor to ceiling. This approach can double or triple effective storage without increasing square footage. The key is making high storage accessible and organized, not just cramming items on top shelves where they’re forgotten.

      Install floor-to-ceiling bookcases or shelving units rather than standard 5-6 foot models. An 8-foot tall bookcase provides 60% more shelf space than a 5-foot model while occupying the same floor footprint. IKEA Billy bookcases (7 feet tall, $80-120) or custom built-ins maximize vertical storage affordably. Place frequently-used items at reachable heights (waist to eye level), less-used items higher, and decorative or archival items highest. Use a sturdy step stool for occasional high-shelf access.

      Add upper kitchen cabinets if your apartment has unused wall space above standard cabinets. Many older apartments have soffits or dead space above cabinets that could accommodate additional storage. Installing one or two upper cabinets ($200-400 with installation) provides space for infrequently-used serving pieces, small appliances, or bulk supplies. If structural modifications aren’t allowed, add open shelving or hanging racks for items used less frequently.

      Utilize doors with over-the-door organizers that don’t require installation. Bedroom doors hold shoe organizers storing shoes, accessories, craft supplies, or cleaning products ($15-30). Bathroom doors accommodate towel racks, robe hooks, or hanging organizers for toiletries ($20-40). Closet doors hold belts, scarves, ties, or small items ($10-25). These solutions add 5-10 cubic feet of storage per door without occupying floor or shelf space.

      Install wall-mounted shelves in living areas, bedrooms, and bathrooms for items you use regularly but don’t need furniture to store. Floating shelves ($20-50 per shelf) hold books, plants, photos, or decorative items at various heights creating visual interest while providing function. In bathrooms, wall shelves above toilets utilize otherwise wasted space for toiletries and linens. In bedrooms, shelves beside or above the bed replace bulky nightstands.

      Use furniture with vertical elements like tall dressers (5-6 drawers) instead of wide, low dressers. A 50-inch tall, 30-inch wide dresser provides the same storage as a 35-inch tall, 50-inch wide dresser while saving 20 inches of wall space—significant in small rooms. Similarly, tall narrow bookcases work better than short wide ones. When shopping, compare height-to-width ratios; prioritize vertical designs in space-limited apartments.

      Implement closet organization systems that maximize vertical hanging space. Double hanging rods in closets double capacity—hang shorter items (shirts, folded pants, skirts) on upper and lower rods. Add shelf dividers creating separate cubby spaces for folded items, preventing toppling stacks. Install hooks inside closet doors or on side walls for bags, belts, or jackets. A well-organized small closet can hold as much as a poorly-organized walk-in closet.

      Mount televisions on walls rather than using TV stands. Wall-mounted TVs ($50-150 for professional installation) free up 6-12 square feet occupied by TV stands while creating a cleaner aesthetic. The space under the TV can accommodate a slim console for media devices, or remain open improving perceived room size. Ensure walls can support the weight—drywall alone won’t suffice; mounting requires studs or appropriate anchors for masonry walls.

      Add vertical dividers in cabinets and drawers organizing items standing upright rather than stacked. Sheet pan organizers ($15-25) store baking sheets, cutting boards, and serving platters vertically in cabinets, making everything visible and accessible without unpiling. Drawer dividers create slots for plates stored on edge, doubling capacity versus stacking. This principle works for files, magazines, and craft supplies too—vertical storage prevents the “dig through the pile” problem.

      Create “zones” at different heights for different purposes. Eye-level (4-6 feet) holds daily-use items you access frequently. Upper zones (6-8 feet) store occasional-use items like holiday decorations or off-season clothing. Lower zones (floor-2 feet) hold heavy items or bulky storage bins. This purposeful height organization makes the system functional rather than creating “out of sight, out of mind” storage where items are forgotten.

      Avoid overloading vertical storage creating dangerous toppling hazards. Anchor tall furniture to walls using furniture straps ($10-20 for two straps)—essential in earthquake-prone areas but wise everywhere. Don’t stack items unsecured on high shelves where they might fall. Use bins or boxes containing loose items rather than piling individual objects. The goal is maximizing space safely, not creating hazards defeating the purpose of independent living.

      Tip 4: Choose Light Colors and Mirrors to Expand Visual Space

      Color psychology and strategic mirror placement create illusions of spaciousness transforming cramped apartments into seemingly larger, airier spaces. This costs far less than moving to actual larger apartments ($50-300 for paint and mirrors versus $200-500 monthly rent increases) while delivering measurable perceptual benefits. Studies show light-colored rooms feel 15-30% larger than identically-sized dark rooms according to 2024 environmental psychology research.

      Paint walls in light, neutral colors reflecting maximum light. Whites, soft beiges, light grays, and pale blues make ceilings appear higher and walls farther apart. Benjamin Moore White Dove, Sherwin Williams Accessible Beige, or Behr Swiss Coffee work beautifully in apartments. Avoid stark white which feels institutional; choose warm whites with slight cream or beige undertones creating warmth while maintaining lightness. One gallon ($35-50) covers 350-400 square feet; most apartments need 3-5 gallons for full repainting ($150-250 in materials).

      Use the same color throughout open living areas creating visual continuity. When walls, ceilings, and adjacent rooms share colors, the eye travels uninterrupted creating perceived spaciousness. Contrasting colors between rooms fragment space making each area feel smaller and disconnected. If you want color variety, limit bold colors to small accent walls (one wall per room maximum) keeping the majority light and cohesive.

      Position large mirrors opposite or adjacent to windows doubling natural light and creating depth illusions. A 30×40 inch mirror ($80-200) on the wall across from a window reflects the outdoor view, making the room feel like it has an additional window. Mirrors beside windows capture and distribute sunlight throughout the space. Avoid placing mirrors where they reflect clutter or less attractive views—strategic placement matters as much as size.

      Create mirror gallery walls using multiple smaller mirrors instead of one large mirror. Grouping 5-9 decorative mirrors of various sizes ($15-40 each) creates visual interest while expanding perceived space. Arrange mirrors with 2-4 inches between frames for cohesive grouping. This approach costs less than single large mirrors while adding personality. Use mirrors with frames coordinating with your decor style—warm metallic frames for traditional spaces, simple frames for modern aesthetics.

      Install mirrored closet doors if your apartment allows modifications. Bifold or sliding mirrored doors replace solid doors, instantly making bedrooms feel twice as large. These doors ($200-400 installed) provide full-length mirrors for dressing while visually expanding cramped bedrooms. If permanent installation isn’t permitted, lean oversized standing mirrors ($100-250) against walls—place felt pads underneath preventing floor scratches and wall contact preventing damage.

      Choose furniture with light-colored upholstery and wood tones maintaining the airy feeling. Dark furniture visually weighs down small spaces, while light neutrals and natural woods keep rooms feeling open. Cream, taupe, light gray sofas and chairs with light oak, maple, or whitewashed wood pieces create continuity with light walls. You can add color through easily-changed accessories (pillows, throws) rather than permanent large furniture pieces.

      Maximize natural light by keeping window treatments light and minimal. Sheer white or cream curtains provide privacy while allowing light penetration. Avoid heavy drapes or dark colors blocking windows. If privacy isn’t a concern, leave windows uncovered entirely—nothing expands space like abundant natural light. For windows requiring coverage, top-down/bottom-up shades or cellular shades in white allow flexible light control while maintaining brightness.

      Add reflective or glass surfaces throughout the apartment bouncing light and creating openness. Glass or lucite coffee tables, metallic lamp bases, glossy ceramics, and glass-door cabinets contribute to overall lightness. Unlike solid wood or dark finishes absorbing light, reflective surfaces amplify available light making spaces feel larger and brighter. Balance is key—too much reflection becomes visually cold, so combine reflective elements with warm textiles and wood tones.

      Keep walls relatively clear of heavy artwork or busy patterns that visually close in space. Large-scale, light-colored abstract art or simple landscape photography in light frames contributes to openness better than gallery walls of small dark pieces. If you love displaying many photos or artwork, dedicate one wall as a gallery wall while keeping other walls clear. This focused approach prevents the “covered walls” feeling that shrinks perceived room size.

      Avoid the temptation to use only white throughout—this creates sterile, uncomfortable spaces. Layer shades of cream, beige, soft gray, and warm white for depth and interest while maintaining lightness. Add warmth through wood tones, warm metallics (brass, copper), and warm-toned textiles. The goal is bright and spacious, not cold and institutional. Think “Scandinavian” or “coastal” design rather than “hospital” or “rental white box.”

      Design Element Space-Expanding Choice Space-Shrinking Choice Cost Impact
      Wall Color Light neutrals (white, beige, soft gray) Dark colors (navy, charcoal, burgundy) Same cost
      Furniture Light upholstery, natural wood Dark upholstery, dark wood Same cost
      Mirrors Large, strategically placed None or small decorative only +$100-300
      Window Treatments Sheer, white, minimal Heavy drapes, dark colors -$50-150 (simpler = cheaper)
      Flooring Light wood, light carpet Dark wood, dark carpet Same cost
      Lighting Multiple sources, bright bulbs Single overhead, dim bulbs +$100-200
      Design choices that expand versus shrink perceived apartment size (2025 costs)

      Tip 5: Ruthlessly Curate Belongings Using the “One Year Rule”

      The hardest part of downsizing isn’t arranging furniture—it’s deciding what possessions to keep versus release. Most seniors accumulated belongings across decades, much of it unused for years but laden with emotional significance or “just in case” justification. The one-year rule provides objective criteria cutting through emotional attachment: if you haven’t used, worn, or enjoyed an item in the past year, you won’t use it next year either. This rule eliminates 60-70% of possessions for typical downsizers, according to professional organizers.

      Apply the one-year rule category by category, not room by room. Start with clothing—the easiest category emotionally and physically. Remove every item you didn’t wear in the past year (excluding special occasion items like funeral suits or wedding guest dresses). Be honest: clothes that didn’t fit, styles you felt uncomfortable in, items waiting for weight loss—these won’t get worn. Donate, sell, or give to family. Most people wear 20% of their clothes 80% of the time; downsizing forces identifying that active 20%.

      Tackle kitchen items using frequency of use. Remove duplicate items keeping only the number you actually use. You don’t need 20 coffee mugs when you use the same two favorites daily. Keep one set of dishes for daily use, one nice set for holidays, and donate the rest. Specialty appliances used once yearly (bread makers, fondue pots, electric griddles) can be borrowed, rented, or simply skipped—the occasion isn’t worth the storage space they demand.

      Address hobby and craft supplies realistically. That sewing machine unused for five years won’t suddenly become useful in a smaller space. Unfinished craft projects languishing for years won’t get completed—keep active projects only. Materials for hobbies you’ve moved on from serve no purpose except guilt. Donate usable supplies to senior centers, schools, or craft groups where they’ll actually get used. Focus storage on current, active interests rather than past or aspirational hobbies.

      Books deserve special attention because many seniors have hundreds accumulated over lifetimes. Keep favorites you reread, reference books you consult regularly, and books with significant sentimental value (first editions, signed copies, family heirlooms). Release books you read once years ago and don’t remember, duplicates of classics available at any library, outdated reference books superseded by internet information. Aim to keep 20-30% of your collection—the books that truly matter to you now.

      Paperwork and documents require ruthless culling. Keep only: current year tax documents plus seven prior years, active warranties and manuals, vital records (birth certificates, property deeds, wills), and active financial statements. Shred or recycle: old tax documents beyond seven years, expired warranties, manuals for items you no longer own, old greeting cards (photograph favorites first), magazine clippings you’ve never referenced. Most Americans keep 10x more paper than necessary.

      Sentimental items create the greatest struggle. You can’t keep everything from your children’s childhoods, every gift received, every souvenir purchased. Choose 5-10 truly meaningful items per person or category, photograph the rest, then release. Your children’s artwork: keep their very best pieces, photograph others before recycling. Travel souvenirs: keep a few favorites evoking strong memories, release generic items. Inherited family items: keep pieces you actually love and use, pass others to family members who appreciate them more.

      Apply the “does this serve my life now” test to everything uncertain. Past you might have needed that item, but does current you? Future you might theoretically need it, but realistically will you? If honest answer is no, release it. This principle eliminates “just in case” items that fill storage “in case” scenarios that never occur. Living in 800 square feet means prioritizing items serving your actual current life, not imagined future scenarios.

      Create a “maybe” box for items you can’t decide about immediately. Pack uncertain items in a box, seal it, date it, and store it. If you haven’t needed anything from the box in six months, donate it unopened. This removes decision paralysis while providing security that you’re not being too hasty. Most people never open maybe boxes, realizing they didn’t need or miss those items. The few times you do need something, you can replace it if necessary.

      Offer items to family before donating or discarding. Adult children or grandchildren might want family furniture, dishes, or heirlooms. Give them first choice, but don’t let guilt prevent donating items nobody wants. Many seniors keep things because “the kids might want this,” but when offered, kids decline—they have their own space limitations. Offer once, accept their decision gracefully, then release items without guilt. Your possessions are not their obligation.

      Tip 6: Create Defined Zones in Open-Plan Living Spaces

      Many modern apartments feature open-plan layouts combining living, dining, and kitchen areas in one space. Without defined zones, these areas feel chaotic and cluttered. Strategic furniture placement, area rugs, and lighting create distinct functional areas within open plans, making 600-square-foot spaces feel organized like 1,000-square-foot apartments with separate rooms. This zoning approach provides psychological benefits—clear zones reduce visual stress and help brains process spaces as organized rather than jumbled.

      Use area rugs to define living, dining, and sleeping zones visually. A 5×7 or 8×10 rug under seating furniture anchors a living area. A 4×6 rug under a dining table defines eating space. In studio apartments, a rug under or beside the bed separates sleeping from living areas. Choose rugs in coordinating colors or patterns maintaining visual flow while providing distinction. Ensure rugs lay flat with non-slip pads—tripping hazards defeat the organizational purpose.

      Position furniture creating implied walls or boundaries between zones. A sofa placed perpendicular to a wall (rather than against it) creates a room divider effect, with living space on one side and dining or sleeping on the other. A bookcase used as a room divider provides storage while separating zones. Console tables behind sofas define boundaries while adding surface space. These arrangements eliminate the “everything in one big room” feeling without requiring actual walls.

      Install lighting specific to each zone rather than relying on single overhead fixtures. A living area needs floor lamps beside seating and perhaps a table lamp. A dining area benefits from pendant lights or a chandelier centered over the table. A bedroom zone requires bedside lamps. This layered, zone-specific lighting makes each area feel distinct and appropriately lit for its function. Different lighting levels also create visual separation between zones.

      Use different wall colors or accent walls distinguishing zones in open plans. Paint the wall behind your bed a different color from living area walls, creating visual bedroom definition. An accent wall behind a dining table signals a separate eating zone. Keep colors coordinating—different tones of the same color family rather than wildly contrasting schemes. Too much color contrast fragments small spaces, while subtle shifts create distinction without chaos.

      Add room dividers or screens creating flexible privacy and definition. Folding screens ($100-300), curtain dividers ($50-150 with ceiling track), or open shelving units ($150-400) separate sleeping from living areas in studios or large bedrooms converted to multi-use spaces. These dividers provide visual separation and some sound absorption without permanent construction. Choose dividers allowing light passage—solid walls shrink spaces while translucent or open dividers maintain openness.

      Establish traffic patterns respecting zones you’ve created. Main walkways should go around defined zones, not through them. If you must walk through your living area zone to reach the kitchen, arrange furniture creating a clear pathway rather than forcing navigation around randomly-placed pieces. Think of zones as rooms—you wouldn’t walk through the middle of a traditional living room to reach another area; apply the same logic to open-plan arrangements.

      Vary furniture heights creating visual interest while defining zones. Living areas might feature a low coffee table and low seating. Dining zones have higher tables and chairs. Work zones use desk-height surfaces. This height variation signals functional differences and creates visual rhythm preventing the monotonous “everything at the same height” problem. Varying heights also improves sightlines—you can see across a low living area to a higher dining area beyond.

      Add plants or tall decorative elements marking zone boundaries. A large floor plant placed at the edge of a living area signals “this is the end of this zone.” A tall vase or sculpture on a console table behind a sofa reinforces the boundary. These natural markers create gentle division without harsh lines or bulky furniture. Plants particularly soften open spaces while providing health benefits and visual interest.

      Maintain some visual connection between zones avoiding excessive separation. The goal is organized distinction, not total isolation making the space feel chopped-up. Use coordinating colors, similar styles, or repeated elements (same wood tones, matching metals) creating flow between zones. If your living area features warm beige and blue, incorporate those colors in dining and sleeping zones. This repetition unifies while allowing each zone its distinct character.

      Resist the temptation to cram too many zones into limited space. A 400-square-foot studio realistically accommodates sleeping, living, dining, and possibly small work zones. Attempting to add craft zones, exercise zones, and guest zones creates overcrowded chaos. Prioritize essential zones, and accept that some functions happen in flexible ways (yoga mat in living zone, folded when not in use) rather than requiring dedicated permanent spaces.

      Senior apartment with defined living, dining, and sleeping zones using rugs and furniture placement
      Strategic zoning transforms open-plan apartments into organized, functional living spaces
      Visual Art by Artani Paris

      Tip 7: Prioritize Accessibility and Safety in Layout Decisions

      Downsizing often coincides with declining mobility, making accessibility planning essential during the move rather than afterthought modifications later. Furniture arrangement, storage placement, and pathway clearances directly affect your ability to age safely in place. Poor layouts cause falls, limit independence, and accelerate decline. Strategic accessibility planning costs nothing but prevents injuries potentially costing thousands in medical bills and rehabilitation. According to 2024 CDC data, 40% of senior falls occur in living rooms and bedrooms due to furniture placement and clutter.

      Maintain 36-48 inch clear pathways throughout your apartment, measuring with a tape measure rather than estimating. Walker users need 48 inches minimum; wheelchair users need 5 feet for comfortable navigation. Main traffic routes—entrance to living area, living area to kitchen, bedroom to bathroom—require widest clearances. Secondary paths like approaching storage or less-used furniture can be narrower but never less than 36 inches. Mark desired pathways on your floor plan before placing any furniture.

      Position frequently-used items at reachable heights (waist to shoulder level) eliminating excessive bending or stretching. Store everyday dishes in lower cabinets rather than upper. Keep commonly-worn clothes in middle dresser drawers, not bottom drawers requiring deep bending. Place remote controls, phones, and daily medications on surfaces at seated arm height. This “golden zone” storage (30-60 inches from floor) reduces physical strain and fall risks from excessive reaching or bending.

      Eliminate tripping hazards including throw rugs without non-slip backing, electrical cords crossing pathways, low furniture difficult to see, and floor clutter. Secure all area rugs with proper non-slip pads or double-sided tape. Run cords along walls secured with clips or covers, never across walkways. Choose furniture in colors contrasting with flooring—dark furniture on dark floors creates trip risks from poor visibility. Implement the “clear floor” policy: nothing stored on floors except furniture.

      Install adequate lighting especially in transition areas between rooms and zones. Falls spike at doorways, hallways, and stairs due to inadequate lighting during navigation transitions. Add nightlights along pathways from bedroom to bathroom, living room to kitchen, and entrance to living areas. Motion-sensor lights provide illumination automatically without fumbling for switches. Ensure light switches are located at room entrances, not requiring navigation through dark spaces to reach lighting controls.

      Furniture should have rounded edges and stable bases preventing tipping. Avoid glass-top tables (shattering hazard), unstable tables prone to tipping if leaned on, and furniture with protruding corners at hip or shin height. Choose pieces with sturdy legs and broad bases. If you use furniture for balance support while walking, ensure it can bear your weight without sliding or tipping. Furniture doubling as mobility aids must be securely positioned and stable.

      Create clear zones for assistive devices—walkers, wheelchairs, canes—when not in use. These devices become tripping hazards when left randomly around apartments. Designate spots near the entrance, beside your bed, and near seating where devices remain when you’re not using them. Wall-mounted cane holders ($15-25) or dedicated walker parking spaces keep devices accessible but organized. Never leave assistive devices in pathways or propped against furniture where they might fall.

      Ensure bedroom layout allows emergency exit from both sides of the bed. If one side is against a wall, you’re trapped if you fall on the open side and can’t cross the bed. Position beds allowing access from both sides provides escape routes during emergencies and allows caregivers to assist from either side if needed. This might mean downsizing from a king to a queen bed to fit both-sides-accessible arrangement in smaller bedrooms.

      Position seating allowing safe entry and exit without obstacles. Chairs and sofas need 24-30 inches of clear space in front for sitting and standing. Place seating near but not blocking pathways, so you can approach directly rather than squeezing between pieces. Ensure seating doesn’t face walls at very close distance—feeling trapped spatially increases anxiety and makes safe exiting difficult. Consider sight lines too—seating with clear view of entrance doors provides security awareness of visitors or emergencies.

      Plan for future mobility changes even if current abilities are good. The “can I navigate this in a wheelchair” test prevents needing to rearrange everything when mobility declines. Doorways should stay clear, pathways should accommodate assistive devices, and high-traffic areas should have grab bar installation potential (solid walls, not just drywall). Forward-thinking planning prevents disruptive and expensive future modifications. Aging in place requires designing for 5-10 years ahead, not just today’s abilities.

      Tip 8: Digitize Memories and Documents to Reduce Physical Storage

      Physical photo albums, document boxes, and memorabilia collections consume enormous space in small apartments. Modern technology allows preserving these memories digitally, freeing physical space while actually improving accessibility and preservation. A box of photos sitting in a closet gets viewed rarely if ever; the same photos scanned to a computer or cloud storage become accessible anytime from your tablet or shared easily with family. Digitization projects take time but deliver lasting space and organizational benefits.

      Photograph or scan family photos systematically, working through one album or box at a time. Smartphones take adequate photos of photos—just ensure good lighting and hold the camera parallel to avoid distortion. For higher quality, use a flatbed scanner ($80-150) scanning at 300-600 DPI. Photo scanning services ($0.25-0.75 per photo) offer professional quality if you have hundreds of photos and limited time or tech comfort. Organize digital photos by decade, event, or person, creating folders matching your organizational preferences.

      Scan important documents creating digital backup while eliminating paper storage. Birth certificates, passports, property deeds, insurance policies, medical records, and tax documents can all be scanned to PDFs and stored on your computer plus external hard drive or cloud service for redundancy. Keep original vital records (birth certificates, legal documents) but eliminate copies and supporting paperwork that only needs to exist digitally. A filing cabinet holding 2,000 sheets of paper becomes a 1GB folder occupying zero physical space.

      Convert VHS tapes, cassettes, and old media to digital formats before they degrade further. Services like Legacybox ($40-100 depending on quantity) convert videotapes, film reels, slides, and audio recordings to digital files. If you have dozens of tapes, this investment preserves irreplaceable memories while eliminating boxes of obsolete media no longer viewable without special equipment. Digital versions can be easily shared with family members who’d never borrow boxes of VHS tapes.

      Use photo books for curated memory displays instead of keeping thousands of loose photos. Services like Shutterfly, Snapfish, or Chatbooks ($15-40 per book) let you design photo books from digital images. Create one book per decade, one per family member, or themed books (weddings, vacations, grandchildren). Display 3-5 photo books on a shelf occupying 12 inches of space instead of 10 boxes of photos occupying 15 cubic feet. The books are actually viewable and shareable, unlike boxes stored away forgotten.

      Create digital “memory boxes” organized by person, event, or theme in cloud storage. Google Drive, Dropbox, or iCloud (first 5-15GB free) provide secure storage accessible from any device. Organize folders logically: “Family Photos > Smith Family > Grandchildren > Emma” creates hierarchical structure. Add text files with captions or stories accompanying photos. Share folder links with family members so everyone can access family history. This collaborative approach enriches memories beyond what physical photo boxes stored individually could achieve.

      Back up digital files in multiple locations preventing loss. Keep files on your computer’s hard drive, an external hard drive ($50-100 for 1-2TB), and cloud storage. This three-location rule ensures that if one fails, two backups remain. External hard drives last 5-10 years; replace them periodically transferring files to new drives. Cloud services provide automatic backup reducing risk of human error forgetting to save files manually.

      Release physical items after digitizing without guilt. Photographs exist to preserve memories, not be objects themselves. Once memories are preserved digitally, the physical photos have served their purpose. Keep a few special physical photos if desired—perhaps 20-30 favorites displayed or in one album. Release the rest knowing memories are safe and actually more accessible than when stuffed in boxes. Future generations will appreciate receiving USB drives or cloud links rather than inheriting boxes of deteriorating photos to sort themselves.

      Consider gifting digitized collections to family during your lifetime. Share digital photo collections with adult children and siblings, allowing them to enjoy family history while you’re alive to provide context and stories. Many seniors find this sharing process deeply satisfying—connecting generations through preserved memories. Create shared cloud albums family members contribute to, building collaborative family archives. This transforms dusty boxes into living, growing family repositories.

      Digitize hobby documents and reference materials too. Recipes clipped from magazines, instruction manuals, craft patterns, gardening notes—all can be photographed or scanned then organized digitally. A filing drawer of recipes becomes a digital folder easily searched. Digitized recipes can be enlarged on tablets for easier reading while cooking. Instruction manuals clutter drawers unnecessarily when most are available free online or scannable to PDFs.

      Accept that some physical items hold value beyond their content and deserve keeping. Your grandmother’s handwritten recipe cards, your child’s artwork, love letters from your spouse—these possess physical and emotional significance beyond information content. Don’t digitize and discard everything. Keep a reasonable number of physical sentimental items in a dedicated memory box ($30-50 for attractive storage boxes). The goal is reduction to manageable levels, not elimination of all physical memory objects.

      Tip 9: Invest in Quality Pieces You Love Rather Than Filling Space

      Downsizing offers opportunity to curate your environment intentionally, surrounding yourself with objects you genuinely love rather than accumulation from decades of “good enough” purchases. Small spaces magnify both beauty and mediocrity—every item is visible and impactful. This principle argues for fewer, better possessions over many mediocre ones. One beautiful chair you love beats three cheap chairs filling space. This shift from quantity to quality transforms apartments into personal sanctuaries reflecting your taste and values.

      Evaluate existing furniture honestly: do you love it, or do you keep it because it’s functional? Functional suffices in large homes where mediocre pieces fade into background. Small apartments showcase every piece—mediocrity becomes glaring. If you dislike your current sofa but kept it because “it works,” downsizing offers justification for replacement. Invest in one quality sofa you love ($1,200-2,500) rather than moving a disliked sofa and adding other furniture trying to compensate for its inadequacy.

      Apply the “love it or lose it” test to decorative items. If you don’t actively enjoy looking at something, it’s consuming space without providing joy. Keep art you find beautiful, sculptures you appreciate, photos evoking positive emotions. Release items kept from obligation, gifts you never liked, trendy purchases regretted, or objects you stopped noticing years ago. Every object in view should earn its place through beauty, utility, or meaning—preferably all three.

      Budget more for fewer pieces you’ll use daily rather than spreading money across many items. That $400 invested in an exceptional coffee table bringing daily pleasure delivers better value than four $100 mediocre items you tolerate. Quality furniture lasts decades—buying once for $1,500 beats replacing $500 furniture every 5 years. Calculate cost per year of ownership: a $1,200 chair lasting 15 years costs $80 annually; a $400 chair lasting 4 years costs $100 annually. Quality is economy.

      Seek pieces with emotional resonance or personal significance. Furniture from your childhood home, art from meaningful travels, handcrafted items from local artisans—these objects tell your story and make your apartment distinctly yours. Generic mass-produced décor creates generic spaces. Personal, meaningful objects create home. One inherited table loaded with family history outweighs ten anonymous tables from big-box stores.

      Choose classic, timeless styles over trendy items quickly dated. Quality furniture in traditional, transitional, or simple modern styles remains attractive for decades. Trendy items look outdated in 3-5 years, requiring replacement or living with embarrassingly dated spaces. At 70+, your furniture purchases may be your last—choose styles you’ll love at 80 and 90, not what’s Instagram-popular today. Classic doesn’t mean boring; it means enduring beauty surviving fashion cycles.

      Resist the urge to immediately furnish your entire apartment. Live with essential pieces for 2-3 months understanding how you actually use the space before adding more. You might discover you don’t need everything you thought you did. Many downsizers report that half-furnished apartments feel more spacious and serene than they anticipated, leading to permanent minimalism. Add pieces only when genuine need or opportunity for perfect item arises, not from urgency to “finish” furnishing.

      Seek quality secondhand rather than cheap new. Estate sales, consignment stores, and online marketplaces offer quality furniture at 40-70% below retail. A solid wood dresser from the 1960s ($200-400 used) outlasts and outperforms a particleboard dresser ($300 new) while possessing character modern pieces lack. Inspect used items for structural soundness, but don’t reject based solely on cosmetic issues easily remedied with cleaning or minor repair.

      Curate decorative collections displaying only best examples. If you collected something for decades, keep your 10-20 favorite pieces and release the rest. A focused, high-quality collection displayed beautifully creates more impact than masses of items crowding shelves. Apply museum thinking—museums display 10% of holdings, storing the rest. Your apartment isn’t a storage facility; it’s a curated display of your life’s best treasures.

      Remember that empty space has value. Rooms don’t need every surface covered, every corner filled. Breathing room makes beautiful pieces shine and creates peaceful environments. Japanese aesthetic principles emphasize negative space allowing eyes and minds to rest. In small apartments especially, restraint in quantity elevates quality of chosen pieces. The space around objects matters as much as the objects themselves.

      Tip 10: Establish New Routines and Organizational Systems Immediately

      Successfully downsizing requires new habits matching your reduced space. Systems that worked in 2,500 square feet fail in 800. Establishing organizational routines immediately prevents clutter creep that gradually overwhelms small apartments. The “one in, one out” principle, daily tidying, and ruthless mail management must become automatic habits. Without intentional systems, small spaces quickly become chaotic, undoing all downsizing work and creating constant stress.

      Implement the “one in, one out” rule for all categories: when you acquire something new, remove something existing. Buy new shirt? Donate an old one. Receive a gift? Find something to release. This maintains equilibrium preventing accumulation that downsized spaces can’t accommodate. The discipline feels restrictive initially but becomes liberating—you evaluate all new acquisitions against existing possessions, reducing impulse purchases and thoughtless accumulation.

      Create a daily 10-minute tidying routine, ideally before bed. Return everything to designated homes—dishes to kitchen, clothes to closet, magazines to basket, remotes to tray. This brief daily reset prevents gradual entropy that’s overwhelming to address weekly. In small spaces, disorder multiplies visually because everything is visible. Daily attention maintains order; weekly attention allows chaos to accumulate beyond easy recovery.

      Establish “homes” for every category immediately upon moving in. Mail goes in one designated spot, keys on one hook, medications in one drawer. When everything has a specific home, tidying is mechanical, not decision-making. Label shelves or drawers during initial setup if helpful. The first month’s habits persist indefinitely—good habits make life easy, bad habits create ongoing frustration.

      Manage incoming mail ruthlessly using the “touch it once” principle. Sort mail immediately: trash/recycle (60-70%), pay/respond (20-25%), file (10-15%). Never set mail down to “deal with later”—this creates piles that grow exponentially. Shred/recycle junk mail immediately. Set up online billing eliminating most paper mail. Unsubscribe from catalogs. Most seniors can reduce mail by 80% through aggressive pruning of mailing lists.

      Implement seasonal clothing rotation if closet space is limited. Store off-season clothes in under-bed storage, upper closet shelves, or hall closet. Keep current season clothes in the main closet. This doubles effective closet capacity by ensuring displayed clothes are actually wearable now. Mark calendar for seasonal switches (May 1 and November 1) making it automatic rather than something perpetually postponed.

      Schedule monthly mini-purges addressing accumulation before it becomes overwhelming. Set a recurring calendar reminder: first Saturday monthly, review one category (books, kitchenware, bathroom supplies, decorative items). Remove items you haven’t used since the last review. This ongoing maintenance prevents needing major periodic purges. Small regular attention maintains order; neglect allows chaos requiring disruptive intervention.

      Establish “holding zones” for items exiting your apartment. Keep a donation box or bag in your closet. When you identify items to release, place them immediately in the donation container. When full, drop at donation center—don’t let full boxes sit for weeks. Some seniors schedule monthly donation center trips, ensuring regular outflow matching any inflow. Friction in the removal process causes abandoned donation piles that become clutter themselves.

      Create efficient morning and evening routines utilizing your space optimally. Knowing exactly where everything is and having systems for daily tasks reduces cognitive load and time wasted searching. Morning routine: clothes laid out previous night, breakfast items in same location, keys/wallet/phone in designated spot. Evening routine: dishes cleaned immediately, clothes put away, next day’s items prepared. Routines create efficiency making small-space living smooth rather than cramped.

      Review systems quarterly, adjusting what isn’t working. If mail still piles, modify your system. If clothes overflow the closet, reassess what you’re keeping. If surfaces accumulate clutter, investigate why things aren’t returning to homes. Systems serve you—when they fail, change them rather than blame yourself. Flexibility in methods while maintaining overall principles of organization allows evolution matching your needs and capabilities as they change.

      Real Transformations: Seniors Who Successfully Downsized

      Case Study 1: From 2,400 to 850 Square Feet – Minneapolis, Minnesota

      Eleanor and Frank Morrison (76 and 78 years old) leaving family home after 48 years

      The Morrisons raised four children in their Minneapolis house, accumulating possessions from five decades. When Frank’s mobility declined after a stroke, maintaining the house and navigating stairs became impossible. They resisted downsizing for two years from emotional attachment and overwhelming logistics. Finally, their daughter hired a senior move manager ($1,200 for full service) who guided them through a 6-month downsizing process in early 2025.

      They systematically addressed each room using the one-year rule. The move manager helped photograph family items offered to children, arranged estate sale for unwanted furniture ($2,800 earned), and coordinated movers. They kept: one small sofa (sold 3-piece sectional), lift chair, queen bed (from king), one dresser each (from three), and carefully curated decorative items. The 850-square-foot apartment felt spacious with proper furniture scaling. They installed floor-to-ceiling shelving for books and added mirrors expanding perceived space.

      Results:

      • Reduced monthly housing costs by $1,400 (mortgage + maintenance vs. apartment rent)
      • Eleanor reported feeling “lighter” emotionally—relieved from stuff management burden
      • Frank’s mobility improved with accessible, single-floor layout and grab bars
      • After six-month adjustment, both reported preferring apartment living: “We should have done this sooner”

      “I thought leaving our house would break my heart. Instead, I felt liberated. The stuff we accumulated over 48 years had become a burden, not a treasure. Our apartment has everything we need, nothing we don’t. We spend time living instead of maintaining a house and managing possessions.” – Eleanor Morrison

      Case Study 2: Solo Downsize on Fixed Income – Tucson, Arizona

      Carmen Ramirez (72 years old) widowed, living on Social Security

      Carmen’s husband died in 2023, leaving her with a 1,800-square-foot house she couldn’t afford or maintain alone. Social Security provided $1,700 monthly—barely covering the mortgage. She needed to downsize to a $900/month apartment but had limited savings for moving costs. She tackled downsizing herself over eight months in 2024-2025, selling furniture through Facebook Marketplace ($1,400 earned) and Craigslist, donating extensively to local charities, and asking church friends for moving help.

      Carmen’s biggest challenge was releasing her husband’s belongings—his workshop, clothes, collections. A grief counselor helped her understand that keeping possessions wouldn’t keep memories alive. She photographed everything, kept a few meaningful items, and donated the rest to veterans’ organizations her husband had supported. For her 650-square-foot apartment, she kept only furniture that fit the measured floor plan. She painted one wall terracotta, added smart lighting ($150), and positioned mirrors strategically.

      Results:

      • Reduced monthly costs by $1,200 (house expenses vs. apartment rent + utilities)
      • Total moving costs: $800 (paint, small truck rental, helpers’ lunch, supplies)—covered by furniture sales
      • Carmen created a cozy, personal space reflecting her taste rather than maintaining “our” house frozen in time
      • Joined apartment complex’s social activities—made new friends reducing widow isolation

      “I was terrified of downsizing alone on my limited budget. Taking it slow, selling things myself, and accepting help made it possible. My apartment isn’t as big as my house, but it’s mine. I can afford it comfortably, and it’s actually easier to keep clean and warm. I wish I hadn’t waited so long out of fear.” – Carmen Ramirez

      Case Study 3: Pre-emptive Downsizing While Still Healthy – Portland, Oregon

      Michael and Susan Chen (68 and 67 years old) planned downsizing before crisis

      Unlike many seniors downsizing from necessity, the Chens proactively downsized while healthy and active in early 2025. They observed friends struggling with crisis-driven moves after health emergencies and decided to downsize on their terms while able to manage the process thoughtfully. They sold their 2,600-square-foot house and moved to a 1,100-square-foot condo in a walkable urban neighborhood they loved but couldn’t afford when raising children.

      They took 10 months systematically downsizing, applying ruthless curation. They asked: “Does this serve our life now or our life five years ago?” Released: duplicate kitchenware, excess furniture, professional wardrobes (they’re retired), hobby equipment from abandoned interests, books they’d never reread. Kept: favorites from each category, travel souvenirs with strong memories, art they loved, and enough entertaining items for family gatherings. They invested in quality replacements scaled for the condo—beautiful sofa, lift chairs, perfect-sized dining table.

      Results:

      • House sale profit plus reduced housing costs funded travel and hobbies previously unaffordable
      • Walkable location eliminated car dependency—Susan stopped driving due to vision changes without life disruption
      • Maintenance-free condo living freed 10-15 hours weekly previously spent on house upkeep
      • Both reported increased life satisfaction: “We designed our retirement lifestyle instead of defaulting to old patterns”

      “Downsizing before we had to was the smartest decision of our retirement. We controlled every aspect rather than making desperate decisions during a health crisis. We live in a neighborhood we love, in a beautiful space we chose carefully, with only possessions that matter. Our friends say we’re brave, but it’s not bravery—it’s intentional living.” – Susan Chen

      Frequently Asked Questions

      How long does downsizing typically take from start to finish?

      Timeline varies based on starting point and urgency. Planned downsizing averages 6-10 months: 2-4 months sorting and purging, 1-2 months finding an apartment, 1-2 months selling/donating, 2-3 months transition. Crisis-driven downsizing compresses this to 1-3 months causing significantly more stress. Allow longer if possible—rushing leads to regretted decisions and incomplete purging that continues plaguing you. If you have 6+ months, use them. The psychological benefits of gradual transition outweigh urgency’s temporary efficiency.

      Should I downsize before or after selling my house?

      Ideally, downsize possessions before listing your house for sale. Decluttered homes show better, photograph better, and sell faster at higher prices. Real estate agents report that staged, minimalist homes sell 30% faster than cluttered homes. Start purging 3-4 months before listing, intensifying as sale approaches. If you must sell quickly, consider temporary storage ($100-200 monthly) for excess items while downsizing post-sale. However, this adds stress and cost—better to declutter first when possible. Never move items you’ll immediately discard—purge before moving to reduce moving costs.

      What do I do with items my adult children don’t want but I feel guilty discarding?

      First, truly offer items with clear deadline: “I’m downsizing by March. Please take anything you want by February 15th.” After the deadline, guilt-free donation or sale is appropriate. Your children’s possessions are not your obligation beyond reasonable offering. Many seniors keep items “for the kids” that kids explicitly rejected—this serves neither party. Photograph items before donating so children can request copies if regret arises (rarely happens). Remember: burdening children with unwanted inheritance later is worse than donating now. Release guilt—you raised them, provided for them, and offered items. Your job is complete.

      How do I handle the emotional grief of leaving my family home?

      Recognize grief as legitimate and necessary rather than weakness to suppress. Allow yourself to mourn. Take photos or videos of every room before leaving. Write memories associated with spaces. Create a memory book combining photos and stories. Have a closing ritual—final walk-through alone or with family, saying goodbye to rooms and memories. Consider short-term counseling if grief feels overwhelming—many seniors benefit from 4-6 therapy sessions during major transitions. Join senior support groups where others share similar experiences. Understand that grief lessens with time—most seniors report that after 6 months in new apartments, attachment to old houses fades replaced by appreciation for current homes.

      Can I successfully downsize if I’m not naturally organized or good at making decisions?

      Yes, but consider hiring help. Senior move managers ($1,000-3,000 depending on scope), professional organizers ($50-100/hour), or even organized family members or friends can guide the process. These helpers provide objective opinions, make decisions when you’re paralyzed, and maintain momentum when you feel overwhelmed. The cost is investment in mental health and successful outcome. Alternatively, use structured decision frameworks: one-year rule, keep/maybe/go boxes, photograph-then-release for sentimental items. Systems compensate for natural disorganization. Many naturally disorganized seniors successfully downsize using external structure and help.

      What’s the biggest mistake seniors make when downsizing?

      Moving too much furniture that doesn’t fit, creating immediate regret and expensive problems. Measure everything first—apartment dimensions and all furniture. Create scaled floor plans testing arrangements. Be ruthlessly honest about scale—furniture perfect for 18×20 rooms overwhelms 12×14 apartments. Second biggest mistake: not purging enough initially, then struggling with cramped apartments requiring second-round purging that’s more stressful than doing it right initially. Third mistake: rushing the process making desperate decisions later regretted. Start early, measure accurately, purge thoroughly. These prevent most common downsizing disasters.

      How do I know if I’m downsizing too much versus not enough?

      “Too much” feels barren, uncomfortable, and lacking necessary items. “Not enough” feels cramped, cluttered, and difficult to navigate. Test by living with reduced items before final decisions. Create a “maybe” box for uncertain items—if you haven’t needed them in 6 months, you downsized appropriately. Most seniors err toward keeping too much rather than too little. If your new apartment feels crowded after move-in, continue purging. If it feels empty, you can add. Start conservative (less is more) and add back if truly needed. Furniture and items are replaceable; storage space is not.

      Should I rent storage for items I can’t decide about immediately?

      Storage units make sense for true short-term transitions (3-6 months) while settling into apartments and finalizing decisions. Long-term storage ($100-200 monthly) quickly becomes expensive—$1,200-2,400 annually storing items worth less than rental costs. Many seniors rent storage “temporarily” that becomes permanent, paying thousands storing forgotten items. If considering storage, set a firm 6-month deadline for retrieval or donation. Better approach: use “maybe” boxes in your apartment—if you haven’t retrieved items in 6 months, donate unopened. This costs nothing and forces honest evaluation of actual need.

      How do I maintain my identity and sense of home in a smaller space?

      Display curated items reflecting your life, interests, and values rather than generic décor. Keep your 20-30 favorite photos rather than all 500. Display the 10 travel souvenirs evoking strongest memories. Hang artwork you love. Use furniture you find beautiful. Smaller space doesn’t mean less personality—it means more intentional expression. Create one “memory wall” or shelf showcasing life’s highlights. Use colors you love. Maintain hobbies important to you even if space is limited. Identity comes from chosen, meaningful objects, not quantity of possessions. Many seniors report feeling more “themselves” in curated apartments than in cluttered houses where meaningful items got lost among masses of stuff.

      What if I downsize and then regret giving away specific items?

      Genuine regret is actually rare—most fears about regret exceed actual experience. Research shows only 5-10% of downsizers truly regret specific donation decisions. Photograph everything before releasing it—photos preserve memories and appearance. Keep a “released items” notebook listing what went where and why—this reduces anxiety about future regret by documenting thoughtful decisions. If you do regret something, assess if it’s genuine need or nostalgia. Can the item be replaced if truly necessary? Often yes, affordably. Can you borrow from family/friends if occasionally needed? Usually yes. The relief from living uncluttered vastly outweighs rare regret about specific items.

      Is it better to downsize gradually or all at once in intensive effort?

      Gradual downsizing (6-10 months) causes less emotional and physical stress, allows thoughtful decisions, and provides adjustment time. Work through categories systematically—clothes one month, kitchen next month, books following month. This steady approach prevents burnout and desperation decisions. Intensive downsizing (1-3 months) suits those with urgent timelines but creates overwhelm and regret. However, even within urgency, work systematically rather than randomly. If forced to intensive timeline, hire help—professional organizers, move managers, or dedicated family members. Regardless of pace, systematic approach beats chaotic rushing. Gradual when possible; intensive with help when necessary.

      Action Plan: Your 10-Step Downsizing Roadmap

      1. Measure your new apartment precisely and create a scaled floor plan – Before making any decisions, obtain exact dimensions of every room, doorway, hallway, and closet. Draw a floor plan using graph paper or free software like RoomSketcher. Measure your current furniture. Test arrangements virtually before moving anything. This objective data prevents emotional decisions creating practical problems. Spend 2-3 hours on this foundational step—it guides every subsequent decision.
      2. Establish your timeline and work backwards to create schedule – If moving in 6 months, allocate: Month 1-2 for sorting and initial purging, Month 3 for major furniture decisions, Month 4 for selling/donating, Month 5 for final purging and packing, Month 6 for moving. Break large tasks into weekly mini-goals. Write deadlines on a calendar. Share timeline with family helping you. Accountability prevents perpetual postponement. Adjust timeline if urgent but maintain systematic approach even if compressed.
      3. Apply the one-year rule systematically to every category – Start with easiest category emotionally (usually clothing) building confidence for harder categories (sentimental items, collections). If you haven’t used, worn, or enjoyed something in 12 months, you won’t use it next year. Be ruthlessly honest. Create three piles: keep, donate, undecided. Place “undecided” items in dated boxes—if unused in 6 months, donate unopened. Work through one category weekly: Week 1 clothing, Week 2 kitchen, Week 3 books, Week 4 hobby items, Week 5 decorative items, Week 6 furniture decisions.
      4. Offer family items to relatives with clear deadlines – Email or call family members: “I’m downsizing and offering items you might want. Please respond by [date 4 weeks out] with what you’d like. Anything not claimed will be donated.” Include photos of available items. Set firm pickup deadline. After deadline, guilt-free donation proceeds. Don’t let “maybe someone wants this” prevent releasing items. Family has had opportunity; your responsibility ends there. This prevents storing items indefinitely hoping someone eventually wants them.
      5. Sell valuable items but donate everything else without guilt – Selling takes significant time and energy. Determine what’s worth this effort—antiques, jewelry, quality furniture might justify selling. Everything else should be donated immediately rather than languishing while you “plan to sell it.” The opportunity cost of your time and the storage space occupied often exceeds potential sale proceeds. Use Facebook Marketplace or Craigslist for valuable items ($100+). Donate the rest to Goodwill, Salvation Army, or charities providing free pickup. Release quickly rather than perfect monetization.
      6. Choose multi-functional furniture scaled appropriately for your space – Every furniture piece should serve 2-3 purposes or provide hidden storage. Replace oversized pieces with properly-scaled alternatives—queen bed instead of king, loveseat instead of sofa, console table that expands for dining. Invest in quality multi-functional pieces ($800-1,500 per major item) rather than cheap single-purpose furniture. Sofa with storage, ottoman serving as coffee table and seating, bed with drawers underneath—these choices maximize limited space effectively.
      7. Implement vertical storage solutions throughout your apartment – Install floor-to-ceiling shelving, add upper cabinets where possible, use over-door organizers, mount TVs on walls, choose tall narrow furniture over short wide pieces. Think upward, not outward. This approach doubles or triples effective storage without consuming additional floor space. Invest $200-500 in shelving, organizers, and mounting hardware. Ensure high storage remains accessible with a sturdy step stool. Organize vertically by frequency of use—eye level for daily items, upper areas for occasional use.
      8. Paint walls light colors and position mirrors strategically – Light, warm neutrals (soft white, beige, warm gray) make apartments feel 20-30% larger than dark colors. Paint main living areas including bedroom in cohesive light palette ($150-300 for paint and supplies). Position large mirrors ($80-200 each) opposite or adjacent to windows reflecting light and views. Create mirror groupings on empty walls. This visual expansion costs far less than moving to actual larger spaces while delivering significant perceptual benefits.
      9. Digitize photos, documents, and memorabilia freeing physical space – Scan or photograph family photos, important documents, and memorabilia preserving memories digitally (free using smartphone, $100-300 for scanning service if preferred). Store digital files on computer, external hard drive ($50-100), and cloud service (first 5-15GB free). Create digital photo books ($20-40 each) with curated favorites. Release physical items after digitization—memories are preserved and more accessible than boxes stored away. This single project can eliminate 10-20 cubic feet of stored materials.
      10. Establish organizational systems and daily routines immediately – Upon moving in, designate homes for every category before unpacking completely. Implement “one in, one out” rule, daily 10-minute tidying, and ruthless mail management from day one. First month’s habits persist indefinitely—establishing good systems early prevents clutter creep that gradually overwhelms small spaces. Write down your systems (where things go, daily routines, weekly maintenance tasks) and post somewhere visible until habits form automatically (usually 6-8 weeks). Systems maintain the hard-won organization achieved through downsizing.


      Disclaimer
      This article provides general interior design and downsizing guidance for seniors and does not constitute professional organizing services, real estate advice, legal counsel, or moving services. Individual circumstances vary significantly including physical capabilities, financial resources, family situations, and emotional readiness for downsizing. Consult with professional organizers, senior move managers, real estate agents, or financial advisors for personalized guidance. The timeline and cost estimates provided represent averages and may not reflect your specific situation. Always verify furniture dimensions, apartment regulations, and lease terms before making modifications or purchases.
      Information current as of October 2, 2025. Moving and downsizing best practices continue evolving.

      Get Monthly Downsizing and Organization Tips

      Receive practical downsizing strategies, space-saving ideas, and emotional support for seniors navigating home transitions—delivered free every month.

      Related Articles

      Published by Senior AI Money Editorial Team
      Updated October 2025
    • Affordable Interior Upgrades for Seniors Over 60 (2025)

      Affordable Interior Upgrades for Seniors Over 60 (2025)

      Meta Description

      Affordable interior upgrades for seniors over 60 in 2025. Safe, stylish, and senior-friendly improvements to make homes more comfortable and accessible.


      Summary Audio Script

      “Creating a safe and comfortable home doesn’t have to be expensive. This guide explores affordable upgrades perfect for seniors over 60. From better lighting to ergonomic furniture, these ideas balance safety, accessibility, and style—helping older adults live confidently at home.”


      Getting Started

      For many adults over 60, home is not just a place to live—it is where memories are made and independence is maintained. Yet as we age, small features in our living spaces can become obstacles. Slippery floors, dim lighting, or low furniture can increase risks of accidents and discomfort.

      The good news is that creating a safer, more senior-friendly home doesn’t require a large renovation budget. With thoughtful and affordable upgrades, you can improve comfort, accessibility, and style at the same time. This guide highlights simple yet effective interior improvements that make a big impact. Whether you are planning changes for yourself or helping a loved one, these tips will show how easy it can be to upgrade a space for senior living.


      How We Chose

      • Ease of Use — Recommendations that can be installed or adjusted without professional help.
      • Accessibility — Features designed to support mobility, balance, and independence.
      • Price — Upgrades that are budget-friendly while providing lasting value.
      • Safety — Focus on preventing falls, slips, and common household risks.
      • Availability — Items and solutions that are widely available online and in local stores.

      Upgrade 1 — Improved Lighting

      Switch to LED bulbs for brighter, energy-efficient lighting. Add motion-sensor night lights in hallways and bathrooms to prevent nighttime falls.
      👉 Case Example: Margaret, 68, added motion-sensor lights in her hallway. Now she walks at night without worry.


      Upgrade 2 — Safer Flooring & Rugs

      Replace slippery rugs with non-slip mats or secure them with grip pads. Affordable slip-resistant vinyl flooring also improves safety.
      👉 Case Example: Helen, 75, used rug grippers in her living room, reducing trip hazards instantly.


      Upgrade 3 — Ergonomic Furniture

      Chairs with armrests, raised seating, and supportive cushions make sitting and standing easier. Bed risers add comfort without the need for a new bed.
      👉 Case Example: John, 72, raised his favorite chair with risers, making it easier to stand up without strain.


      Upgrade 4 — Grab Bars & Handrails

      Installing grab bars in bathrooms and along stairways provides affordable safety support. Portable options are available for renters.
      👉 Case Example: Robert, 70, added grab bars in his bathroom, giving him more confidence when bathing.


      Upgrade 5 — Accessible Storage

      Use pull-out shelves, lazy Susans, and drawer organizers to reduce bending and stretching. These upgrades are inexpensive and DIY-friendly.
      👉 Case Example: Linda, 67, installed pull-out kitchen shelves, making cooking easier and less tiring.


      Bonus Tips

      1. Use contrasting colors on stairs and thresholds to improve visibility.
      2. Add smart plugs or timers for lamps and appliances.
      3. Keep emergency contacts visible in common areas.

      Further Information


      FAQ

      Q1: What are the most affordable upgrades for seniors at home?
      A1: Simple upgrades like brighter LED lighting, non-slip rugs, grab bars, and furniture risers are cost-effective and highly impactful. They improve safety and comfort without requiring major renovations.

      Q2: Can seniors install these upgrades themselves?
      A2: Many upgrades, such as adding night lights, securing rugs, or placing grab bars, are DIY-friendly. For more complex tasks, family support or a handyman may be helpful.

      Q3: How can seniors keep their homes stylish while making them safe?
      A3: Choosing modern slip-resistant flooring, ergonomic furniture with elegant designs, and warm lighting ensures that safety improvements still look attractive and inviting.


      Conclusion

      Affordable interior upgrades allow seniors over 60 to maintain independence while enjoying greater safety and comfort. From simple lighting adjustments to safer flooring and supportive furniture, these changes can dramatically improve daily life without straining budgets.

      The goal is not just to prevent accidents, but to create a living space that feels warm, stylish, and supportive of aging with dignity. With just a few thoughtful improvements, seniors and their families can transform homes into environments that foster confidence, accessibility, and long-term comfort.

      Published by Senior AI Money Editorial Team
      Updated October 2025
    • Crafting and DIY Projects for Seniors: Step-by-Step Ideas in 2025

      Crafting and DIY Projects for Seniors: Step-by-Step Ideas in 2025

      Meta Description

      Explore fun and easy crafting and DIY projects for seniors in 2025. Step-by-step ideas that boost creativity, memory, and joy at home.


      Summary Audio Script

      “In 2025, crafting and DIY projects give seniors more than entertainment—they boost memory, reduce stress, and create joy. With simple, step-by-step projects, older adults can enjoy creativity while staying active and connected.”


      Getting Started

      Crafting is more than just a hobby—it’s therapy for the mind and body. Seniors benefit from creative projects because they encourage self-expression, strengthen fine motor skills, and reduce stress. In 2025, with more online tutorials, senior-friendly kits, and accessible tools, crafting has never been easier.

      Whether making greeting cards, knitting a scarf, or repurposing household items into something new, DIY projects offer both purpose and fun. This guide introduces step-by-step ideas tailored for seniors, ensuring activities are simple, affordable, and rewarding.


      How We Chose

      We selected projects based on:

      • Accessibility — Easy-to-follow instructions suitable for different skill levels.
      • Affordability — Many projects use inexpensive or recycled materials.
      • Health Benefits — Support for memory, dexterity, and relaxation.
      • Creativity — Opportunities for personalization and self-expression.
      • Enjoyment — Activities that bring joy and a sense of accomplishment.

      Section 1 — Handmade Greeting Cards

      Creating greeting cards allows seniors to combine drawing, painting, and collage into small, meaningful projects.

      Step-by-Step:

      1. Gather blank cards, markers, stickers, or magazines for cut-outs.
      2. Decide on a theme (birthday, holiday, thank-you).
      3. Decorate using personal touches like favorite colors or photos.
      4. Write a heartfelt message inside.

      👉 Case Example: Helen, 73, makes cards for family birthdays. Her grandchildren treasure the handmade notes.


      Section 2 — Knitting and Crocheting

      Knitting is both soothing and productive. Seniors can make scarves, hats, or blankets while improving hand coordination.

      Step-by-Step:

      1. Start with basic yarn and large knitting needles.
      2. Learn simple stitches such as knit and purl.
      3. Follow a beginner-friendly pattern.
      4. Practice slowly and increase complexity over time.

      👉 Case Example: Robert, 77, learned to crochet during retirement. Now, he donates blankets to local charities.


      Section 3 — DIY Memory Collage Boards

      Memory boards are great for preserving family history and encouraging storytelling.

      Step-by-Step:

      1. Collect photos, postcards, or newspaper clippings.
      2. Arrange them on a corkboard or foam board.
      3. Add labels or short notes for context.
      4. Display in a common area to spark conversations.

      👉 Case Example: Linda, 81, created a collage of her travels. Sharing it with her children brought back joyful memories.


      Section 4 — Upcycled Crafts from Everyday Items

      Turning old jars, boxes, or fabric scraps into decorative items is affordable and eco-friendly.

      Step-by-Step:

      1. Clean and prepare old containers (jars, cans, boxes).
      2. Paint, wrap with fabric, or decorate with ribbons.
      3. Repurpose as storage, vases, or gift holders.

      👉 Case Example: James, 79, painted glass jars into colorful lanterns, adding cozy light to his garden.


      Section 5 — Simple DIY Jewelry

      Making beaded bracelets or necklaces is enjoyable and great for fine motor skills.

      Step-by-Step:

      1. Gather beads, elastic string, or wire.
      2. Plan a color pattern.
      3. Thread beads carefully, securing the ends.
      4. Wear or gift the finished piece.

      👉 Case Example: Margaret, 82, crafts bracelets for her friends. They love the personalized designs.


      Section 6 — Seasonal Decorations

      Crafting decorations for holidays keeps seniors engaged year-round.

      Step-by-Step:

      1. Choose a holiday (spring, Thanksgiving, Christmas).
      2. Collect paper, fabric, or natural items like leaves.
      3. Cut and assemble into wreaths, garlands, or table pieces.
      4. Store safely for reuse each year.

      👉 Case Example: George, 78, enjoys making handmade Christmas ornaments. Each year, his family looks forward to adding them to the tree.


      Bonus Tips

      1. Work in a well-lit space with easy access to supplies.
      2. Invite family or friends for shared crafting sessions.
      3. Start with small projects to build confidence.
      4. Display finished projects to celebrate accomplishments.

      Further Information


      FAQ

      Q1: Are crafting projects safe for seniors with arthritis?
      A1: Yes. Many crafts can be adapted using larger tools, softer materials, or shorter sessions. Crafts like knitting with larger needles or painting with wide brushes are arthritis-friendly.

      Q2: Do crafting projects really improve senior mental health?
      A2: Absolutely. Creative activities help reduce stress, improve mood, and encourage self-expression. They can also stimulate memory through storytelling and design.

      Q3: What’s the easiest DIY project for seniors to start with?
      A3: Handmade greeting cards or simple beaded jewelry are excellent beginner projects. They require minimal supplies, are affordable, and provide quick satisfaction.


      Conclusion

      Crafting and DIY projects are more than hobbies—they are powerful tools for health and happiness in 2025. Seniors benefit from reduced stress, improved memory, and stronger fine motor skills while creating meaningful items.

      The beauty of crafting lies in its flexibility. Seniors can start with small, simple projects or explore more advanced creations as confidence grows. Whether making cards, jewelry, or seasonal décor, every project brings joy and purpose.

      In 2025, creativity is for everyone. With accessible tools, affordable supplies, and online resources, seniors can enjoy crafting at home while enriching their well-being.

      Published by Senior AI Money Editorial Team
      Updated October 2025
    • Creative Art Projects for Seniors to Try at Home in 2025

      Creative Art Projects for Seniors to Try at Home in 2025

      Meta Description

      Discover fun and creative art projects for seniors to try at home in 2025. Boost joy, memory, and relaxation with simple senior-friendly ideas.


      Summary Audio Script

      “In 2025, seniors can enjoy meaningful creativity right at home. From painting and collage to digital art and simple crafts, these projects bring joy, improve memory, and support relaxation. Let’s explore easy art activities seniors can try today.”


      Getting Started

      Art is more than a hobby—it’s therapy for the mind and soul. Seniors often find creative projects rewarding because they encourage self-expression, boost memory, and provide a calming routine. In fact, studies show that engaging in art can improve cognitive health and emotional well-being for older adults.

      In 2025, seniors don’t need a studio or expensive materials to enjoy art. With accessible tools, online tutorials, and senior-focused resources, creativity is just a few steps away. This guide introduces easy, affordable, and enriching art projects seniors can try at home.


      How We Chose

      • Ease of Use — Projects that require simple tools and minimal setup.
      • Accessibility — Large-handle brushes, bright paints, or digital apps with easy navigation.
      • Affordability — Low-cost supplies, many under $20.
      • Health Benefits — Projects that support memory, relaxation, and dexterity.
      • Enjoyment — Activities designed to bring joy, not stress.

      Section 1 — Painting with Purpose

      Painting remains one of the most therapeutic art forms for seniors. Watercolors, acrylics, or even finger painting can help express emotions and reduce stress. Using large brushes and simple color palettes keeps the activity approachable.

      👉 Case Example: Helen, 74, paints sunflowers every morning. The routine gives her a sense of accomplishment and boosts her mood.

      🔗 National Institute on Aging – Creative Activities


      Section 2 — Collage & Memory Boards

      Cutting and arranging images into collages allows seniors to tell their life story. Memory boards with family photos or travel pictures encourage conversation and strengthen connections with loved ones.

      👉 Case Example: Robert, 79, created a collage of his Navy years. Sharing it with his grandchildren sparked meaningful conversations.

      🔗 Verywell Mind – Art Therapy Benefits


      Section 3 — Clay & Sculpture Projects

      Air-dry clay or soft modeling materials are great for seniors who want tactile experiences. Creating simple bowls, beads, or figurines strengthens hand muscles and stimulates creativity.

      👉 Case Example: Linda, 80, started making small clay jewelry pieces. It improved her finger dexterity and gave her gifts to share with friends.

      🔗 American Art Therapy Association


      Section 4 — Digital Art & Photography

      In 2025, technology opens new doors for seniors. Tablets with stylus pens or beginner-friendly apps like Procreate (for drawing) and Canva (for design) allow seniors to explore digital art. Photography, too, is a rewarding way to capture everyday beauty.

      👉 Case Example: James, 77, uses a tablet to make digital greeting cards for his family. It keeps him connected and creative.

      🔗 Senior Planet – Digital Arts Classes


      Section 5 — Crafts with Everyday Materials

      Recycling old items into crafts is both fun and eco-friendly. Seniors can repurpose jars into vases, knit scarves, or fold paper into origami. These small projects are rewarding and cost-friendly.

      👉 Case Example: Margaret, 82, saves glass jars and paints them into colorful candle holders. Her living room now glows with handmade décor.

      🔗 AARP – Arts and Crafts for Seniors


      Bonus Tips

      1. Set aside a “creativity corner” at home with easy-to-reach supplies.
      2. Invite family or friends—art is more fun when shared.
      3. Try short 15–20 minute sessions to avoid fatigue.
      4. Don’t focus on perfection—enjoy the process.

      FAQ

      Q1: Can art really help seniors improve memory?
      A1: Yes. Creative activities like painting, collage, and crafts stimulate different parts of the brain. Studies show they can support memory, problem-solving, and emotional well-being.

      Q2: What if I have limited mobility or arthritis?
      A2: Seniors can use adaptive tools such as larger brushes, ergonomic handles, or digital apps. Many projects can also be done while seated, making them more accessible.

      Q3: Do I need to be “artistic” to enjoy these projects?
      A3: Not at all. The focus is on self-expression and enjoyment, not professional skill. Seniors can start with simple projects and gradually explore more as confidence grows.


      Conclusion

      Art at home offers seniors more than entertainment—it provides healing, memory support, and joy. In 2025, creative projects like painting, collage, clay, digital art, and crafts are more accessible than ever.

      The key is to focus on process over perfection. With affordable supplies and helpful resources, seniors can create art that reflects their personality while improving well-being. Whether it’s painting a flower, building a memory board, or designing digital cards, every brushstroke or cutout is a step toward joy and fulfillment.

      In 2025, creativity belongs to everyone—including seniors who want to celebrate life through art.

      Published by Senior AI Money Editorial Team
      Updated October 2025

    ARTANI NETWORK : ARTANI.FR · ARTANI BRANDING · ARTANI PARIS.FR · ARTANI GROUP · ARTANI KOREA · ARTANI PARIS.COM · SENIOR AI MONEY
    © 2025 Ho CHANG / ARTANI NETWORK — All Rights Reserved.